Quick Homemade Strawberry Filling for Cake
- Time: Active 5 minutes, Passive 10 minutes, Total 15 minutes
- Flavor/Texture Hook: Glossy, jammy, and bursting with bright ruby red berries.
- Perfect for: Layer cakes, birthday parties, and impressive dessert filling.
- Create the Ultimate Quick Homemade Strawberry Filling for Cake
- Why This Simple Fruit Filling Works
- Essential Ingredients for Bright Flavor
- Tools for a Smooth Filling
- Step by Step Cooking Guide
- Solving Your Common Filling Issues
- Simple Swaps for Special Diets
- Storage and Long Term Freezing
- Tips for Using Your Filling
- Common Myths About Fruit Fillings
- Recipe FAQs
- 📝 Recipe Card
Create the Ultimate Quick Homemade Strawberry Filling for Cake
The kitchen fills with the scent of summer the moment those berries hit the warm pan. You know that specific aroma, right? It’s that sweet, slightly floral perfume that only happens when fresh fruit meets heat and sugar. I remember the first time I tried to make a layer cake for a friend's bridal shower.
I thought I could just use a jar of strawberry jam from the pantry. It was a disaster, honestly. The jam was too thin, and by the time we cut the cake, the middle layer had completely soaked into the sponge, making the whole thing look like a soggy mess.
That experience taught me that a real deal filling needs to be its own thing. It needs enough body to stand up to the weight of a heavy cake layer but enough "shatter" in the texture to feel fresh, not like gummy candy.
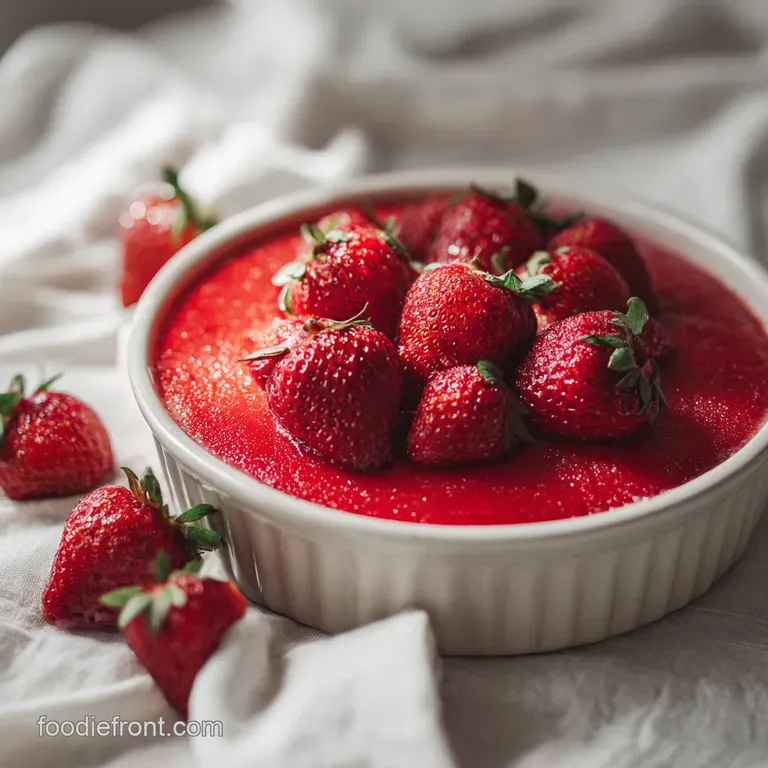
When you make this quick homemade strawberry filling for cake, you'll see the berries transform from matte, firm chunks into a translucent, glowing syrup that looks like liquid rubies. It’s absolutely stunning when it drips down the side of a white cake.
We aren't just making jam here, we're building a structural component for your baking. This recipe is designed to be thick and reliable, giving you those clean, professional slices every single time. Best of all, it only takes about 15 minutes total from the first chop to the final stir.
You get all that deep, concentrated flavor without spending hours standing over a bubbling pot.
Why This Simple Fruit Filling Works
- Starch Gelatinization: The cornstarch molecules swell and trap water when they reach a boil, creating a thick, stable gel that won't run.
- Pectin Activation: Mashing half the berries releases natural pectins from the fruit cells, which helps the filling set with a more natural, jammy mouthfeel.
- Acid Balance: Lemon juice does more than just add zing, it prevents the sugar from recrystallizing and keeps the color a bright, vivid red.
- Heat Concentration: A short, 1 minute boil evaporates just enough water to intensify the strawberry flavor without making the fruit taste "cooked" or muddy.
| Cooking Method | Total Time | Final Texture | Best Use Case |
|---|---|---|---|
| Stovetop (This Recipe) | 15 minutes | Thick, glossy, stable | Layer cakes and cupcakes |
| Slow Reduction | 45 minutes | Deep, dark, chewy | Toast or swirl in cheesecakes |
| No Cook Maceration | 30 minutes | Thin, syrupy, liquid | Ice cream topping or pancakes |
Choosing the right method depends on how much time you have and what you're filling. If you need something that stays put between two layers of heavy sponge, the stovetop method is the only way to go. It gives you that immediate thickness that holds its shape even at room temperature.
Ingredient Deep Dive
| Component | Role in Recipe | Pro Secret |
|---|---|---|
| Fresh Strawberries | Primary flavor and bulk | Quarter them for the best texture mix |
| Granulated Sugar | Sweetener and preservative | Adjust by 1 tbsp if berries are very tart |
| Cornstarch | Structural thickener | Always mix with liquid before adding to heat |
| Lemon Juice | Flavor brightener and setter | Use fresh juice for better enzyme action |
Essential Ingredients for Bright Flavor
- 16 oz fresh strawberries, hulled and quartered: These provide the base. Why this? Fresh berries have better structural integrity than frozen ones when cooked.
- 0.5 cup granulated white sugar: Sweetens and helps the fruit release juice. Why this? It dissolves cleanly without adding any competing molasses flavors.
- 2 tbsp cornstarch: Our primary thickening agent. Why this? It creates a clear, glossy finish rather than a cloudy one.
- 1 tbsp freshly squeezed lemon juice: Adds necessary acidity. Why this? It cuts through the sugar and highlights the natural berry notes.
- 0.125 tsp fine sea salt: Enhances every other flavor. Why this? A tiny bit of salt makes the strawberries taste "more" like strawberries.
- 0.5 tsp pure vanilla extract: Adds a soft, creamy finish. Why this? It bridges the gap between the fruit and the cake batter.
- 2 tbsp water: Helps get the cooking process started. Why this? Prevents the sugar from burning before the berries release their juices.
Tools for a Smooth Filling
You don't need a professional pastry kitchen to pull this off, but a few specific tools make the job much easier. I always reach for a small, heavy bottomed saucepan. This is crucial because it distributes heat evenly, preventing the sugar from scorching in the corners of the pan.
A thin, cheap pan will give you "hot spots," and nobody wants a burnt strawberry aftertaste in their birthday cake.
A potato masher is my secret weapon here. While a spatula works, the masher allows you to control exactly how many berries stay whole. I like a "half and half" approach: half crushed for the sauce, half whole for the bite. You'll also want a small whisk for that cornstarch slurry.
If you leave even one tiny lump of starch in that bowl, it will turn into a weird, gummy bead in your final filling.
Chef's Tip: Use a silicone spatula to scrape the sides of the pan constantly. This ensures every bit of cornstarch is integrated and nothing sticks to the edges.
step-by-step Cooking Guide

- Place 16 oz quartered strawberries, 0.5 cup sugar, 0.125 tsp sea salt, and half of the lemon juice into your saucepan. Add 2 tablespoons of water. Note: The water prevents burning during those first two minutes.
- Set the pan over medium heat. Watch for the sugar to dissolve and the berries to start glistening.
- As the mixture warms, use your potato masher to crush about half of the berries. Stop when you see a mix of pulp and chunks.
- In your small side bowl, whisk the 2 tbsp cornstarch with the remaining lemon juice until it's a smooth, milky liquid.
- Wait for the strawberry mixture to reach a gentle simmer, then pour in the slurry while whisking the fruit mixture constantly.
- Continue to cook over medium heat. You will see the liquid turn from a cloudy pink to a deep, clear red.
- Boil the mixture for 1 full minute. The filling will become thick and glossy. This is the starch "waking up."
- Remove the pan from the heat immediately. Stir in the 0.5 tsp vanilla extract.
- Transfer the filling to a glass bowl. Let it cool completely at room temperature before you even think about putting it in the fridge.
- Once cooled, cover and chill. It will continue to firm up as the temperature drops.
Solving Your Common Filling Issues
Why Your Filling Is Runny
If your filling looks more like soup than jam, the most likely culprit is the temperature. Cornstarch needs to reach a full boil to actually work. If you just let it get "hot," the starch molecules won't fully expand.
Another reason might be the berries themselves; very ripe summer berries hold more water, so they might need an extra 30 seconds of boiling to tighten up.
Removing Excessive Grittiness
Sometimes, if the sugar doesn't dissolve fully before the mixture thickens, you might feel a slight graininess. To avoid this, make sure your heat isn't too high at the start. You want the sugar to melt into the fruit juices before the cornstarch starts to do its heavy lifting.
If it’s already finished and feels gritty, you can try reheating it very gently with a teaspoon of water, but it's better to get it right the first time.
| Problem | Root Cause | Solution |
|---|---|---|
| Cloudy appearance | Starch didn't cook long enough | Boil for 1 full minute until clear |
| Too thick/gummy | Too much cornstarch used | Stir in 1 tsp of warm water to loosen |
| Filling is bleeding | Used frozen berries without draining | Add 1 extra tsp of cornstarch to the slurry |
If you're using this as a layer in a larger bake, like my Vanilla Mug Cake Masterclass but scaled up, you need that stability. A runny filling will just soak into the cake and ruin the crumb.
Common Mistakes Checklist
- ✓ Never add dry cornstarch directly to the hot pan (it will clump instantly).
- ✓ Don't skip the lemon juice; it's the "high definition" button for the fruit flavor.
- ✓ Let the filling cool to room temperature before refrigerating to prevent condensation.
- ✓ Always use a glass or stainless steel bowl for cooling; plastic can hold onto old smells.
- ✓ Pat your strawberries dry after washing to keep the water ratios precise.
Simple Swaps for Special Diets
If you're looking for a version without refined sugar, you can swap the granulated sugar for honey or maple syrup. Just keep in mind that these will change the flavor profile significantly. Honey adds a floral note that is lovely but distinct.
If you go this route, reduce the added water to just 1 tablespoon, as liquid sweeteners add their own moisture to the pot.
For those who need a keto friendly option, a sugar-free granulated sweetener like erythritol works well. However, be careful with the thickener. Cornstarch is high in carbs, so you might consider using a tiny bit of xanthan gum instead.
Just be warned: xanthan gum can get "snotty" if you use too much, so start with just a quarter teaspoon and whisk like your life depends on it!
If you want a different fruit profile entirely, this method works beautifully with raspberries or blackberries. Raspberries break down much faster, so you might not even need the potato masher. If you decide to go with a different berry, check out how I balance sweetness in my Whipped Strawberry Cream Cheese for more inspiration on fruit to dairy ratios.
Storage and Long Term Freezing
This filling is a dream for meal preppers because it stays fresh in the fridge for up to 5 days. Just make sure it’s in an airtight container. I actually think the flavor improves after 24 hours because the vanilla and lemon have time to really mingle with the strawberry juices.
If you want to freeze it, you're in luck. This filling freezes beautifully for up to 3 months. When you're ready to use it, thaw it in the fridge overnight. Don't try to microwave it from frozen, or the starch structure might break down and leave you with a watery mess.
Once it's thawed, give it a good stir with a spoon to bring back that glossy sheen.
For zero waste, if you have just a few tablespoons left over, don't toss them! Stir them into plain Greek yogurt, swirl them into oatmeal, or use them as a topping for a quick dessert. It’s essentially a high end fruit compote that tastes better than anything you can buy in a jar.
Tips for Using Your Filling
For Preventing Cake Layer Slides
The biggest mistake people make is plopping the filling directly onto the cake and spreading it to the edges. Don't do that! You need to create a "buttercream dam." Pipe a thick ring of frosting around the outer edge of your cake layer, then fill the center with your strawberry mixture.
This dam acts as a wall that keeps the filling from squishing out when you put the next layer on top.
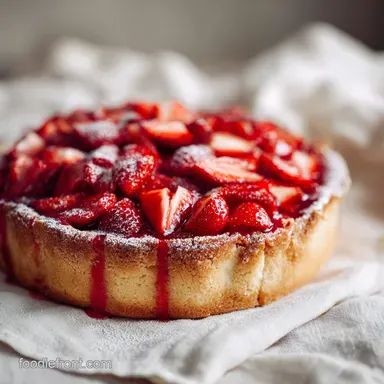
For an Easy Pastry Upgrade
This filling isn't just for cakes. I love using it inside puff pastry to make quick turnovers. Since it's already thickened, it won't leak out and make the pastry soggy while it bakes. Just put a spoonful in the center of a pastry square, fold it over, crimp the edges, and bake until golden.
It turns a basic grocery store ingredient into an impressive treat.
For the Perfect "Burst" Texture
If you want that "pro" look, try adding a few finely diced fresh strawberries into the filling after it has cooled. This gives you two different textures: the silky, jammy cooked base and the bright, crisp snap of fresh fruit. It makes the cake feel much more expensive and thoughtful.
Trust me, your friends will ask which bakery you bought the filling from!
Common Myths About Fruit Fillings
A lot of people think you have to use a massive amount of sugar to get a filling to set. That’s actually a myth. While sugar helps with the "set" in traditional jam making (which relies on long boil times), our recipe uses cornstarch for the heavy lifting.
This means we can keep the sugar lower, allowing the actual flavor of the berries to be the star of the show.
Another common misconception is that frozen berries are just as good as fresh for this specific recipe. While you can use frozen, they release a lot more water during the thawing process. If you go the frozen route, you must thaw and drain them first, or your filling will end up being far too thin.
I always recommend fresh if you can find them the texture of the quartered pieces is just so much better after they've been simmered for a few minutes.
Finally, some folks believe that "more is better" when it comes to vanilla. In this recipe, the vanilla is a supporting actor. If you add too much, it starts to taste like candy instead of fruit.
Stick to the half teaspoon; it's just enough to add that velvety finish without masking the bright acidity of the lemon and strawberries. Keep it simple, and the fruit will thank you!

Recipe FAQs
How to prevent cornstarch from clumping in the filling?
Whisk the cornstarch with the remaining lemon juice in a separate bowl until smooth before adding it to the heat. Never pour dry powder directly into the pan, or it will seize into hard, gummy lumps.
Can I use frozen strawberries instead of fresh?
Yes, but omit the 2 tablespoons of water listed in the recipe. Frozen berries release significant liquid as they thaw, so the extra water is unnecessary for the cooking process.
Is it true I should stir the filling constantly while it boils?
Yes, constant stirring is critical to prevent the sugar and starch from scorching on the bottom of the pan. If you enjoyed mastering the consistency of fruit preserves here, you will find that same stirring technique essential for maintaining a smooth, clump free texture in other starch thickened sauces.
How to tell when the filling is done cooking?
Look for the mixture to become thick, translucent, and glossy while at a full boil. You must maintain this boil for one full minute to ensure the cornstarch is fully activated and the raw flour taste is cooked out.
How to store the filling for later use?
Place the cooled mixture in an airtight glass or stainless steel container and refrigerate for up to 5 days. Always allow the filling to reach room temperature before sealing it to avoid condensation that can dilute the texture.
Can I freeze this strawberry filling?
Yes, this filling freezes perfectly for up to 3 months when stored in a sealed container. Thaw it slowly in the refrigerator overnight; avoid using the microwave to defrost, as high heat can break the starch structure and make the filling watery.
Is it necessary to use fresh lemon juice?
Yes, it is essential for both flavor and chemistry. The acidity acts as a "high definition" button for the strawberry flavor and helps ensure the cornstarch creates a stable, glossy set.
Quick Homemade Strawberry Filling
Ingredients:
Instructions:
Nutrition Facts:
| Calories | 50 kcal |
|---|---|
| Protein | 0.3 g |
| Fat | 0.1 g |
| Carbs | 12.5 g |
| Fiber | 0.8 g |
| Sugar | 11.3 g |
| Sodium | 24 mg |
