Peanut Butter Protein Fudge: Velvet-Smooth and Healthy
- Time: Active 10 minutes, Passive 120 minutes, Total 130 minutes
- Flavor/Texture Hook: A velvety, melt on-the tongue density with a salty sweet finish
- Perfect for: Post workout recovery or a late night sweet tooth fix that won't cause a sugar crash
- Create a Velvety Peanut Butter Protein Fudge
- Why This Recipe Works
- Essential Components for a Deep Flavor Deep Dive
- Required Shopping List Items
- Necessary Kitchen Equipment
- Creating the Ultimate Peanut Butter Protein Fudge
- Fixing Common Set and Texture Issues
- Adjusting for Different Batch Sizes
- Debunking Common Preparation Myths
- Long Term Storage and Quality Maintenance
- Garnish Strategy and Color Balance Tips
- Recipe FAQs
- 📝 Recipe Card
Create a Velvety Peanut Butter Protein Fudge
Have you ever wondered why most protein based snacks feel like you are chewing on a flavored eraser? It is a frustration I have lived through more times than I care to admit, especially after long gym sessions when I just want something decadent that doesn't ruin my progress.
The secret isn't in adding more sugar; it is in how we manipulate the fats to keep the protein from feeling chalky.
I remember the first time I tried to make a healthy peanut butter protein fudge without a plan. I just threw powder and nut butter together, and the result was so dry it practically turned into dust in my mouth. It was a total disaster.
But after a few experiments with temperature and ratios, I realized that the coconut oil acts as a bridge, turning those dry ingredients into a silky, cohesive block that snaps when you bite it.
This particular batch is a staple in my kitchen because it satisfies that deep, primal craving for something rich and nutty. We are talking about a texture that is dense enough to feel like real candy shop fudge but carries enough protein to actually be useful for your body.
If you’ve been looking for a way to use up that vanilla protein powder sitting in your pantry, this is the most impressive way to do it.
Why This Recipe Works
- Lipid Solidification: Coconut oil transitions from a liquid to a solid at 76°F (24°C), which allows the fudge to set firmly in the fridge while remaining tender enough to bite.
- Emulsification Bridge: The natural oils in the peanut butter bind with the melted coconut oil, creating a fatty matrix that encapsulates the dry protein particles.
- Moisture Retention: Maple syrup acts as a humectant, drawing in just enough moisture to ensure the fudge stays supple rather than turning into a brittle brick.
- Particle Size Management: Sifting the protein powder prevents "hot spots" of dry floury texture, ensuring every square inch of the fudge has the same velvety mouthfeel.
| Fudge Thickness | Fridge Set Time | Visual Cue | Best For |
|---|---|---|---|
| 0.5 inch | 60 minutes | Opaque and firm edges | Thin snack bites |
| 1 inch | 120 minutes | Fully matte surface | Traditional fudge squares |
| 1.5 inches | 180 minutes | Resistance when pressed | Gourmet thick cut cubes |
When choosing your set time, remember that the density of this butter protein fudge relies heavily on that cooling period. If you rush the process, the center will stay gooey, and you'll lose that satisfying "snap" that makes high-quality fudge so addictive.
Essential Components for a Deep Flavor Deep Dive
The magic of this healthy peanut butter protein fudge recipe lies in the quality of your fats and the specific type of protein you choose to incorporate. Using a "no stir" peanut butter might seem easier, but the additives can sometimes prevent the fudge from setting with that classic, slightly crumbly yet creamy finish we are aiming for.
| Component | Role in Recipe | Pro Secret |
|---|---|---|
| Natural Peanut Butter | Primary structural base | Use the drippy oil at the top for extra shine |
| Coconut Oil | Temperature based setting agent | Always melt completely before mixing to avoid lumps |
| Protein Powder | Bulk and "flour" replacement | Vanilla whey blends usually provide the smoothest finish |
| Maple Syrup | Sweetener and binder | Grade A Amber provides the best balance of sweetness |
The interaction between the maple syrup and the salt is what truly transforms this from a simple snack into something that tastes like a luxury dessert. If you are a fan of high protein treats, you might find that this pairs beautifully with other pantry staples, much like how some people love a good Peanut Butter Cookie on the side of their afternoon tea.
Required Shopping List Items
- 1 cup creamy natural peanut butter: Look for the kind where the only ingredients are peanuts and salt. Why this? Natural oils blend more effectively with melted coconut oil for a smoother set.
- 0.75 cup vanilla or peanut butter protein powder: A whey casein blend or a high-quality vegan pea protein works best. Why this? It provides the structural integrity needed to hold the fudge shape without baking.
- 0.25 cup coconut oil, melted: Use refined if you want no coconut flavor, or unrefined for a tropical hint. Why this? This is the "glue" that hardens when chilled to create the fudge texture.
- 3 tbsp maple syrup: Real maple syrup is non negotiable here. Why this? It adds a complex sweetness that masks the "supplement" taste of protein powder.
- 1 tsp vanilla extract: A small but mighty flavor enhancer. Why this? It rounds out the nuttiness and makes the fudge taste like a bakery item.
- 0.25 tsp sea salt: Fine grain is best for even distribution. Why this? Salt cuts through the fat and heightens the perception of the maple and vanilla.
- 0.25 cup sugar-free dark chocolate chips: For the optional (but highly recommended) swirl.
- 1 tbsp peanut butter: Specifically for thinning the chocolate for the decorative top.
| Original Ingredient | Substitute | Why It Works |
|---|---|---|
| Peanut Butter | Almond Butter | Similar fat profile but yields a slightly more subtle, roasted flavor. |
| Maple Syrup | Honey | Similar viscosity. Note: Adds a stronger floral note that may compete with the peanut. |
| Coconut Oil | Cocoa Butter | Stays solid at higher temperatures. Note: Gives the fudge a white chocolate like snap. |
Using honey instead of maple syrup will result in a much stickier fudge that might require extra time in the freezer. I usually stick to maple because it creates a cleaner break when you slice into the chilled block.
Necessary Kitchen Equipment
You don't need a massive arsenal of tools for this, but the quality of your mixing bowl matters more than you’d think. I always opt for a glass or ceramic bowl because they hold heat better than metal.
If your kitchen is cold, a metal bowl will cause the coconut oil to start seizing before you’ve even finished mixing in the protein powder.
- 8x8 inch square baking pan: This size creates the ideal thickness for 16 servings.
- Parchment paper: Essential for lifting the set fudge out without it sticking to the corners.
- Silicone spatula: This allows you to scrape every last bit of the "dough" from the bowl.
- Small microwave safe bowl: For melting the chocolate swirl components.
Creating the Ultimate Peanut Butter Protein Fudge
- In a large glass mixing bowl, combine the creamy peanut butter, melted coconut oil, maple syrup, and vanilla extract. Whisk with a silicone spatula until the mixture is glossy and completely uniform.
- Sift the protein powder into the wet mixture to prevent clumping. Note: This ensures a velvety mouthfeel without dry pockets.
- Gently fold the powder into the base until a thick, dough like paste forms and no white streaks remain.
- Line an 8x8 inch square baking pan with parchment paper, leaving an overhang on two sides to act as a sling.
- Transfer the fudge mixture into the prepared pan. Use the back of a spoon to press the mixture until the surface is flat and even into the corners.
- Melt the chocolate chips with 1 tablespoon of peanut butter in 30 second bursts in the microwave until smooth and pourable.
- Drizzle the chocolate over the top and use a toothpick to swirl until a marbled pattern emerges.
- Place the pan in the refrigerator for at least 2 hours until the fudge is firm to the touch and no longer tacky.
- Lift the parchment sling and place on a cutting board. Slice into 16 squares using a sharp, warmed knife for clean edges.
Fixing Common Set and Texture Issues
One of the most common frustrations with easy protein peanut butter fudge is the "separation anxiety." If you see a layer of oil sitting on top of your fudge before it goes into the fridge, it means the emulsion broke. This usually happens if your peanut butter was too cold or your coconut oil was too hot.
Why Your Fudge Is Oily
If your fudge looks like it's sweating, the fats didn't bind with the protein powder. This often happens with 3 ingredient protein fudge when the mixing isn't thorough enough. You need to vigorously whisk the wet ingredients before the dry powder enters the scene.
Why Your Fudge Is Crumbly
A crumbly texture usually points to too much protein powder or a powder that is highly absorbent (like some vegan blends). If the "dough" looks like sand before you put it in the pan, you need to add another teaspoon of melted coconut oil to bring it back to a supple state.
| Problem | Root Cause | Solution |
|---|---|---|
| Grainy Texture | Protein powder clumps | Sift the powder and use a whisk to break up the initial dry bits. |
| Won't Set | Insufficient coconut oil | Ensure you measured exactly 0.25 cup; don't eye ball the fats. |
| Too Sweet | Excessive syrup | Add an extra pinch of sea salt to balance the palate. |
Between the mixing and the chilling, there are a few tiny details that can make or break the visual appeal of this high protein peanut butter dessert.
Common Mistakes Checklist
- ✓ Ensure the coconut oil is completely liquid (clear, not cloudy) before adding to the PB.
- ✓ Don't skip the parchment paper; this fudge is very high in fat and will stick to metal pans.
- ✓ Let the fudge sit at room temperature for 5 minutes before slicing to prevent the chocolate top from cracking.
- ✓ Use a "natural" peanut butter that requires stirring; the lack of stabilizers helps the fudge melt better.
Adjusting for Different Batch Sizes
If you are cooking for one and don't want a whole tray of fudge staring at you from the fridge, you can easily scale this down. For a half batch, use a smaller loaf pan. The math is simple, but keep in mind that smaller volumes cool faster, so you might only need 90 minutes of chill time instead of the full 2 hours.
When scaling up for a party, I suggest doubling everything but the salt. For some reason, saltiness scales aggressively in fat heavy recipes. Use 1.5x the salt instead of 2x to keep the flavor balanced. If you find yourself making a massive batch of treats, you might also enjoy making a Banana Applesauce Cake to provide a lighter, fruitier contrast on your dessert platter.
Debunking Common Preparation Myths
Many people believe that protein powder becomes "damaged" if it isn't baked. In reality, whey and plant proteins are perfectly safe to consume "raw" in a fudge format. In fact, keeping them unheated preserves the flavor of the vanilla or chocolate much better than over high heat baking does.
Another myth is that you can substitute coconut oil with butter 1:1. While butter is delicious, it has a lower saturated fat content and a different melting point than coconut oil. If you use butter, the fudge will be much softer at room temperature and might even melt in your hands.
Stick to coconut oil for that "candy bar" stability.
Long Term Storage and Quality Maintenance
Storage: This fudge must live in the fridge. Because of the coconut oil base, it will soften significantly if left on the counter for more than 30 minutes. Keep it in an airtight container for up to 7 days.
Freezing: This is actually the best way to store it! I love eating it straight from the freezer. It doesn't turn into a rock; it just gets extra chewy. It will stay fresh for up to 3 months.
Zero Waste Tip: If you have crumbs or small broken pieces of fudge, don't throw them away. Crumble them over a bowl of Greek yogurt or oatmeal. The fats and protein will melt slightly into the warm oats, creating a built in flavor booster.
You can also use the leftover oil from the bottom of the peanut butter jar to grease your knife before slicing the fudge it makes for a much cleaner cut.
Garnish Strategy and Color Balance Tips
When you are presenting a dish that is primarily brown, visual contrast is your best friend. This is where the "Impressive" part of my cooking style comes in. We want this homemade protein peanut butter fudge to look like it came from a high end boutique, not just a plastic container in your gym bag.
To achieve a professional color balance, we focus on three specific accents. First, the Deep Cocoa Swirl. By melting the chocolate chips and swirling them, you break up the monolithic tan color of the peanut butter. Don't over mix; you want distinct ribbons of dark against the light base.
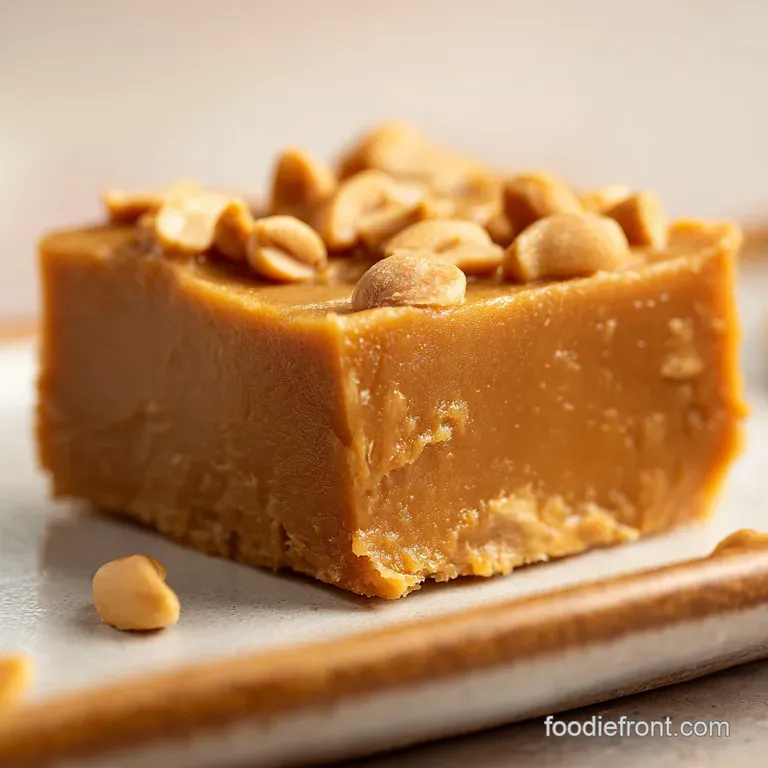
Second, add White Sea Salt Flakes. I’m talking about the big, crunchy Maldon style flakes. Adding these right after the chocolate swirl (while it's still wet) provides a bright white pop that signals "gourmet" to the brain. Finally, use Pale Gold Roasted Peanuts.
Roughly chop a handful of dry roasted peanuts and scatter them over the top. This adds a third color tier and provides a textural hint of what is inside the fudge.
Chef's Note: For the cleanest slices, dip your knife in hot water and wipe it dry between every single cut. The heat from the metal will glide through the coconut oil like a hot wire through wax, giving you those perfectly sharp, photo ready edges.
If you are looking for other ways to satisfy a sweet tooth while keeping things relatively healthy, you might enjoy experimenting with Chocolate Covered Chips for a salty sweet combo that is ready in no time. This fudge is truly the ultimate way to feel like you're indulging without the sugar heavy consequences of traditional candy. Enjoy the velvety texture and that impressive marbled finish!

Recipe FAQs
Is it true I must use a stand mixer to combine the ingredients?
No, this is a common misconception. A silicone spatula is actually more effective for folding the protein powder into the base without overworking the mixture or creating excess air bubbles.
How to ensure the fudge sets with a firm, sliceable texture?
Refrigerate the pan for at least 2 hours. This duration allows the coconut oil to fully transition into a solid state, ensuring the fudge stays firm rather than greasy at room temperature.
Can I use a non-natural peanut butter that contains palm oil?
How to prevent the chocolate topping from cracking when I slice it?
Let the fudge sit at room temperature for 5 minutes before slicing. This short resting period softens the chocolate layer slightly so your knife passes through without shattering the set surface.
Why is my mixture clumpy after adding the protein powder?
Sift the protein powder into the wet mixture to prevent clumping. If you dump it in all at once, the fine particles struggle to hydrate evenly, resulting in dry pockets within the dough like paste.
How to get the fudge out of the pan without breaking it?
Line your 8x8 inch pan with parchment paper, leaving an overhang on two sides. This creates a sling that allows you to lift the entire block of fudge out of the pan cleanly once it has finished setting in the refrigerator.
Must the coconut oil be clear before I begin mixing?
Yes, ensure the coconut oil is completely liquid and clear. If the oil is cloudy or partially solidified, it will create small, waxy fat beads in the fudge rather than incorporating into a smooth, uniform base.
Peanut Butter Protein Fudge
Ingredients:
Instructions:
Nutrition Facts:
| Calories | 165 kcal |
|---|---|
| Protein | 7.3 g |
| Fat | 12.7 g |
| Carbs | 7.9 g |
| Fiber | 1.4 g |
| Sugar | 4.8 g |
| Sodium | 62 mg |
