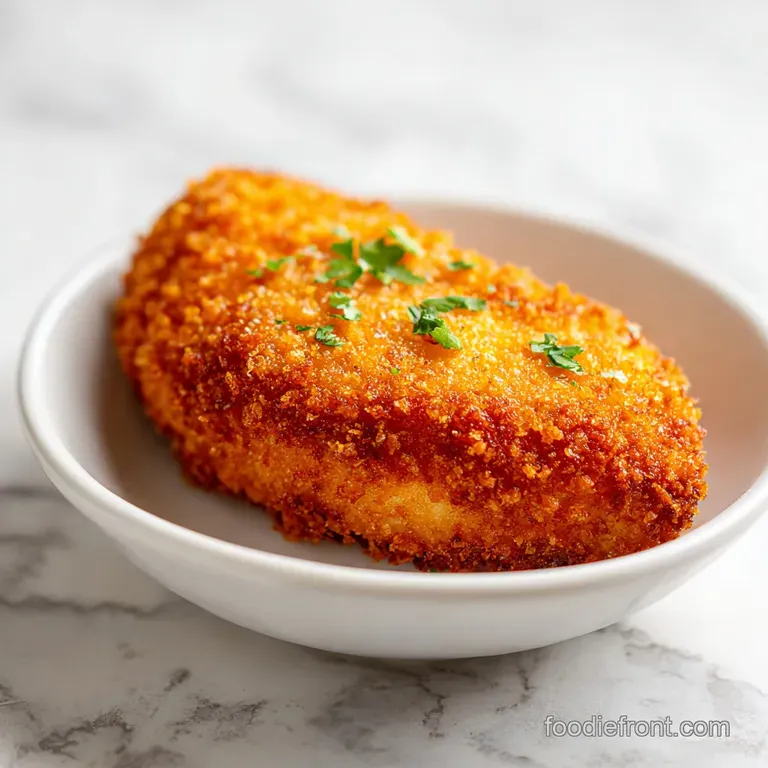
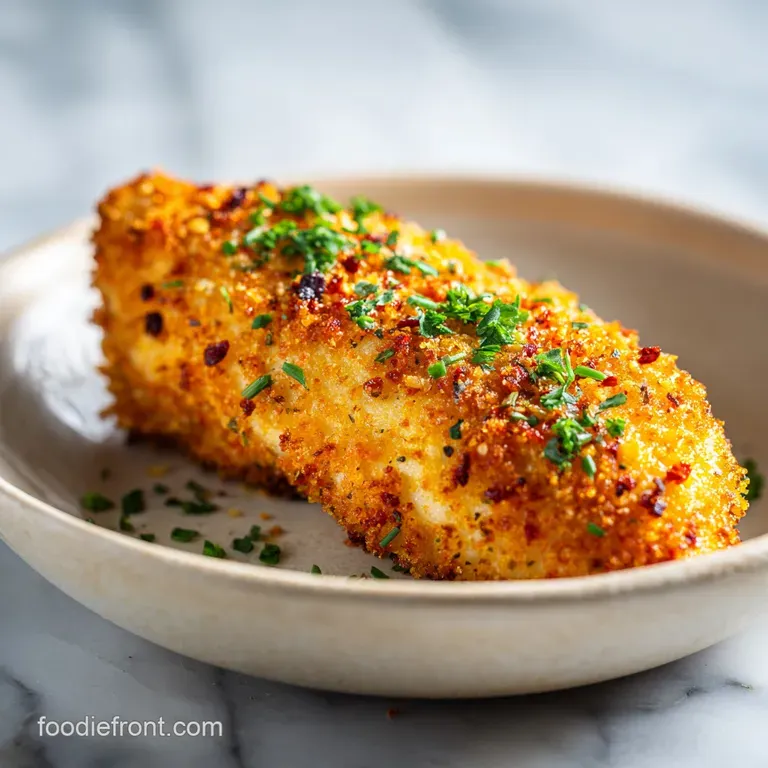
Breaded Chicken: Shatteringly Crisp
- Time: Active 10 minutes, Passive 12 minutes, Total 22 minutes
- Flavor/Texture Hook: Golden, nutty Parmesan crust with a satisfyingly loud crunch.
- Perfect for: Busy weeknight dinners or a reliable meal prep staple that kids love.
- Master the Perfect Golden Brown Breaded Chicken
- The Science and Specs for Success
- Essential Components for a Shatter Crisp Crust
- The Right Gear for Crispy Results
- A Simple Path to Golden Perfection
- Fixing Common Breading Blunders
- Creative Twists and Scaling Secrets
- Keeping Your Chicken Fresh and Crispy
- Pairing Your Hearty Family Meal
- Recipe FAQs
- 📝 Recipe Card
Master the Perfect Golden Brown Breaded Chicken
I'll never forget the first time I tried to make breaded chicken for my kids. I was so excited, but the result was a total mess the breading slid off like a wet blanket, leaving behind "bald" spots of gray, unseasoned meat. It was honestly heartbreaking to see all that effort end up in the bin.
I realized then that great chicken isn't just about the coating; it's about the bond between the meat and the crust.
Since that soggy Tuesday, I've spent years obsessing over the physics of the dredge. I discovered that if you don't treat the chicken like a canvas, the paint just won't stick. Now, when I drop a cutlet into the pan, that immediate, rhythmic sizzle is music to my ears.
I've learned that breaded chicken and a simple side of roasted veggies make the most comforting meal, provided you follow a few non negotiable rules about moisture.
Right then, let's get you to that perfect, mahogany colored finish. We aren't just making dinner; we're mastering a technique that will make you the hero of your kitchen. Trust me on this, once you hear that first "crunch" as the knife slides through the crust, you'll never go back to the frozen bags again.
The Science and Specs for Success
The Physics of the Crunch
The Moisture Barrier Effect: Flour absorbs surface proteins and moisture, creating a dry "glue" that allows the egg wash to anchor itself to the meat. Without this initial dry layer, the egg would simply slide off during the cooking process.
Starch Gelatinization: As the Panko hits the heat, the starches in the breadcrumbs and flour hydrate and then dehydrate rapidly, forming a rigid, crispy structure. This process is what gives you that loud "shatter" when you take a bite.
Protein Denaturation: Pounding the chicken to a 1/2 inch thickness breaks down tough connective tissues, ensuring the meat cooks at the same speed as the breading browns. This prevents the common tragedy of burnt crumbs and raw centers.
| Method | Time | Texture | Best For |
|---|---|---|---|
| Stovetop | 12 minutes | Maximum crispiness, buttery finish | Quick weeknight dinners |
| Oven Baked | 18 minutes | Even browning, lower active effort | Large batches for families |
| Air Fryer | 10 minutes | Very crunchy, less oil used | Healthy meal prep |
If you love this texture, you’ll also enjoy my Baked Chicken Wings recipe. This method is very similar to the crunch we achieve there, just using a different cut of meat.
Essential Components for a Shatter Crisp Crust
For a truly successful breaded chicken recipe, we need to look at our building blocks. The Panko breadcrumbs are the stars here because their jagged, large surface area provides way more "crunch potential" than standard fine crumbs.
Adding the Parmesan cheese isn't just for flavor the fat in the cheese helps the crust brown more deeply than breadcrumbs alone could ever manage.
| Ingredient | Science Role | Pro Secret |
|---|---|---|
| All purpose flour | Moisture anchor | Season the flour itself, not just the chicken |
| Large eggs | Protein glue | Whisk with a teaspoon of water to thin the proteins |
| Panko breadcrumbs | Structural crunch | Press them firmly into the meat with your palm |
| Parmesan cheese | Fat based browning | Use freshly grated for better melting and adhesion |
The Essential List
- 1.5 lbs chicken breasts, pounded to 1/2 inch thickness Why this? Ensures even cooking and maximum surface area for breading.
- 1 tsp fine sea salt
- 1/2 tsp cracked black pepper
- 1/2 tsp garlic powder
- 1/2 cup all purpose flour Why this? The primary adhesive layer for the egg wash.
- 2 large eggs
- 1 tbsp water
- 1.5 cups panko breadcrumbs Why this? Creates a lighter, crispier texture than traditional crumbs.
- 1/4 cup freshly grated Parmesan cheese
- 1 tsp smoked paprika
- Cooking spray (avocado or grapeseed oil)
| Original Ingredient | Substitute | Why It Works |
|---|---|---|
| All purpose flour | Cornstarch | Creates a lighter, glass like crunch; naturally gluten-free |
| Panko breadcrumbs | Crushed saltines | Very salty and crispy, though slightly more dense |
| Parmesan cheese | Pecorino Romano | More piquant and salty. Note: Reduce added salt if using this |
The Right Gear for Crispy Results
You don't need a professional kitchen to nail this, but a few specific tools make the flow much easier. A heavy bottomed skillet, like a cast iron or a heavy stainless steel pan, is non negotiable for the stovetop method. These pans hold onto heat, so the temperature doesn't plummet when you add the cold chicken.
Chef's Tip: Use the "dry hand, wet hand" technique. Use one hand for the flour and breadcrumbs, and the other for the egg wash. This prevents your fingers from becoming breaded clubs halfway through the process!
If you're making this as part of a Chicken Cutlet Recipe, you'll find that having three wide, shallow bowls (like pie tins) makes the dredging station far less chaotic.
A Simple Path to Golden Perfection
1. Preparing the Cutlets
Place the 1.5 lbs chicken breasts between two sheets of plastic wrap. Using a meat mallet or a heavy rolling pin, pound them to an even 1/2 inch thickness. Note: This ensures the chicken cooks through exactly when the crust is golden.
2. Seasoning the Base
Pat the chicken completely dry with paper towels. Season both sides of the meat with 1 tsp fine sea salt, 1/2 tsp cracked black pepper, and 1/2 tsp garlic powder.
3. Setting the Station
Set up three shallow bowls. In the first, place 1/2 cup all purpose flour. In the second, whisk 2 large eggs with 1 tbsp water. In the third, mix 1.5 cups panko breadcrumbs, 1/4 cup grated Parmesan, and 1 tsp smoked paprika.
4. Executing the Dredge
Dredge one piece of chicken in the flour, shaking off any excess. Dip it into the egg wash until fully coated, then let the excess drip off.
5. Applying the Crunch
Place the chicken in the panko mixture. Press down firmly on both sides until the crumbs are packed tightly against the meat.
6. Preheating the Surface
Heat a large skillet over medium heat with a light coating of cooking spray or oil. Wait 2 minutes until the oil shimmers slightly.
7. The Initial Sizzle
Carefully place the chicken in the pan. Cook for 5-6 minutes on the first side until the edges are deep golden brown.
8. The Final Flip
Flip the chicken carefully. Cook for another 5-6 minutes until the internal temperature hits 165°F (74°C).
9. Resting the Meat
Remove the chicken from the pan and place it on a wire rack. Let it rest for 3 minutes until the juices redistribute. This keeps the bottom from getting soggy!
Fixing Common Breading Blunders
One of the biggest frustrations is when the breading falls off in the pan. This usually happens because the chicken was too wet before it hit the flour, or because you flipped it too early. Patience is your best friend here!
Why Your Breading Falls Off
If your breading is sliding off, it's often due to "steam off." This happens when moisture is trapped between the meat and the flour. As the chicken cooks, that moisture turns to steam and pushes the breading away.
| Problem | Root Cause | Solution |
|---|---|---|
| Soggy bottom | Resting on a flat plate | Rest on a wire rack to allow air circulation |
| Pale crust | Pan not hot enough | Wait for the oil to shimmer before adding meat |
| Burnt crumbs | Heat too high | Reduce heat to medium and use a high smoke point oil |
Common Mistakes Checklist
- ✓ Always pat the chicken bone dry before the first flour dredge.
- ✓ Don't skip the water in the egg wash; it thins the "glue" for an even coat.
- ✓ Avoid overcrowding the pan - cook in two batches if necessary.
- ✓ Never flip the chicken more than once; it disturbs the crust's structure.
- ✓ Let the chicken rest on a rack, not a paper towel, to maintain the crunch.
Creative Twists and Scaling Secrets
If you're cooking for a big family gathering, you can easily double this recipe. Just remember that the salt and spices shouldn't be strictly doubled; use about 1.5x the amount of seasoning to avoid over salting. When scaling down for one or two people, you can beat one egg and only use half of it to save on waste.
Engineering the Perfect Bond
Many people believe that searing meat "seals in the juices." This is a complete myth. Searing is actually about the Maillard reaction, which creates those complex, savory flavors in the crust. The juiciness of your breaded chicken comes from not overcooking the meat, not from "sealing" it.
- If you want a spicy kick: Add 1/2 tsp of cayenne pepper to the flour mixture.
- If you want a herb crusted version: Swap the paprika for 1 tbsp of dried Italian seasoning.
- If you want it extra crispy: Use the "double dredge" method by dipping back into the egg and panko a second time.
Keeping Your Chicken Fresh and Crispy
Storage is usually the enemy of breaded chicken because the fridge is a humid environment. To keep things as fresh as possible, store your leftovers in an airtight container with a piece of parchment paper between layers.
Storage: Keep in the fridge for up to 3 days. For the best texture, avoid the microwave when reheating; it will turn the crust into a rubbery mess. Instead, use a toaster oven or air fryer at 350°F (180°C) for 5 minutes.
Freezing: You can freeze these for up to 2 months. I recommend freezing them "flash style" on a baking sheet first, then transferring to a freezer bag. You can cook them straight from frozen in the oven at 400°F (200°C) for about 20 minutes.
Zero Waste: Don't toss those leftover breadcrumbs! If you have extra panko/Parmesan mix that hasn't touched raw chicken, toast it in a dry pan and sprinkle it over roasted broccoli or pasta for a quick flavor boost.
Pairing Your Hearty Family Meal
When it comes to serving, I love to keep it classic. A big squeeze of fresh lemon juice over the hot chicken is essential it cuts through the richness of the fried breading.
If you're looking for a side that feels a bit more indulgent, this chicken pairs beautifully with a creamy mash or even a light cucumber salad to balance the crunch.
I often serve this alongside my favorite Frozen Chicken Tenders recipe if I'm feeding a mix of adults and pickier kids. It's the ultimate crowd pleaser that feels like a big, warm hug at the end of a long day. Just remember, the goal is comfort, so don't stress the small stuff as long as it's golden and hot, your family is going to love it!

Recipe FAQs
How do you get breading to stick to chicken?
Press the final breadcrumb layer firmly onto the meat. Use the standard three step process: seasoned flour first to dry the surface, followed by an egg wash, and then the final breading. The initial flour layer acts as the necessary adhesive base for the egg to bond with.
Do you put egg or flour first for breaded chicken?
Flour must go first. The first step in creating a strong bond is coating the dried chicken in seasoned flour, which absorbs surface moisture. You then dip the floured piece into the egg wash, which acts as the "glue" to hold the final breading layer.
What does "breaded chicken" mean?
It means coating raw chicken in a dry mixture, usually flour, egg, and breadcrumbs, before cooking. This process creates a crispy, flavorful exterior crust that protects the chicken interior from drying out during frying or baking.
Should I fry or bake breaded chicken for the best crunch?
Frying generally yields the maximum crunch, but baking works well if properly managed. Pan-frying uses hot fat to immediately crisp the crust, but for a healthier, even result, ensure your oven is preheated to at least 400°F and use a wire rack. If you enjoyed mastering the texture here, apply the high heat technique to our Chicken Parm Sandwich recipe.
Why does my breading fall off during cooking?
The primary reason is moisture interference between the meat and the crust. This often happens if the chicken wasn't thoroughly patted dry before the flour, or if you flip the chicken too soon, breaking the initial bond formation.
Is it true that pounding the chicken before breading won't affect the final texture?
No, pounding the chicken is crucial for texture and even cooking. Uniform thickness ensures that the breading browns at the same rate the meat cooks through, preventing a common tragedy of burnt crumbs and raw centers.
Can I substitute Panko breadcrumbs for regular fine breadcrumbs?
Yes, Panko is highly recommended for superior crunch. Panko flakes are larger and airier than traditional crumbs, which results in a lighter, less dense crust that holds its crispness longer.
Crispy Breaded Chicken

Ingredients:
Instructions:
Nutrition Facts:
| Calories | 489 kcal |
|---|---|
| Protein | 62.4g |
| Fat | 11.2g |
| Carbs | 30.8g |
| Fiber | 1.4g |
| Sugar | 0.9g |
| Sodium | 638mg |
