Jammy Dried Cherry Recipe with Browned Butter
- Time: Active 20 minutes, Passive 2 hours 12 mins, Total 2 hours 32 mins
- Flavor/Texture Hook: Velvety crumb with a tart fruit snap and a dark chocolate shatter
- Perfect for: Impressive holiday gifting or a cozy weekend baking project
- A Truly Chewy and Tart Dried Cherry Recipe
- The Logic Behind This Sweet Treat
- Vital Statistics For Baking Success
- The Core Components For Flavor
- Necessary Tools For Your Kitchen
- Step By Step Baking Method
- Common Fixes For Baking Mishaps
- Intelligent Swaps For Every Pantry
- Keeping Your Cookies Fresh Longer
- Presentation And Color Balance Tips
- Kitchen Wisdom and Myths
- Dried Cherry Recipe FAQs
- 📝 Recipe Card
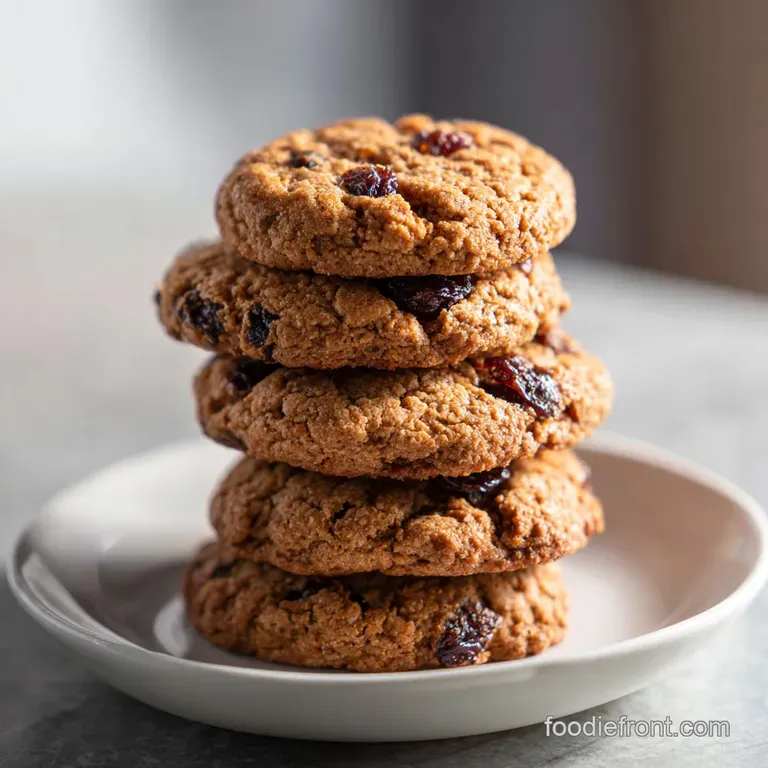
A Truly Chewy and Tart Dried Cherry Recipe
Have you ever wondered why some cookies have fruit that tastes like little pieces of leather while others feel like a soft, velvet hug? I used to be the person who just tossed dried fruit straight from the bag into the bowl, thinking the oven would work its magic. Honestly, it was a disaster every single time.
My cookies would come out looking great, but biting into one was like a game of "is this a cherry or a pebble?" It was so frustrating.
That all changed when I started treating my fruit like it was the star of the show. I realized that if you don't give those cherries a little bath first, they'll just suck the moisture right out of your dough, leaving you with a dry cookie and a tough fruit bit.
This specific dried cherry recipe is my personal love letter to everyone who has ever struggled with mediocre fruit cookies. It’s got that dark chocolate shatter and a salty finish that makes people think you’ve got a secret pastry degree.
We are going for a vibe that is easy and impressive. You don't need fancy equipment, just a little patience for the chill time. Trust me on this one, once you taste the difference between a dry cherry and one that’s been properly hydrated, there is no going back.
You'll be the person everyone asks for the recipe at every single party.
The Logic Behind This Sweet Treat
Osmotic Rehydration: Soaking the fruit in a small amount of warm liquid allows the dried cells to absorb moisture, ensuring the cherries stay jammy during the bake.
Maillard Intensification: Using browned butter creates toasted milk solids that provide a complex, caramel like base that balances the sharp acidity of the tart cherries.
Hydration Equilibrium: The addition of an extra egg yolk introduces more lecithin and fat, which creates a fudgy, velvety crumb that won't go stale overnight.
Starch Gelatinization: A long chill period allows the flour to fully hydrate, which leads to more even browning and a superior chew that shatters slightly at the edges.
| Cooking Method | Time Invested | Resulting Texture | Best For |
|---|---|---|---|
| Stovetop | 8 minutes | Toasty, nutty aroma | Maximum flavor depth |
| Oven Only | 12 minutes | Soft, pale crumb | A lighter, classic feel |
| Hybrid Prep | 20 minutes | Crispy edges, fudgy core | The ultimate experience |
Preparing the ingredients is half the battle when you want to make an impressive dessert. While the stovetop method for browning the butter adds a few minutes, the flavor impact is massive compared to just melting it in the microwave.
It turns a simple cookie into something that tastes like it came from a high end boutique bakery.
If you are looking for other impressive treats to round out your dessert table, these Chocolate Covered Marshmallows recipe are a fantastic quick option that looks stunning next to these cookies. Both use high-quality chocolate to really "wow" your guests without you having to spend all day in the kitchen.
Vital Statistics For Baking Success
| Ingredient | Science Role | Pro Secret |
|---|---|---|
| High Fat Butter (1 cup) | Provides the fat structure and nutty base notes. | Brown it until it smells like toasted hazelnuts for a deep flavor. |
| Dried Tart Cherries (1.5 cups) | Acts as the acidic counterpoint to the sweet dough. | Chop them roughly so every single bite has a piece of fruit. |
| Dark Chocolate (1 cup) | Offers a bitter contrast and a luxurious melt. | Use a bar and chop it yourself for those beautiful "pools" of chocolate. |
| Egg Yolk (1 extra) | Increases the fat content for a richer, fudgy texture. | Ensure it is room temperature so it emulsifies perfectly with the butter. |
The key to a successful dried cherry recipe is understanding how these parts move together. The sugar isn't just for sweetness; it’s for structure. We are using dark brown sugar because the extra molasses keeps things moist and gives us that chewy pull we all crave.
Using high fat European style butter is a game changer here because it has less water than standard supermarket sticks. This means your cookies won't spread into a thin puddle on the tray. It's the difference between a "good" cookie and one that people actually talk about the next day.
The Core Components For Flavor
- 1.5 cups (225g) dried tart cherries: Why this? They provide a sharp, bright tang that cuts through the heavy butter and chocolate.
- Substitute: Dried cranberries (slightly sweeter, less complex).
- 2 tbsp (30ml) hot water, bourbon, or brandy: Why this? Essential for waking up the fruit and making it tender again.
- Substitute: Apple juice or orange juice for a non alcoholic fruit punch.
- 1 cup (227g) unsalted high fat European style butter: Why this? Higher fat means a richer mouthfeel and better browning potential.
- Substitute: Standard unsalted butter (add 1 tsp less liquid to compensate).
- 0.75 cup (150g) granulated white sugar: Why this? Creates those perfectly crisp, golden brown edges.
- Substitute: Cane sugar for a slightly more earthy sweetness.
- 0.75 cup (160g) packed dark brown sugar: Why this? The molasses content is what gives us the fudgy, chewy center.
- Substitute: Light brown sugar (will be slightly less chewy).
- 1 large egg + 1 egg yolk, room temperature: Why this? The extra yolk adds a velvety richness that regular cookies lack.
- Substitute: 2 small eggs if you don't want to separate them.
- 2.25 cups (280g) all purpose flour: Why this? The perfect protein balance for structure without being "bready".
- Substitute: A 1:1 gluten-free baking flour blend.
- 1 tsp (5g) baking soda: Why this? Reacts with the brown sugar for lift and browning.
- Substitute: 3 tsp baking powder (but the texture will change significantly).
- 0.5 tsp (3g) fine sea salt: Why this? Enhances every other flavor in the bowl.
- Substitute: Table salt (use slightly less as it’s finer).
- 1 cup (170g) dark chocolate chunks (60% cacao): Why this? Dark chocolate pairs naturally with the tartness of the cherries.
- Substitute: Semi sweet chocolate chips if you prefer a sweeter profile.
- 0.5 tsp flaky sea salt for finishing: Why this? Adds a professional crunch and balances the sugars.
- Substitute: A tiny pinch of regular sea salt.
Chef's Tip: If you’re using bourbon to soak your cherries, don’t toss the leftover liquid! Whisk it into your vanilla extract for an even deeper, more complex aroma that fills the whole house while you bake.
Necessary Tools For Your Kitchen
You don't need a mountain of gadgets to master this dried cherry recipe, but a few basics will make your life much easier. I always suggest using a light colored skillet for the butter so you can actually see the milk solids turning brown.
If you use a dark pan, you'll likely burn it because you can't see the color change!
A sturdy stand mixer is great, but a hand mixer works just as well. The most important tool is actually a kitchen scale. Baking by weight is the only way to ensure your cookies come out the same every single time.
If you scoop flour with a cup, you might end up with 20% more than you actually need, which leads to a cakey, dry cookie.
Don't forget a good cookie scoop. It might seem unnecessary, but having uniform sizes means they all finish cooking at the exact same moment. No more raw centers on the big ones and burnt edges on the small ones! Plus, it makes them look totally professional, like you bought them from a fancy bakery.
step-by-step Baking Method
Enhancing The Texture Of Fruit
Place your 1.5 cups of dried cherries in a small bowl and pour over the 2 tbsp of hot liquid and 1 tsp of vanilla. Note: This softens the fruit so it doesn't bake into hard bits. Cover and let them sit for at least 30 minutes while you prep the rest.
Mastering The Brown Butter Base
Melt the 1 cup of butter in a skillet over medium heat, swirling constantly. Cook until it foams and you see tiny brown specks at the bottom. Immediately pour it into a large mixing bowl to stop the cooking. Let it cool until it's no longer hot to the touch but still liquid.
Proper Preparation Of The Ingredients
Whisk together the 2.25 cups of flour, 1 tsp baking soda, and 0.5 tsp fine sea salt in a separate medium bowl. Note: Sifting isn't required, but a good whisking ensures the leavening is evenly distributed. Set this aside for a moment.
Creating The Perfect Dough Texture
Add the 0.75 cup white sugar and 0.75 cup dark brown sugar to the cooled brown butter. Mix on medium speed for about 2 minutes. Note: It won't get "fluffy" like creamed butter, but it should look like wet sand.
Managing Temperature For Best Results
Add the egg and the extra egg yolk one at a time, beating well after each. Mix until the batter looks glossy and slightly thickened. If your eggs are too cold, the butter might clump, so make sure they are room temp!
Incorporating The Final Flavors
Turn the mixer to low and slowly add the dry ingredients. Stop just as the last streak of flour disappears. Fold in the soaked cherries (and any remaining liquid) and the 1 cup of dark chocolate chunks by hand. Note: Overmixing at this stage makes for a tough cookie.
Importance Of The Chill Period
Cover the bowl and refrigerate for at least 2 hours, or even overnight. Wait until the dough is firm and the flavors have melded. This is the hardest part, but it’s non negotiable for the best texture and flavor.
Achieving That Golden Professional Look
Preheat your oven to 350°F (180°C). Scoop rounded tablespoons of dough onto a lined baking sheet, spacing them 2 inches apart. Bake for 10-12 minutes until the edges are golden and the centers still look slightly soft.
The Perfect Salty Finish
Remove the tray and immediately sprinkle with the flaky sea salt while they are still hot. Note: The heat helps the salt crystals stick to the melting chocolate chunks. Let them cool on the pan for 5 minutes before moving to a wire rack.
Common Fixes For Baking Mishaps
Solutions For Burning Your Butter
Brown butter goes from "perfect" to "burnt" in about 10 seconds. If it smells like smoke instead of hazelnuts, or if the bits at the bottom are black rather than dark brown, you have to toss it and start over. To prevent this, have a bowl ready to pour the butter into as soon as it reaches that deep amber color.
This stops the residual heat from the pan from continuing to cook the delicate milk solids.
Fixing Flat And Greasy Cookies
If your cookies come out looking like thin pancakes, it usually means your butter was too hot when you mixed it with the sugar, or you skipped the chill time. The dough needs to be cold when it hits the oven so the edges set before the middle has a chance to melt completely.
If they are already flat, try "scooting" them back into a circle with a large round cutter immediately after they come out of the oven.
| Problem | Root Cause | Solution |
|---|---|---|
| Tough cherries | Fruit was too dry | Soak in hot liquid for 30+ mins before adding. |
| Gritty texture | Sugar didn't dissolve | Beat the sugars and butter longer before adding eggs. |
| Dry/Crumbly cookie | Too much flour | Measure by weight or "spoon and level" the flour. |
Common Mistakes Checklist
- ✓ Never use cold eggs; they will cause the browned butter to seize and clump.
- ✓ Don't skip the extra egg yolk; it is the secret to the velvety, rich crumb.
- ✓ Avoid overbaking; the cookies should look slightly underdone in the center when you pull them out.
- ✓ Use a silicone mat or parchment paper to prevent the bottoms from browning too quickly.
- ✓ Ensure your baking soda is fresh by testing a pinch in vinegar (it should bubble aggressively).
Intelligent Swaps For Every Pantry
Scaling this dried cherry recipe is actually quite simple if you follow a few basic rules. If you want to cut the recipe in half, just beat one egg in a small cup and use exactly half of it by weight or volume. For the extra yolk, you can just use the yolk of a smaller egg.
When you scale down, the baking time usually stays the same, but keep a close eye on them around the 8 minute mark just in case.
If you are scaling up for a big party, don't just double the salt and spices. I find that using 1.5 times the salt and leavening is usually plenty for a double batch, otherwise, the flavor can become a bit metallic.
Always bake in batches rather than cramming two trays into the oven at once, as this can affect the heat circulation and leave you with unevenly cooked cookies.
Adapting For gluten-free Needs
This recipe works surprisingly well with a high-quality gluten-free 1:1 flour blend. Because there is so much moisture from the soaked cherries and the extra egg yolk, you won't get that "sandy" texture often associated with gluten-free baking.
Just make sure your blend contains xanthan gum to help hold everything together.
Transforming Dough Into A Cake
You can actually press this dough into a 9 inch round cake pan to create a "dried cherry cake recipe" style cookie cake. You’ll need to increase the bake time to about 20-25 minutes. It creates a dense, fudgy wedge that is absolutely incredible served warm with a scoop of vanilla bean ice cream. If you like the idea of baked treats, these Sweet Potato Slices recipe offer a similar natural sweetness that works great for a snack tray.
Keeping Your Cookies Fresh Longer
- Countertop: Store in an airtight container for up to 5 days. Add a piece of white bread to the container to keep them soft!
- Freezing Dough: Scoop into balls and freeze on a tray. Once solid, move to a bag. Bake from frozen, adding 2 minutes to the time.
- Freezing Baked: Wrap individual cookies in plastic and freeze for up to 3 months. Thaw at room temperature for an hour.
- Zero Waste Tip: If your cookies finally go stale, crumble them up! They make an incredible topping for Greek yogurt or can be folded into a homemade no churn ice cream base.
- Leftover Cherries: If you have extra soaked cherries, simmer them with a bit of sugar and water to make a quick jam for your morning toast.
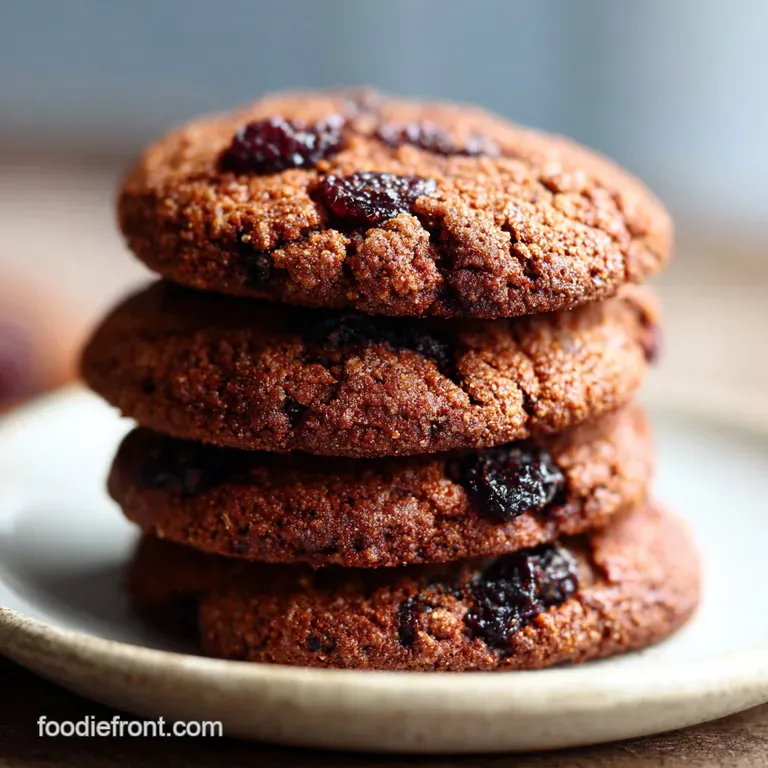
Presentation And Color Balance Tips
When you’re making a dried cherry recipe, the visual appeal is just as important as the taste. To make these look truly impressive, we focus on a specific color balance and garnish strategy. You want those vibrant reds and dark chocolates to pop against the golden dough.
- Deep Ruby Accents: After scooping your dough balls, press 2 or 3 extra soaked cherries onto the top of each ball. This ensures the bright red color is visible on the surface rather than hidden inside.
- Glossy Obsidian Pools: Use a few extra chocolate chunks and place them right next to the cherries on top. As they bake, they will melt into beautiful, dark pools that contrast sharply with the fruit.
- Snowy Crystal Garnish: The final touch is the flaky sea salt. Add this the second the tray leaves the oven. The white crystals catch the light and tell your guests that this is a sophisticated, balanced dessert.
If you want a different but equally stunning presentation, consider serving these alongside some Chocolate Covered Strawberries recipe. The combination of red fruit and dark chocolate across both treats creates a beautiful, cohesive look for any dessert spread.
Kitchen Wisdom and Myths
There is a common myth that browning butter is the same as melting it. In reality, browning the butter is a chemical transformation. You are actually cooking off the water and toasting the protein solids.
This is why browned butter cookies have a much more complex, savory sweet profile than those made with just melted butter. It isn't just a game changer; it's a completely different ingredient.
Another myth is that you can't over soak your cherries. While you want them plump, if you leave them in liquid for days, they will lose their structural integrity and turn into mush in the oven. 30 minutes to 2 hours is the "Goldilocks" zone for this dried cherry recipe.
You want them to have a bit of a snap left so they provide a textural contrast to the soft dough.
Finally, people often think that chilling dough is an optional step for when you have extra time. It isn't! Chilling allows the fats to solidify, which controls the spread, and it gives the flour time to absorb the liquid from the eggs and butter.
A chilled cookie will always be more flavorful and have a better "chew" than one baked immediately. Trust the process, and you’ll be rewarded with the best cookie of your life.

Dried Cherry Recipe FAQs
What can you do with dried cherries?
Use them baked into goods or rehydrated as a topping. They add intense flavor and chew to cookies, muffins, and granola bars. They are also fantastic simmered briefly to create a sauce for pork or chicken, much like the fruit base in our Mushroom Bisque Soup recipe provides savory depth.
Do you soak dried cherries before baking?
Yes, soaking is essential for a soft texture. Soaking the dried fruit in warm liquid for at least 30 minutes rehydrates the cells, preventing them from sucking moisture out of your dough and becoming tough.
How to dry cherries at home?
Wash and pit the cherries, then arrange them in a single layer on dehydrator trays or a parchment lined baking sheet for the oven. Dehydrate at 135°F (57°C) until they are pliable but no longer sticky, which typically takes 8 to 12 hours depending on your method.
What are dried cherries good for?
They are excellent for balancing rich flavors with sharp acidity. Their concentrated tartness cuts through the richness of butter and chocolate in baking. They are also great for texture contrast when added to salads or savory grain bowls.
Can I use dried cherries instead of fresh cherries in a baked good?
Yes, but you must account for moisture loss. Use about one-third the volume of dried cherries compared to fresh, and always soak them first to prevent them from drying out your final product.
Is it true that chilling cookie dough overnight improves the flavor of dried fruit cookies?
Yes, the long chill period is critical for flavor development and texture. This time allows the flour to fully hydrate and the ingredients to meld, which results in a chewier, more complex cookie, a principle similar to letting batters rest for superior texture.
What is the best liquid to soak dried cherries in?
Warm water or a spirit like brandy or bourbon works best. Warm liquid speeds up rehydration, and alcohol slightly softens the fruit while adding a subtle depth of flavor that pairs well with chocolate.
Jammy Dried Cherry Recipe
Ingredients:
Instructions:
Nutrition Facts:
| Calories | 234 kcal |
|---|---|
| Protein | 2.1 g |
| Fat | 10.5 g |
| Carbs | 33.3 g |
| Fiber | 0.9 g |
| Sugar | 22.2 g |
| Sodium | 103 mg |
