Irresistible Dinner Rolls: Soft and Fluffy
- Time: Active 145 minutes, Passive 20 minutes, Total 165 minutes
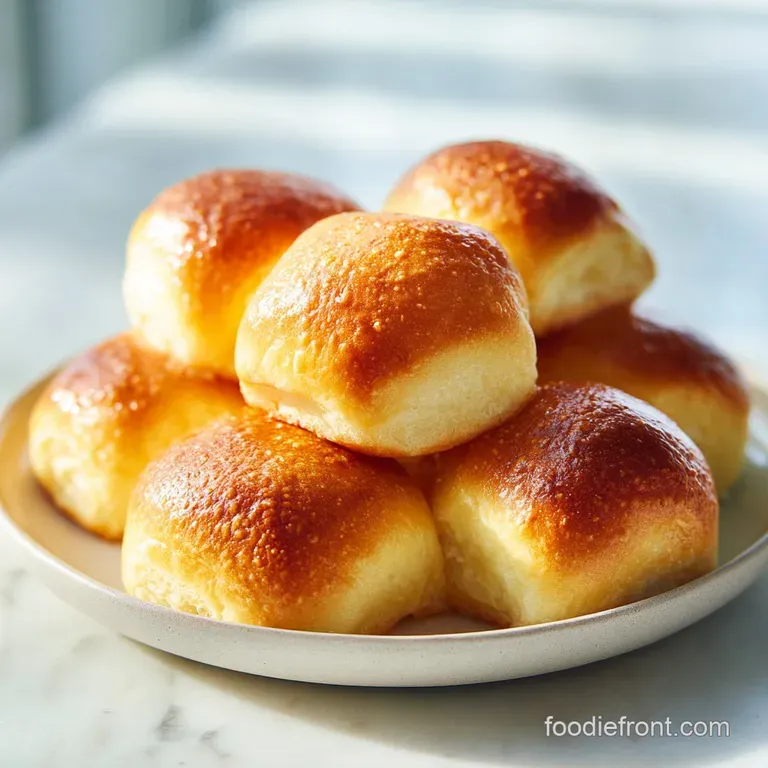
- Flavor/Texture Hook: Pillowy soft with a shimmering honey salt finish
- Perfect for: Holiday feasts or cozy Sunday dinners
- How to Nail Irresistible Dinner Rolls
- Essential Recipe Specs and Timing
- Component Deep Dive and Secrets
- Ingredients for a Fluffy Crumb
- Best Tools for Bread Success
- Creating the Perfect Pillowy Rolls
- Solving Common Dough Problems Easily
- Scaling Up or Down Successfully
- Debunking Bread Baking Myths
- Proper Storage and Reheating Tips
- Comforting Mains for Warm Bread
- Recipe FAQs
- 📝 Recipe Card
How to Nail Irresistible Dinner Rolls
There is nothing quite like the smell of yeast blooming in warm milk on a Sunday afternoon. It hits you the second you walk into the kitchen, a scent that promises comfort and a hearty meal ahead.
When I first started baking bread, I was terrified of yeast, thinking it was some finicky creature that would fail if I breathed on it wrong. But once I felt the dough transform from a sticky mess into a smooth, elastic ball under my hands, I was hooked.
You'll see what I mean the moment these come out of the oven. The kitchen fills with this sweet, buttery aroma that practically pulls the kids away from their screens and toward the table. Watching that first brush of honey butter melt into the golden crust is pure magic.
We usually can't even wait for them to cool down before we're tearing into them, steam rising from the center as the "shatter" of the flaky salt hits the tongue.
Trust me, these are going to be the star of your dinner. Whether you are a seasoned baker or this is your first time touching flour, this process is designed to be foolproof. We are going to focus on the texture of the dough and the timing of the rise to ensure every single one of these 15 rolls turns out exactly how you want them: light, airy, and completely soul warming.
Essential Recipe Specs and Timing
Fat Interference: Fat from the butter and egg coats gluten strands, preventing them from becoming too long and tough. This is what creates that "short" or tender bite rather than a chewy baguette texture.
Yeast Fermentation: The sugar feeds the yeast, which then releases carbon dioxide. These gas bubbles get trapped in the gluten network, causing the rolls to inflate and become light during the double rise process.
Starch Gelatinization: Warm milk helps the flour starches absorb liquid more efficiently. This ensures the crumb stays moist and soft for days instead of drying out immediately after cooling.
| Cook Method | Time | Texture | Best For |
|---|---|---|---|
| Standard Oven | 20 minutes | Evenly golden and soft | Large family dinners |
| Air Fryer | 12 minutes | Crispy exterior, dense center | Small batches (3-4 rolls) |
| Convection Oven | 15 minutes | Darker crust, very airy | Advanced bakers |
The choice of method depends entirely on your available gear and how many people you are feeding. For a classic family meal, the standard oven method provided in the steps below is my absolute favorite because it allows the rolls to crowd together and steam each other, which keeps the sides incredibly soft.
Component Deep Dive and Secrets
| Ingredient | Science Role | Pro Secret |
|---|---|---|
| Warm Milk | Hydration and softness | Keep it between 40°C and 43°C |
| All Purpose Flour | Structure and crumb | Weigh it for consistent density |
| Unsalted Butter | Tenderness and flavor | Use high-quality European style |
| Active Dry Yeast | Leavening agent | Always bloom in sugar water first |
Ingredients for a Fluffy Crumb
- 240ml warm whole milk (105°F to 110°F) | Substitute: Oat milk Why this? Provides the essential liquid and fat for a tender, enriched dough structure.
- 50g granulated sugar | Substitute: Honey Why this? Feeds the yeast and provides a subtle sweetness to the finished rolls.
- 7g active dry yeast (1 packet) | Substitute: Instant yeast Why this? The engine that makes the bread rise and creates the airy interior.
- 525g all purpose flour | Substitute: Bread flour Why this? Offers the right amount of protein for structure without being too chewy.
- 75g unsalted butter, softened | Substitute: Margarine Why this? Enriches the dough, creating a silky texture and classic buttery flavor profile.
- 1 large egg, room temperature | Substitute: 60g plain yogurt Why this? Acts as an emulsifier and helps the rolls rise higher in the oven.
- 6g fine sea salt | Substitute: Table salt Why this? Regulates the yeast activity and enhances every other flavor in the dough.
- 30g unsalted butter, melted (for glaze) | Substitute: Olive oil Why this? Adds a shimmering finish and keeps the crust from getting too hard.
- 15ml honey | Substitute: Maple syrup Why this? Adds a floral sweetness to the glaze that pairs perfectly with salt.
- 1 tsp flaky sea salt | Substitute: Kosher salt Why this? Provides a delicate crunch and a pop of seasoning on the top.
Best Tools for Bread Success
You don't need a professional bakery setup to make irresistible dinner rolls, but a few specific tools make the job much easier. A stand mixer such as a KitchenAid with a dough hook is my go to because it does the heavy lifting of kneading for 7 to 10 minutes without wearing out your arms.
If you are doing this by hand, just be prepared for a bit of a workout!
A digital kitchen scale is another non negotiable for me. When you're working with 525g of flour, a "cup" can vary wildly depending on how you scoop it, which leads to dry or sticky rolls. Using a scale ensures your dough is perfect every single time.
Finally,, a 9x13 inch (23x33 cm) baking pan is the ideal size to hold all 15 rolls so they can rise together and support each other's height.
Creating the Perfect Pillowy Rolls

- Combine 240ml warm milk, 50g sugar, and 7g yeast in your mixer bowl. Whisk gently until the mixture is frothy and bubbling. Note: This ensures your yeast is alive and ready to work.
- Add the 75g softened butter, egg, 6g salt, and half the flour. Mix on low speed until a thick paste forms.
- Gradually add the remaining flour while the mixer runs. Stop adding when the dough clears the sides of the bowl but still feels slightly tacky to the touch.
- Increase the speed to medium and knead for 7-10 minutes. Stop when the dough becomes smooth, elastic, and passes the windowpane test.
- Transfer the dough to a greased bowl and cover it tightly. Let it sit in a warm spot for 60-90 minutes until it has doubled in volume.
- Gently punch the dough down to release large air bubbles. Divide the mass into 15 equal pieces, roughly 65g each until you have uniform spheres.
- Arrange the spheres in a greased 9x13 inch pan. Cover and let rise for another 30-45 minutes until they are puffy and touching.
- Preheat your oven to 175°C. Bake for 18-20 minutes until the tops are deep golden brown.
- Whisk 30g melted butter with 15ml honey. Brush this over the rolls while they are still steaming hot.
- Sprinkle with 1 tsp flaky salt until the crystals stick to the honey butter.
Solving Common Dough Problems Easily
For Rolls That Refuse to Rise
If your dough is sitting there like a lead weight, the most common culprit is the temperature of the milk. If the milk was over 46°C, it likely killed the yeast.
If it was too cold, the yeast is just "sleeping." You can try moving the bowl to a warmer spot, like inside an oven that is turned off but has the light on.
For a Crumb That Feels Dense
A heavy, dense roll usually means the dough didn't have enough time to proof or it was overloaded with flour. Ensure you are using the windowpane test during kneading. If you can stretch a small piece of dough thin enough to see light through it without it tearing, your gluten is developed. If it snaps, keep kneading.
| Problem | Root Cause | Solution |
|---|---|---|
| Dry/Crumbly Texture | Too much flour added | Weigh ingredients; dough should be tacky |
| Burnt Bottoms | Pan is too close to heat | Use a middle rack and light colored pan |
| Yeast didn't bloom | Milk was too hot | Keep milk between 40°C and 43°C |
Common Mistakes Checklist
- ✓ Check the expiration date on your yeast before starting (dead yeast won't rise).
- ✓ Don't skip the second rise in the pan; this is where the light texture happens.
- ✓ Use room temperature eggs so they don't shock the warm milk and yeast.
- ✓ Resist the urge to add "just a little more" flour; tacky dough makes soft bread.
- ✓ Let the rolls cool for at least 5 minutes before pulling them apart to set the crumb.
Scaling Up or Down Successfully
When you need to feed a crowd, doubling this recipe is fairly straightforward. You can use two 9x13 inch pans and bake them side-by-side. Just remember to rotate the pans halfway through the 20 minute bake time to ensure even browning.
I usually suggest keeping the yeast and salt at 1.5x the original amount rather than a full double to prevent the dough from rising too fast and losing flavor.
If you are cooking for a smaller household, you can easily halve the recipe. Use half an egg by whisking it in a small bowl and measuring out 25-30g. A 20cm square pan works perfectly for a half batch of about 7 or 8 rolls.
The bake time might drop by about 3-5 minutes, so keep a close eye on them starting at the 15 minute mark.
If you want a more complex flavor, you might consider how this pairs with a Creamy Lemon Chicken. The acidity of the lemon cuts through the rich butter of the rolls beautifully.
Debunking Bread Baking Myths
One of the biggest myths is that you have to knead the dough for twenty minutes by hand to get a good rise. In reality, over kneading can actually make the bread tough and rubbery. Once the dough is smooth and passes that windowpane test, stop! Your mixer is much faster than your hands, so trust the timer.
Another common misconception is that the sugar is only there for flavor. While it does taste good, the primary role of the 50g of sugar is to provide a quick energy source for the yeast.
This helps the fermentation process move along at a steady pace, which is why these irresistible dinner rolls achieve such a great height in just under three hours.
Proper Storage and Reheating Tips
These rolls are best enjoyed fresh, but you can keep them in an airtight container at room temperature for up to 3 days. To revive that just baked softness, wrap a roll in a damp paper towel and microwave it for 10-15 seconds. If you have leftovers that are starting to get a bit firm, don't throw them away!
They make incredible sliders or can be cubed and toasted for the best croutons you've ever had.
For long term storage, these rolls freeze beautifully. Once they are completely cool, wrap them individually in plastic wrap and place them in a freezer bag for up to 2 months. To reheat from frozen, let them thaw at room temperature for an hour, then pop them in a 150°C oven for 5-8 minutes until warmed through.
You can even use the leftover dough scraps to make mini cinnamon sugar bites if you have small pieces left over after shaping your 65g spheres.
Comforting Mains for Warm Bread
This bread is meant to be the supporting actor to a hearty main course. I love serving these alongside a Mediterranean Chicken Veggies pan. The soft rolls are perfect for soaking up any juices or sauces left on the plate, making sure not a single drop of flavor goes to waste.
Since this recipe is quite rich with butter and honey, it also balances well with a simple roasted turkey or a thick beef stew. The contrast between the salty honey glaze and a savory gravy is something your family will ask for every week.
Just make sure you have enough butter on the table, because once these start disappearing, people will be reaching for seconds and thirds before the main course even hits the plates!

Recipe FAQs
Is it true I must add extra flour if the dough feels sticky?
No, this is a common misconception. You should resist the urge to add more flour because keeping the dough slightly tacky is exactly what ensures a light, soft texture after baking.
How to ensure my yeast is active before mixing the dough?
Whisk the warm milk, sugar, and yeast together, then let it sit for 5 10 minutes. You are looking for a visible, frothy foam to form on the surface, which confirms your yeast is alive and ready to provide a good rise.
Why is my dough failing to rise properly?
Check the expiration date on your yeast first, as dead yeast is the most common culprit. If your yeast is fresh, ensure you are using room temperature eggs so you do not accidentally shock the warm milk mixture and kill the yeast activity.
How to achieve the perfect golden crust on these rolls?
Bake the rolls at 350°F (175°C) for 18-20 minutes until they reach a deep golden brown. Immediately brush them with the melted butter and honey mixture while still hot to lock in moisture and add a professional sheen.
Can I speed up the baking process?
No, you must honor the two separate rise times to develop the proper crumb structure. If you enjoy mastering the patience required for proofing here, you will find similar attention to detail pays off in our other recipes.
How to handle the rolls after removing them from the oven?
Cool the rolls in the pan for at least 5 minutes before pulling them apart. This brief resting period is essential to allow the interior crumb to set properly so the rolls do not become gummy when pulled.
Is it necessary to use a stand mixer for this dough?
Yes, using a stand mixer with a dough hook is highly recommended to reach the necessary windowpane test stage. Kneading for 7-10 minutes at medium speed creates the elastic, smooth structure needed for that signature pull apart softness.
Homemade Irresistible Dinner Rolls

Ingredients:
Instructions:
Nutrition Facts:
| Calories | 211 kcal |
|---|---|
| Protein | 4.7 g |
| Fat | 6.9 g |
| Carbs | 31.9 g |
| Fiber | 0.9 g |
| Sugar | 4.8 g |
| Sodium | 178 mg |
