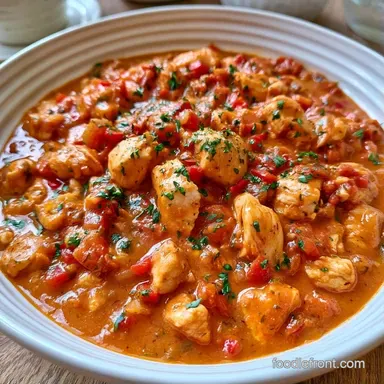
Creamy Chicken Chili

- Time: 15 min active + 45 min cook
- Flavor/Texture Hook: Creamy, zesty and hearty
- Perfect for: Busy weeknight dinners
- Easy Homemade Chicken Chili
- Why This Recipe Works
- Get Your Ingredients Ready
- The Kitchen Tools Needed
- What Each Ingredient Does
- How to Cook It
- What Makes This Chili Work
- Fixing Common Chili Problems
- Adjusting the Serving Size
- Debunking Kitchen Myths
- Storage and Freezer Guide
- Easy Ways to Change It
- Best Ways to Serve
- High in Sodium
- Recipe FAQs
- 📝 Recipe Card
Ever wonder why we think a hearty stew needs eight hours in a slow cooker to taste "real"? I used to believe the same thing. I thought you had to sacrifice your entire Saturday to get a deep, comforting bowl of soup.
But I found out that if you handle the meat right, you can get those same vibes in a fraction of the time. This Chicken Chili is my go to for those Tuesday nights when the kids are hungry and I've only got a small window to get dinner on the table.
It's a simple, one pot meal that doesn't skimp on flavor. You get the zest of green chiles, the creaminess of white beans, and chicken that actually stays juicy.
Easy Homemade Chicken Chili
Why This Recipe Works
Searing the Meat: Browning the chicken breast first creates savory compounds that add depth. This replaces the long simmer time usually needed for a rich base.
Spice Blooming: Adding cumin and paprika to the hot oil before the liquid wakes up the flavors. It makes the Chicken Chili taste more complex without needing a long list of ingredients. If you're into pre made blends, using something like a rotisserie chicken seasoning can add an extra layer of salt and herbs.
Goal | What to change
| Goal | What to change |
|---|---|
| Thicker Base | Mash 1/4 cup of beans |
| More Heat | Add 1 tsp red pepper flakes |
| Lower Carb | Swap beans for extra cauliflower |
Get Your Ingredients Ready
The key to a budget friendly Chicken Chili is using pantry staples that pack a punch. I usually keep canned beans and corn on hand because they're cheap and save a ton of prep time.
The Aromatics
- 1 tbsp olive oil
- 1 medium yellow onion, diced
- 1 medium red bell pepper, diced
- 3 cloves garlic, minced
- 1 jalapeño, seeded and minced
The Protein & Base
- 1.5 lb boneless skinless chicken breast, cut into 1 inch cubes Why this? Lean and cooks quickly in small cubes
- 4 cups low sodium chicken broth Why this? Controls salt levels so you can season at the end
- 1 can (14.5 oz) diced green chiles Why this? Adds a tangy, mild heat
The Heart & Texture
- 2 cans (15 oz each) white cannellini beans, drained and rinsed Why this? Creamy texture that holds up well
- 1 cup frozen corn Why this? Adds sweetness and a bit of pop
- 1 tbsp cornstarch
- 2 tbsp water
The Seasoning
- 1 tsp ground cumin
- 1 tsp dried oregano
- 1/2 tsp smoked paprika
- 1 tsp salt
- 1/2 tsp black pepper
Substitution Guide
| Original Ingredient | Substitute | Why It Works |
|---|---|---|
| Cannellini Beans | Great Northern Beans | Very similar texture and mild flavor |
| Chicken Breast | Chicken Thighs | Juicier meat but adds more fat to the pot |
| Chicken Broth | Vegetable Broth | Works fine, but loses some meaty depth |
I've found that using frozen corn is actually better than canned. It tastes fresher and doesn't have that metallic tang some cheap cans have.
The Kitchen Tools Needed
No specialized gear is required for this recipe. A sturdy pot, such as a large stockpot or a Dutch oven, is ideal since the thick base ensures the chicken browns uniformly without burning.
For prep, you'll mainly need a cutting board and a sharp chef's knife. I also suggest using a whisk and a small bowl to blend the cornstarch slurry, which keeps the final Chicken Chili smooth and lump free.
What Each Ingredient Does
I like to think about how each part contributes to the bowl. It helps me know what to tweak if I'm missing something.
| Ingredient | Role | If You Don't Have It |
|---|---|---|
| Green Chiles | Zesty acidity | Use a splash of lime juice and diced green bell pepper |
| Smoked Paprika | Earthy, woody depth | Use regular paprika and a pinch of cumin |
| Cornstarch | Thickening agent | Mash some of the beans directly in the pot |
| Cannellini Beans | Creamy bulk | Use chickpeas for a firmer bite |
Trust me on the cornstarch. Adding it at the end gives the liquid a glossy look that makes the Chicken Chili feel like a restaurant meal.
How to Cook It
Time to get cooking. Maintain a steady temperature and be patient during the browning process.
- Heat olive oil over medium high. Sauté the diced onion and bell pepper for 3–5 minutes until the onions are translucent. Stir in the garlic and jalapeño, cooking for another 60 seconds until aromatic.
- Turn up the heat slightly and add the cubed chicken. Cook for 5 minutes until the edges are golden brown. Mix in the cumin, oregano, and smoked paprika, coating the meat thoroughly.
- Stir in the chicken broth and green chiles. Bring the pot to a boil, then lower the heat, cover with a lid, and simmer for 20 minutes. Note: Covering the pot preserves the moisture, ensuring the chicken stays tender.
- Add the cannellini beans and frozen corn. Simmer without a lid for another 10 minutes.
- Combine cornstarch and water in a small bowl to make a slurry.
- Stir this slurry into the chili and cook for 2 more minutes until the liquid becomes thick and glossy.
- Season with salt and pepper to taste.
I once forgot to rinse my beans, which gave the Chicken Chili a funky, starchy aftertaste. Be sure to rinse canned beans well under cold water.
What Makes This Chili Work
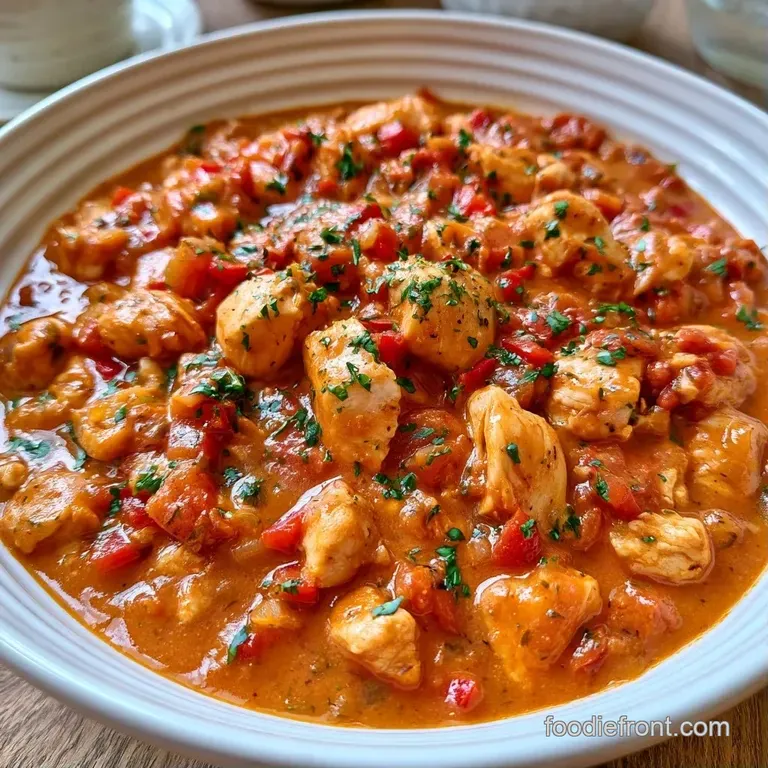
The trick here is the order of operations. By browning the chicken and "blooming" the spices in oil first, we create a foundation of flavor.
Serious Eats' testing shows that searing meat before simmering adds complex flavors that boiling alone can't achieve. In this Chicken Chili, that means we get a rich taste in 60 minutes instead of six hours.
Fixing Common Chili Problems
Home cooking can be unpredictable. Here is how to troubleshoot a few common issues.
The Consistency is Too Thin
If the Chicken Chili feels more like a soup than a stew, try the mash technique. Use a fork or potato masher to crush some of the beans against the pot wall. This releases natural starches to thicken the base, removing the need for extra flour or cornstarch.
The Flavor Lacks Depth
If the taste is a bit dull, it likely needs a bit of acidity. Stir in a squeeze of fresh lime juice or a teaspoon of apple cider vinegar. This balances the richness and helps the spices stand out.
The Chicken is Tough
Rubbery meat is often the result of simmering at too high a temperature. If this occurs, let the Chicken Chili simmer on very low for an additional 15 minutes. The gentle heat will soften the proteins without boiling the chicken into shreds.
Adjusting the Serving Size
If you're cooking for a crowd or just for yourself, you can shift the proportions.
Scaling Down To make a half batch, use a smaller pot to prevent the liquid from evaporating too quickly. Reduce the simmering time by about 20%. Since you can't easily halve an egg (not that we use one here), just measure your spices with a half teaspoon.
Scaling Up When doubling the Chicken Chili, don't double the salt and spices exactly. Start with 1.5x the seasonings, then taste at the end. Also, work in batches when browning the chicken. If you crowd the pan, the meat will steam instead of brown, and you'll lose that golden crust.
Debunking Kitchen Myths
Searing meat does not "seal in" the juices. In reality, searing can actually cause some moisture loss. However, it creates a crust that adds an incredible amount of flavor to the Chicken Chili.
Another myth is that canned beans are completely devoid of nutrition. While some have added salt, rinsing them removes a large portion of that sodium. They are a perfectly healthy, budget friendly protein source.
Storage and Freezer Guide
This dish is perfect for meal prep, as it often tastes even better the following day once the flavors have had time to deepen.
Refrigerator Storage
Keep the Chicken Chili in an airtight container for 3 to 4 days. Since the beans tend to soak up the broth while sitting, you may want to stir in a little water during reheating.
Freezer Instructions
This recipe is very freezer friendly. Store the cooled chili in freezer safe bags or containers for up to 3 months. To prevent freezer burn, be sure to press out as much air as possible from the bags.
Reheating for Freshness
Warm the chili on the stovetop over medium heat. If you are using a frozen portion, thaw it in the fridge overnight. Alternatively, you can use a microwave, stirring every two minutes to ensure it heats through evenly. To brighten the dish, try adding a dash of habanero tomato hot sauce.
Zero Waste Tips
Save the bean liquid (aquafaba) if you want to experiment; it works great as a vegan egg replacement in baking. Additionally, freeze any leftover onion or pepper trimmings in a bag to create a simple vegetable stock later.
Easy Ways to Change It
This recipe is incredibly versatile, allowing you to completely transform the flavor profile with just a few simple swaps.
Easy Chicken Chili Verde
For a brighter, tangier taste, replace the diced red pepper with additional green chiles and stir in a cup of tomatillo salsa. This version pairs perfectly with fresh cilantro.
Slow Cooker Chicken Chili
For a hands off approach, place all ingredients excluding the cornstarch slurry into your slow cooker. Cook on low for 6 hours or high for 3. Stir in the corn and slurry during the final 30 minutes.
Instant Pot Chicken Chili
Use the "Sauté" function to brown the chicken and vegetables. Mix in the remaining ingredients and cook on high pressure for 15 minutes. Perform a quick pressure release and stir in the slurry at the end.
Bean Free Keto Swap
To lower the carb count, substitute the cannellini beans with diced cauliflower or extra zucchini. This keeps the Chicken Chili hearty and filling while remaining keto friendly.
Best Ways to Serve
While Chicken Chili is delicious on its own, adding toppings is where the real enjoyment begins.
The Topping Bar
I prefer placing a few small bowls on the table so everyone can personalize their bowl. Freshly diced avocado provides a creamy balance to the heat. A spoonful of Greek yogurt or sour cream helps mellow the spice, while shredded sharp cheddar adds a salty kick.
Side Pairings
Because this is a rich dish, I typically serve it with something light and crunchy. A basic side salad with a zesty lime vinaigrette is a perfect match. If you're looking for something more substantial, try warm corn tortillas or a piece of toasted sourdough bread for dipping.
Now you have a satisfying, cozy meal that doesn't require spending all day in the kitchen. This Chicken Chili proves you can achieve a deep, slow cooked taste even on a tight schedule. Share it with your family and feel free to put your own spin on it!
High in Sodium
890 mg 890 mg of sodium per serving (39% 39% of daily value)
The American Heart Association recommends a daily limit of 2,300 mg of sodium, with an ideal limit of 1,500 mg for most adults to reduce the risk of cardiovascular disease.
Tips to Reduce Sodium
-
Swap the Broth-30%
Replace the low-sodium chicken broth with no-salt added chicken broth or a homemade unsalted stock.
-
Eliminate Added Salt-25%
Completely omit the 1 tsp of salt; the broth and canned ingredients already provide significant sodium.
-
Choose Low-Sodium Beans-20%
Use no-salt added cannellini beans or substitute with dry beans soaked and cooked at home.
-
Rinse Canned Chiles-10%
Thoroughly rinse the canned green chiles under cold water to wash away excess sodium from the canning liquid.
-
Enhance with Aromatics
Increase the smoked paprika and cumin, or add a squeeze of fresh lime juice to brighten the flavor without adding salt.
Recipe FAQs
What are the five main ingredients in chicken chili?
The primary ingredients are chicken breast, cannellini beans, chicken broth, green chiles, and corn. This hearty meal pairs perfectly with seasoned green beans.
List the four core components of the dish.
The four essential ingredients are chicken, white beans, broth, and green chiles. These provide the fundamental texture and savory base.
How to prepare easy chicken chili?
Sauté onions and peppers, then brown the chicken with spices. Simmer with broth and chiles before adding beans, corn, and a cornstarch slurry.
Which common mistakes should be avoided?
Avoid skipping the cornstarch slurry, as the chili will remain too thin. Also, be careful not to overcook the chicken before the simmering stage to keep the meat tender.
Is it true that this must be cooked on a stovetop?
Surprisingly, no. A slow cooker is a great alternative for those who prefer a more hands off cooking experience.
Can you use a slow cooker for this recipe?
Combine all ingredients except the slurry and cook on low for 6-8 hours. Stir in the cornstarch mixture at the very end to achieve the desired thickness.
Hearty Chicken Chili