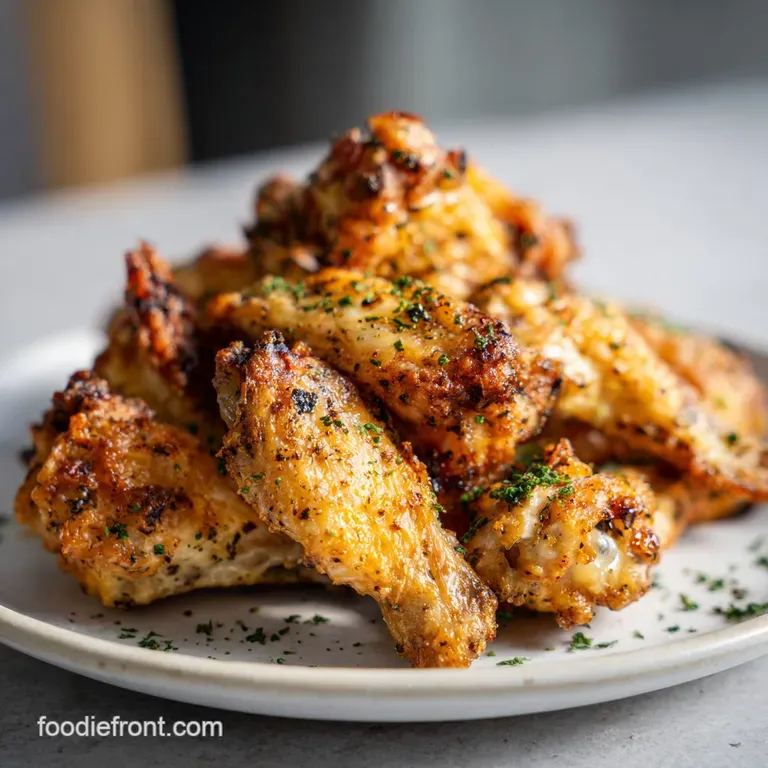
Easy Baked Crispy Chicken Wings
- Time: Active 15 minutes, Passive 45 minutes, Total 1 hour
- Flavor/Texture Hook: Shatter crisp skin with savory, smoky undertones
- Perfect for: Stress free family game nights or easy weeknight dinners
- Why This Method Truly Works
- Essential Stats for Your Batch
- Selecting Your Flavorful Elements
- Minimal Tools for Big Results
- Step-by-Step Cooking Guide
- Fixing Potential Texture Issues
- Flavor Variations and Dietary Swaps
- Keep Leftovers Fresh and Crispy
- Side Dish Pairing Suggestions
- High in Sodium
- Recipe FAQs
- 📝 Recipe Card
I’ll never forget the first time I tried to make wings at home for a Friday movie night. I thought I could just toss them in the oven and they’d come out like the ones from our favorite local pub. Instead, I ended up with a pile of rubbery, sad looking drumettes that were more steamed than roasted.
My kids were polite enough to eat them, but I knew I’d failed the "crunch test." I spent the next three weekends obsessing over how to fix that sogginess without hauling out a deep fryer.
After plenty of trial and error, I found the "magic dust" combo. It’s all about creating a dry environment. When you hear that first crackling sound as you pull the tray out of the oven, you'll know exactly what I mean.
The aroma of smoked paprika and garlic hits you before you even see them, and that first bite actually makes a sound you can hear from across the room. It’s comforting, hearty, and honestly, it’s become the most requested meal in our house.
We’ve all been there, staring at a plate of limp wings and wondering where it went wrong. This method is my gift to every home cook who wants the win without the work. We aren't doing anything fancy or gourmet here.
We’re just using a little bit of kitchen science to make sure your family gets the best dinner possible. So, let’s get into why this works so well and how you can nail it every single time.
Why This Method Truly Works
- Alkaline pH Shift: Baking powder raises the pH level on the skin, which breaks down peptide bonds and allows the skin to brown and crisp much faster than usual.
- Triple Starch Barrier: Mixing all purpose flour, cornstarch, and baking powder creates a micro thin crust that absorbs surface moisture and creates tiny air bubbles for extra crunch.
- Moisture Evaporation: The salt in the rub draws deep seated moisture to the surface where the starch can grab it and cook it off, leaving the skin bone dry and brittle.
- Rendered Fat Synergy: As the natural fat under the chicken skin renders out at high heat, it essentially "oven fries" the starch coating, turning it into a golden, flaky shell.
| Thickness | Internal Temp | Rest Time | Visual Cue |
|---|---|---|---|
| Small (Flats) | 165°F (74°C) | 3 mins | Skin looks taut and mahogany |
| Medium (Drums) | 175°F (79°C) | 5 mins | Juices run clear when pierced |
| Large (Jumbo) | 185°F (85°C) | 5 mins | Meat pulls away from bone |
When you’re cooking wings, especially for a hungry crowd, knowing when to pull them out is the difference between juicy meat and a dry mess. I usually aim for a slightly higher internal temperature for wings around 175°F because the extra collagen in the joints needs that heat to fully break down and become tender.
Don't worry about drying them out; the skin protection keeps the inside velvety.
Essential Stats for Your Batch
| Component | Science Role | Pro Secret |
|---|---|---|
| Baking Powder | pH Modifier | Use aluminum free to avoid a bitter, metallic aftertaste on the finish. |
| Cornstarch | Moisture Absorber | Cornstarch has a higher amylose content than flour, making the crust much more brittle. |
| Sea Salt | Protein Denaturation | Fine salt grains penetrate the skin faster, ensuring seasoned meat all the way to the bone. |
| Smoked Paprika | Color Catalyst | Beyond flavor, the pigments help achieve a deep "fried" look without the actual oil. |
Choosing your ingredients wisely is the first step toward a hearty family meal. While it might seem like a small detail, using the right starch makes a massive impact. I've found that using only flour results in a coating that can get a bit gummy if the wings sit for too long.
By adding cornstarch and baking powder into the mix, we ensure that the "shatter" factor lasts from the first wing to the very last one on the platter.
Selecting Your Flavorful Elements
- 2 lbs chicken wings: Make sure the flats and drumettes are separated for even cooking. Why this? Separated pieces allow air to circulate around every single surface for maximum crispiness.
- Substitute: Chicken drumsticks (increase cook time by 15 mins).
- 1 tbsp baking powder: Ensure it is aluminum free. Why this? This is the chemical engine that creates the bubbly, crispy texture.
- Substitute: Baking soda (use only 1/2 tsp as it is much stronger).
- 1 tbsp all purpose flour: Provides the body for the crust. Why this? It helps the spices and other starches stick to the slick chicken skin.
- Substitute: Rice flour for an even lighter, more delicate crunch.
- 1 tbsp cornstarch: The ultimate crisping agent. Why this? It prevents gluten development, keeping the coating light instead of chewy.
- Substitute: Arrowroot powder or potato starch.
- 1 tsp fine sea salt: Essential for flavor. Why this? Fine grains dissolve quickly into the surface moisture.
- Substitute: Kosher salt (use 1.5 tsp due to larger grain size).
- 1/2 tsp black pepper: Adds a subtle heat.
- Substitute: White pepper for a more floral, sharp bite.
- 1 tsp garlic powder: Classic savory base.
- 1 tsp onion powder: Adds depth and sweetness.
- 1/2 tsp smoked paprika: For color and a hint of backyard grill flavor.
Minimal Tools for Big Results
You don't need a professional kitchen or a fancy deep fryer for these. I'm a big believer in using what you already have. You’ll need a large baking sheet and, most importantly, a wire cooling rack that fits inside it.
This rack is non negotiable because it lifts the chicken up, letting the hot air hit the bottom. Without it, the wings just sit in their own juices and get soggy.
You'll also need a large mixing bowl to toss the wings in the starch mixture and some paper towels. Trust me, the paper towels are your best friend here. If the wings are wet when they go into the bowl, the starch turns into a paste rather than a light coating.
I usually go through quite a few to make sure the chicken is as dry as a bone before I even think about seasoning.
step-by-step Cooking Guide

- Dry the chicken. Pat the 2 lbs of wings thoroughly with paper towels. Note: Surface moisture is the enemy of a good crunch.
- Preheat the oven. Set your oven to 400°F (200°C) and place the wire rack inside the baking sheet.
- Mix the coating. Combine the baking powder, flour, cornstarch, salt, pepper, garlic powder, onion powder, and smoked paprika in a large bowl.
- Dredge the wings. Toss the wings in the starch mixture until they are evenly and lightly coated. until no wet spots remain.
- Arrange for airflow. Place the wings on the wire rack, making sure they aren't touching. Note: Crowding causes the wings to steam rather than roast.
- Start the bake. Place the tray in the center of the oven and bake for 20 minutes.
- Flip for evenness. Carefully flip each wing using tongs. until you see the undersides starting to brown.
- Final crisping. Bake for another 20 to 25 minutes. until the skin is golden brown and bubbling.
- Rest briefly. Let the wings sit on the rack for 5 minutes. Note: This allows the crust to fully set and harden.
- Serve immediately. Toss in your favorite sauce or enjoy them dry while they are still piping hot.
Fixing Potential Texture Issues
Avoiding Metallic Aftertaste
Sometimes people notice a weird, tinny flavor when using baking powder. This usually happens because the brand contains sodium aluminum sulfate. When heated, it reacts in a way that some people find bitter.
Always check the label for "aluminum free." If you’ve already made them and notice this, a quick toss in a tangy Buffalo sauce can help mask the sensation, but the real fix is in the ingredient choice.
Solving Soggy Skin Problems
If your wings come out soft, it’s almost always a moisture or airflow issue. If the oven wasn't fully preheated, the fat doesn't render fast enough to crisp the starch. Similarly, if the wings were touching each other, they trapped steam between them.
Next time, ensure there is at least a half inch of space between every piece of chicken.
| Problem | Root Cause | Solution |
|---|---|---|
| Rubbery Skin | Oven temp too low | Ensure oven is at 400°F (200°C) before tray enters. |
| Patchy Coating | Wings were too wet | Pat chicken dry until the paper towel comes away completely clean. |
| Burnt Spices | Sugar based rub | Avoid adding sugar or honey until the last 5 mins of baking. |
One mistake I once made was trying to use a glass baking dish instead of a metal sheet pan. The glass doesn't conduct heat the same way, and without the wire rack, the bottom of the wings were just sitting in a pool of oil. It was a greasy disaster!
Stick to the metal pan and the rack; it’s the only way to get that 360 degree crunch.
Common Mistakes Checklist
- ✓ Skip the "thaw in the bag" method; pat wings dry individually.
- ✓ Don't skip the cornstarch; it provides a different kind of crunch than flour.
- ✓ Never crowd the pan use two pans if you’re doubling the recipe.
- ✓ Let the oven preheat for at least 15 minutes before starting.
- ✓ Always use a wire rack to prevent "soggy bottom" syndrome.
Flavor Variations and Dietary Swaps
Nashville Hot Heat
If you want to kick things up, you can turn these into a spicy masterpiece. After baking, whisk together some melted butter, cayenne pepper, brown sugar, and a dash of chili powder. Brush this over the hot wings.
The sugar in the sauce will cling to the crispy starch coating, giving you that iconic Nashville glow and a heat that builds with every bite.
Lemon Pepper Dry Rub
For those who prefer a "dry" wing, you can lean into the citrus. Swap the smoked paprika for extra black pepper and add a tablespoon of dried lemon peel to the starch mixture. Once they come out of the oven, hit them with a final dusting of lemon pepper seasoning and some fresh lemon zest.
It’s bright, zingy, and pairs beautifully with a cold drink.
gluten-free Flour Options
You can easily make this recipe gluten-free by swapping the all purpose flour for a high-quality gluten-free blend or simply using more cornstarch. Rice flour is actually a secret weapon here it's even crispier than wheat flour. For another fun alternative, you might like my Spicy Chicken Patties recipe which uses similar breading logic for a different vibe.
Keto Low Carb Swaps
For my low carb friends, you'll want to omit the flour and cornstarch. Use 1.5 tablespoons of baking powder and 1/4 cup of crushed pork rinds or grated parmesan cheese. The parmesan creates a "frico" style crust that is incredibly savory.
It won't have the exact same "shatter" as the starch version, but it’s a very close second that fits perfectly into a keto lifestyle.
Keep Leftovers Fresh and Crispy
Storage: You can keep these wings in an airtight container in the fridge for up to 4 days. However, be aware that the skin will lose its crunch as it absorbs moisture from the meat.
If you want to freeze them, lay them out on a baking sheet first so they don't stick together, then transfer them to a freezer bag for up to 3 months.
Zero Waste Tip: Don't throw away those wing tips if you bought whole wings and cut them yourself! Toss them into a freezer bag. Once you have a couple of pounds of tips, you can boil them with some celery, carrots, and onions to make a rich, gelatinous chicken stock that is miles better than anything you can buy at the store.
Reheating: Please, I beg you, do not use the microwave. It will turn your beautiful wings into rubber. The best way to reheat is in an air fryer at 375°F for about 4-5 minutes.
If you don't have an air fryer, put them back on a wire rack in the oven at 400°F for 8-10 minutes. They will crisp right back up, and you’ll hardly be able to tell they weren't just cooked.
Side Dish Pairing Suggestions
Better Than Pub Combo
When I serve these for a family dinner, I like to keep the sides classic and hearty. A big bowl of creamy coleslaw provides a cold, crunchy contrast to the hot wings. I also usually make a batch of potato wedges.
Since the oven is already at 400°F, you can slide a tray of potatoes in at the same time as the wings. They’ll be done right around the same time, making it a very efficient meal.
Cooling Dipping Contrasts
A good dip is essential. While bottled ranch is fine, a quick homemade blue cheese dressing with chunks of real cheese makes the whole meal feel special. The tanginess of the dressing cuts through the richness of the chicken. If you’re looking for other easy chicken ideas to round out your rotation, these wings go great alongside my Frozen Chicken Tenders recipe if you're feeding a massive crowd of kids and adults.
| Serving Size | Ingredient Adjustments | Pan Size | Cook Time |
|---|---|---|---|
| 2 People | 1 lb wings, 1.5 tsp each starch | Half sheet | 40 mins |
| 4 People | 2 lbs wings, 1 tbsp each starch | Full sheet | 45 mins |
| 8 People | 4 lbs wings, 2 tbsp each starch | Two sheets | 55 mins |
Scaling this up for a party is easy, just remember the golden rule: don't crowd the pan! If you’re making a huge batch, it’s better to use two ovens or cook in shifts than to pile the wings on top of each other. If you like this style of cooking, you should also try my Broiled Chicken Thighs recipe for another fast, crispy skin favorite that the whole family loves.
The Mystery of the "Frying" Oven
One myth I hear all the time is that you need to spray the wings with oil to get them crispy. This is actually a misconception! Chicken wings are naturally very high in fat. As they bake at 400°F, that fat renders out and saturates the starch coating from the inside out.
Adding extra oil can actually make the coating heavy and greasy rather than light and airy. Trust the fat that's already in the wing; it’s more than enough.
Another common myth is that you have to flip the wings every ten minutes. While flipping once is helpful for even browning, flipping too often actually lowers the oven temperature every time you open the door. It also prevents the skin from undisturbed contact with the hot air, which is what builds that crust.
Flip them once, halfway through, and let the oven do the rest of the heavy lifting. Your patience will be rewarded with the best easy baked crispy chicken wings you've ever had.

High in Sodium
928 mg of sodium per serving (40% of daily value)
The American Heart Association recommends limiting sodium intake to no more than 2,300mg per day for most adults.
Tips to Reduce Sodium in Your Chicken Wings:
-
Reduce Salt-25%
The easiest way to cut sodium is to reduce or eliminate the added salt. Try using only 1/4 tsp of fine sea salt instead of 1 tsp. Taste and add more if needed, but be mindful of the sodium content. This will significantly lower the sodium content of the dish.
-
No Salt Added Seasoning Blends-15%
Consider using salt free seasoning blends to replace the garlic powder, onion powder, and smoked paprika. Many blends offer robust flavor without any added sodium. This can help you control the sodium content while still enjoying delicious flavors.
-
Boost Other Flavors-10%
Enhance the flavor of your wings with other spices and herbs like cayenne pepper, dried oregano, or cumin. These additions can provide a more complex and satisfying taste, making you less reliant on salt.
-
Lemon or Lime Juice-5%
A squeeze of fresh lemon or lime juice after cooking can brighten the flavor of the wings and add a zesty tang. Acidity can help balance the taste and reduce the need for sodium.
-
Fresh Herbs
Incorporate fresh herbs like parsley, cilantro, or chives after cooking for a burst of fresh flavor and aroma. They enhance the taste profile naturally without adding sodium. Experiment with different combinations to find your favorite.
Recipe FAQs
What is the secret to the crispiest wings?
Baking powder and high heat. The baking powder raises the skin's pH level, which helps proteins break down, encouraging rapid browning and crisping. Ensure the wings are completely dry before coating for maximum effect.
How to make wings crispy in the oven?
Coat wings evenly in a triple starch mixture and use a wire rack. The coating must contain both flour and cornstarch, and the rack elevates the wings so air circulates underneath, preventing steaming.
What is the best method to bake wings?
Use a wire rack set inside a metal baking sheet at 400°F. This setup mimics the airflow of an air fryer or deep fryer by allowing rendered fat to drip away while hot air dries the crust.
What temperature is best for crispy wings?
Bake initially at 400°F (200°C). This high temperature is crucial for rendering the natural chicken fat quickly, which essentially flash fries the starch coating.
Is it true I must spray the wings with oil to get them crispy?
No, this is a common misconception. Chicken wings have enough natural fat; adding extra oil weighs down the starch coating and results in a greasy texture rather than a crisp one.
Can I use only flour for the coating instead of mixing starches?
No, the cornstarch is essential for texture. Flour alone can become gummy when exposed to moisture, but the cornstarch helps keep the final coating brittle. If you enjoy mastering crispy textures, see how the same principle applies when learning to make Big Mac Casserole recipe.
Should I flip the wings more than once during baking?
No, flip them only once halfway through baking. Flipping too often lowers the oven temperature and disrupts the crust formation process on the underside. Be patient and let the sustained high heat work its magic.
Easy Crispy Baked Chicken Wings

Ingredients:
Instructions:
Nutrition Facts:
| Calories | 382 kcal |
|---|---|
| Protein | 38.5 g |
| Fat | 23.4 g |
| Carbs | 4.2 g |
| Fiber | 0.3 g |
| Sugar | 0.1 g |
| Sodium | 928 mg |
