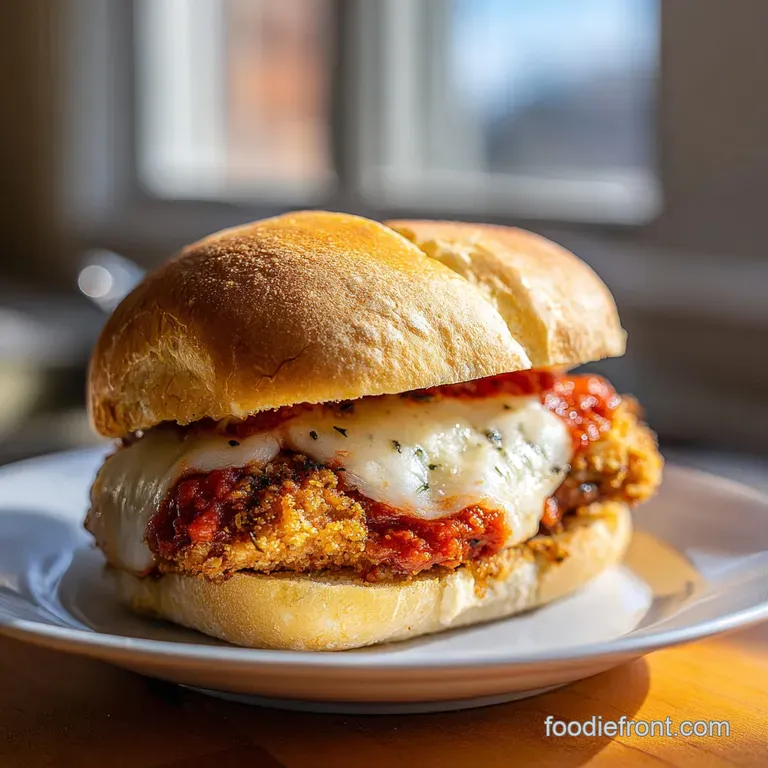
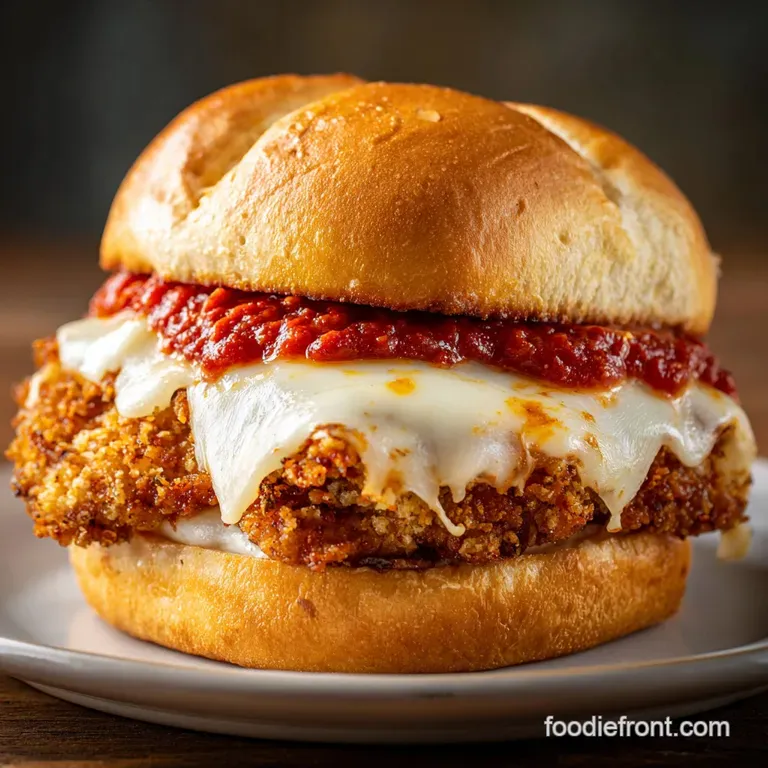
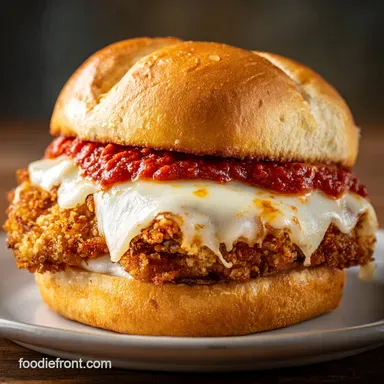
Chicken Parm Sandwich: Shatter Crisp Coating
- Time: Active 20 minutes, Passive 15 minutes, Total 35 minutes
- Flavor/Texture Hook: Shatter crisp Panko coating with velvety melted provolone
- Perfect for: Hearty family dinners or a comforting weekend lunch
The Ultimate Crispy Chicken Parm Sandwich
The first time I tried making a chicken parm sandwich at home, it was a disaster. I remember the sound of the breading just sliding off the meat a sad, wet thud as it hit the plate. The kitchen smelled like burnt oil, the kids were poking at soggy hoagie rolls, and I felt like a failure.
I realized I was overcomplicating the sauce and under preparing the chicken.
Everything changed when I stopped treating it like a fancy Italian dinner and started treating it like a rugged, handheld meal. Now, when I drop that breaded cutlet into the pan, the sizzle is music to my ears.
The aroma of toasted garlic and melting mozzarella fills the house, pulling everyone to the table before I even call them. It is the ultimate "I love you" meal that doesn't require a culinary degree.
We are going for that specific contrast: a crust that gives a distinct shatter when you bite in, followed by a velvety pull of cheese. It’s about being smart with your time and choosing shortcuts that actually improve the final result. Right then, let's get the pans ready.
Essential Recipe Specs
The Physics of the Crunch
Hydration Control: Using Panko instead of traditional crumbs creates air pockets that steam escapes through, preventing the coating from turning into mush. The cheese acts as a moisture barrier between the sauce and the crust, ensuring the breading stays crisp.
| Feature | Fast Method (This Recipe) | Classic Italian Method |
|---|---|---|
| Prep Time | 20 minutes | 1 hour+ |
| Sauce | high-quality jarred/quick simmer | 4 hour slow cook |
| Breading | Panko for maximum shatter | Fine crumbs for softer bite |
Choosing the right thickness for your meat is the difference between a dry sandwich and a juicy one. If you go too thin, the meat overcooks before the crust browns. Too thick, and the middle stays raw while the outside burns. Trust me, 1.5 cm is the "Goldilocks" zone for this dish.
| Thickness | Internal Temp | Rest Time | Visual Cue |
|---|---|---|---|
| 1 cm | 74°C (165°F) | 2 mins | Edges turn opaque quickly |
| 1.5 cm | 74°C (165°F) | 3 mins | Golden crust, clear juices |
| 2 cm | 74°C (165°F) | 5 mins | Deep brown, firm to touch |
Component Analysis
Building a hearty meal for the family means understanding what each part brings to the table. We aren't just tossing things together; we're creating layers of flavor. If you’re in the mood for more heat after trying this, you should definitely check out my Spicy Chicken Patties recipe for a different twist on the chicken sandwich.
| Ingredient | Science Role | Pro Secret |
|---|---|---|
| Panko Breadcrumbs | Surface Area | Don't crush them; the jagged edges create the "shatter" texture. |
| Provolone Cheese | Fat Barrier | Place this under the sauce to protect the crispy chicken coating. |
| Egg Wash | Protein Binder | Whisk until no streaks remain to ensure the flour doesn't clump. |
Minimal Tools Required
You don't need a kitchen full of gadgets for this. A simple heavy bottomed skillet (like a Lodge cast iron) is best because it holds heat steady. You'll also need three shallow bowls for your dredging station.
Honestly, don't even bother with a deep fryer a shallow pan fry gives you more control and a better crust to meat ratio.
For the chicken, a meat mallet or even a heavy rolling pin works wonders for evening out those breasts. If you want to skip the mess, place the chicken in a gallon sized freezer bag before pounding it. This keeps the juices contained and saves you a massive cleanup later.
Perfect Preparation Steps
For the Chicken
- Prep the meat. Slice the 680g (1.5 lbs) of chicken breasts into 4 even cutlets. Note: This ensures they all finish cooking at the exact same time.
- Flatten the cutlets. Use a mallet to pound them to a uniform 1.5 cm thickness.
- Set up stations. Place 60g (1/2 cup) flour in bowl one; whisk 2 large eggs in bowl two; mix 90g (1.5 cups) Panko, 25g (1/4 cup) Parmesan, 1 tsp garlic powder, 1 tsp oregano, 1 tsp salt, and 1/2 tsp pepper in bowl three.
- Dredge the chicken. Coat each piece in flour, dip in egg, and press firmly into the Panko mixture until completely covered and dry to the touch.
For the Assembly
- Fry the cutlets. Heat 3 tbsp of oil in a skillet over medium high heat. Cook for 4 minutes per side until deep golden brown and the internal temp hits 74°C.
- Toast the rolls. Split the 4 hoagie rolls and toast them in the oven or the same skillet until the edges are bronze and firm.
- Layer the cheese. Place one slice of provolone on each hot chicken cutlet. Note: The residual heat starts the melt immediately.
- Add the sauce. Spoon 60ml (1/4 cup) of warmed marinara over the provolone.
- The final melt. Top with 30g (1/4 cup) shredded mozzarella per sandwich and broil for 2 minutes until the cheese is bubbling and slightly charred.
- Garnish and serve. Top with fresh basil leaves and close the sandwich.
Fixing Common Mistakes
Why Your Breading Falls Off
This usually happens because the chicken was too wet before the flour hit it. Always pat your meat dry with paper towels. Another culprit is flipping the chicken too early. Let that crust form!
If you move it before it's ready, the protein bonds haven't set, and the breading will stay stuck to the pan instead of the bird.
Preventing Soggy Buns
The biggest mistake is putting sauce directly on the bread or the bare chicken. Use the "Cheese Shield" method. By putting the provolone slice down first, you create a waterproof layer that keeps the marinara from soaking into your crispy breading. It's a simple trick that changes everything.
| Problem | Root Cause | Solution |
|---|---|---|
| Burnt Breading | Oil too hot | Drop a crumb in; if it turns black instantly, let the oil cool 2 mins. |
| Raw Middle | Chicken too thick | Ensure you pound the meat to exactly 1.5 cm before breading. |
| Bland Flavor | Unseasoned flour | Add a pinch of salt to every bowl in the dredging station, not just the crumbs. |
Common Mistakes Checklist
- ✓ Pat chicken completely dry with paper towels (prevents steaming)
- ✓ Preheat the oil for 3 full minutes before the first cutlet hits the pan
- ✓ Don't overcrowd the skillet work in two batches if necessary
- ✓ Press the Panko into the meat with the palm of your hand to secure it
- ✓ Let the fried chicken rest on a wire rack, not a paper towel, to keep the bottom crisp
Simple Flavor Variations
If your family likes a bit of "zip," try adding a teaspoon of red pepper flakes to the marinara. For a party version of these flavors that's easier to share, try my Buffalo Chicken Dip recipe. It uses many of the same creamy, cheesy elements but in a dip format.
| Original Ingredient | Substitute | Why It Works |
|---|---|---|
| Provolone | Smoked Gouda | Adds a deep, wood fired flavor to the melt. |
| Hoagie Rolls | Brioche Buns | Note: Sweeter and softer, but less structural integrity for heavy sauce. |
| Marinara Sauce | Pesto | Shifts the profile to a fresh, herby, and nutty experience. |
Spicy Arrabbiata Twist
If you want that "Spicy Arrabbiata" version, swap the standard marinara for a jar of Arrabbiata or add a tablespoon of Calabrian chili paste. This cuts through the richness of the cheese and gives the sandwich a sophisticated edge that adults love.
Storing and Reheating
Store any leftovers by separating the chicken from the bread if possible. The chicken will stay good in the fridge for up to 3 days. For the best results, use your air fryer at 190°C (375°F) for about 5 minutes to bring back that shatter-crisp texture.
Microwaving will make the breading rubbery, so avoid it if you can!
You can freeze the breaded (but uncooked) cutlets for up to 2 months. Just place them on a baking sheet to freeze individually before tossing them into a bag. When you're ready for a quick family dinner, you can fry them straight from frozen just add 3 minutes to the cook time per side.
Perfect Side Pairings
Choosing the Right Sides
Because this sandwich is quite heavy and hearty, I usually go for something bright. A simple arugula salad with a lemon vinaigrette cuts through the fat of the cheese perfectly. If you want to lean into the comfort food vibe, garlic parmesan fries are the way to go.
Why use chicken breast for this quick cook?
Chicken breasts are ideal here because they cook through rapidly once pounded thin. Unlike thighs, which have more connective tissue and need longer to render, breasts stay tender during a quick 8 minute fry. This makes them the perfect candidate for a weeknight "fast" version of a classic.
- If you want a lighter bite, use an air fryer at 200°C for 12 minutes, flipping halfway through.
- If you want a massive crunch, double dredge the chicken by going flour egg-flour egg-panko.
- If you want a smokier flavor, use a mix of mozzarella and smoked provolone.
Breading Myths
One common myth is that you need to let the breaded chicken sit in the fridge for an hour to get the crumbs to stick. While that helps for deep frying, for a pan fry, it's actually better to fry immediately.
Letting it sit can actually make the flour underneath the crumbs turn gummy, which leads to the breading slipping off in the pan.
Another misconception is that the oil must be deep. You only need enough to come halfway up the side of the chicken. This allows the top side to "breathe" while the bottom side crisps, ensuring a lighter, less greasy result for your family.

High in Sodium
1120 mg mg of sodium per serving (49% % of daily value)
The American Heart Association recommends limiting sodium intake to about 2,300mg per day for most adults.
Tips to Reduce Sodium in this Chicken Parmesan Sandwich:
-
Low-Sodium Marinara-20%
Switch to a no-salt added or low-sodium marinara sauce. Many commercial sauces are very high in sodium.
-
Reduce Cheese Sodium-15%
Use low-sodium mozzarella cheese and provolone. Also, reduce the amount of Parmesan cheese or omit it altogether; it contributes significantly to the sodium content.
-
Reduce Added Salt-25%
Reduce the amount of sea salt added to the breadcrumb mixture by half, or eliminate it entirely. Taste as you go!
-
Low-Sodium Bread-10%
Consider using low-sodium hoagie rolls, or making your own. Even better, use toasted lettuce wraps.
-
Flavor with Herbs
Enhance flavor with fresh herbs like basil and oregano, and spices like garlic powder and black pepper. These can help you reduce the need for salt.
Recipe FAQs
Is it true that the cheese layer must go under the sauce to prevent a soggy bun?
Yes, this is crucial for texture control. Placing the provolone directly on the hot chicken acts as a fat barrier, effectively shielding the crispy Panko crust from the moisture in the marinara sauce.
How to achieve the "shatter" crisp coating on the chicken cutlet?
Use Panko breadcrumbs and press them firmly onto the meat. The jagged, airy structure of Panko traps less oil and creates superior surface area for crisping compared to fine breadcrumbs.
How long should I pound the chicken cutlets before breading them?
Pound the cutlets to a uniform 1.5 cm thickness. This specific thickness ensures the chicken cooks through evenly in the skillet without drying out while achieving the perfect golden crust.
Why does my breading often fall off during the initial fry?
The chicken surface was likely too wet before being floured. Always pat the meat thoroughly dry with paper towels before beginning the dredging sequence to ensure proper adhesion of the coating.
Can I use pre-cooked chicken in this recipe for faster results?
No, frying is essential for developing the Panko crust texture. Pre-cooked chicken will steam rather than fry, resulting in a soft, disappointing coating.
What is the best way to reheat leftovers while keeping the crust crispy?
Use an air fryer set to 190°C (375°F) for about 5 minutes. This method effectively re-crisps the breading without the residual moisture introduced by microwave heating.
What side dish complements the richness of the chicken parm sandwich best?
A bright, acidic salad cuts through the richness of the cheese and fried crust. A simple arugula salad dressed with lemon vinaigrette provides that necessary acidic contrast to balance the meal.
Crispy Chicken Parm Sandwich
Ingredients:
Instructions:
Nutrition Facts:
| Calories | 682 kcal |
|---|---|
| Protein | 56 g |
| Fat | 19 g |
| Carbs | 67 g |
| Fiber | 4 g |
| Sugar | 6 g |
| Sodium | 1120 mg |
