Cottage Cheese Chocolate Chip Cookies: Soft and Protein-Packed
- Time: Active 15 minutes, Passive 12 minutes, Total 27 minutes
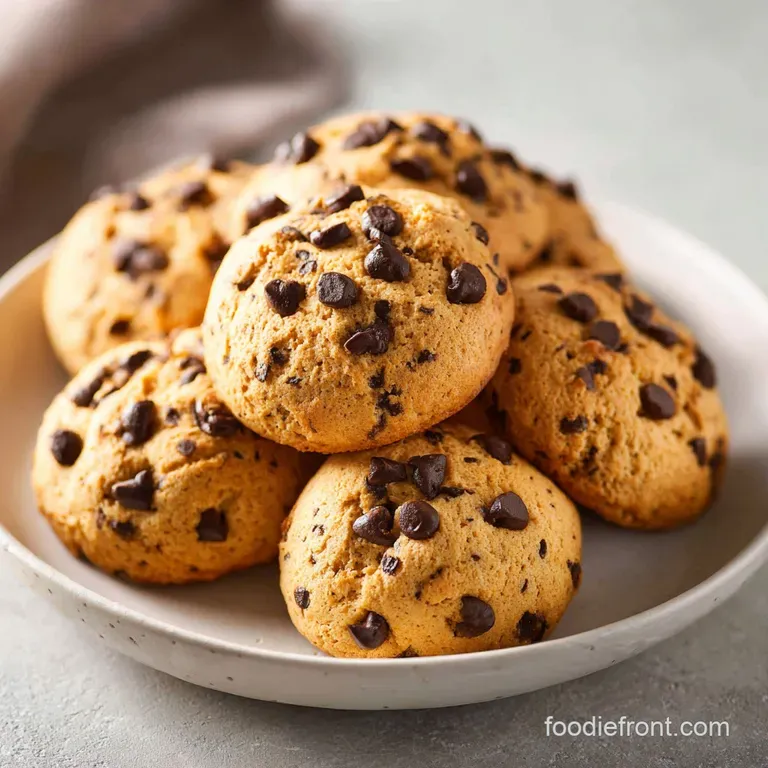
- Flavor/Texture Hook: A pillowy, soft baked center with a rich, dark chocolate shatter
- Perfect for: Post workout snacks, healthy lunchbox treats, and guilt free late night cravings
- Why These Cottage Cheese Chocolate Chip Cookies Succeed
- Essential Specifications for Baking Success
- Breaking Down the Ingredient Performance
- The Right Tools for a Silky Dough
- Step By Step Guide to Cookie Mastery
- Fixing Texture Issues and Baking Blunders
- Flavor Variations to Match Your Sweet Tooth
- Keeping Your Sweet Treats Fresh Longer
- Creative Garnishes and Perfect Serving Ideas
- Recipe FAQs
- 📝 Recipe Card
Why These Cottage Cheese Chocolate Chip Cookies Succeed
The aroma that fills your kitchen when these hit the heat is nothing short of intoxicating. It starts with that warm, toasted oat scent, quickly followed by the deep, sultry notes of melting dark chocolate. I remember the first time I pulled a tray of these cottage cheese chocolate chip cookies out of the oven.
I was honestly prepared for a disaster maybe something rubbery or, heaven forbid, something that tasted like a salad topping. Instead, I found these beautiful, golden mounds that had a soft, almost fudge like interior.
The magic happens in the blender. If you have ever felt hesitant about the texture of cottage cheese, let those worries go right now. Once you whip it into submission with the maple syrup, it becomes this luscious, heavy cream like liquid that provides all the moisture and fat needed to create a tender crumb.
It is the ultimate kitchen hack for anyone who wants a treat that feels indulgent but leaves you feeling fueled rather than sluggish.
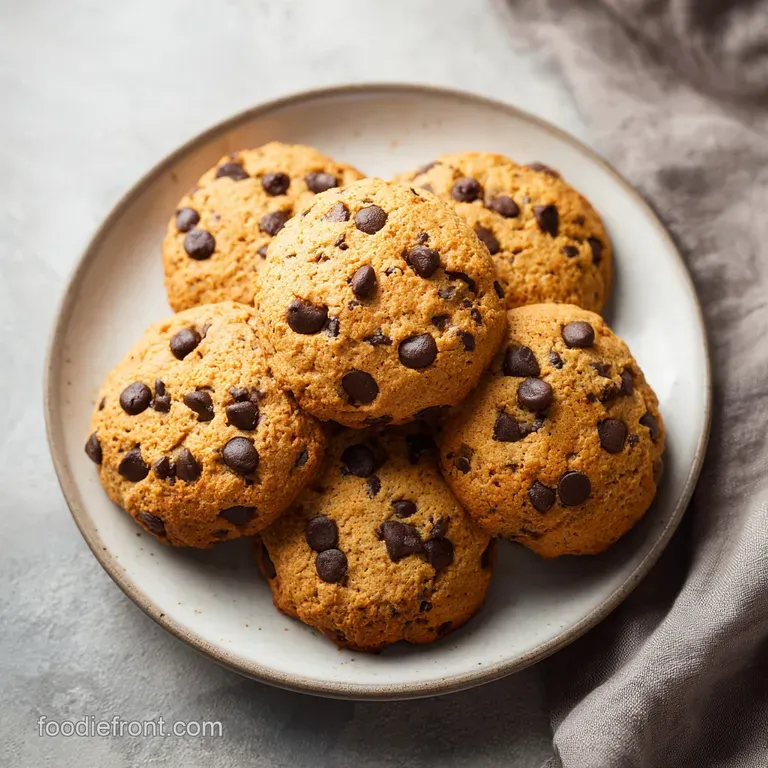
We are going for a specific vibe here: the soft baked, pillowy cookie. Because we are using oat flour and protein powder, these do not behave like a standard butter and sugar dough. They won't spread into thin puddles on your baking sheet.
They hold their shape, giving you a substantial, satisfying bite every single time. It is a total shift in how you think about "healthy" baking, and trust me, once you see that velvety batter, you will be a convert too.
What Actually Makes Them Soft
Moisture Retention: The high water content in the blended cheese creates steam during baking, which lifts the oat flour for a light, airy structure.
Protein Networking: Using both the cheese and vanilla protein powder builds a stable "web" that holds the dark chocolate chips in place without the cookies collapsing.
Sugar Suspension: Maple syrup acts as a liquid humectant, drawing moisture from the air to ensure the cookies never turn into dry, hockey puck like discs.
| Cookie Thickness | Internal Texture | Resting Time | Visual Doneness Cue |
|---|---|---|---|
| 1/2 inch | Fudgy/Dense | 10 minutes | Bottoms are light tan |
| 3/4 inch | Pillowy/Soft | 15 minutes | Edges feel slightly firm |
| 1 inch | Cake like | 20 minutes | Center no longer looks wet |
When you are aiming for that ideal bite, the thickness you choose before sliding the tray into the oven determines everything. Since these don't spread, you are the architect of the final shape. If you like a thicker, more substantial treat, keep those mounds tall.
If you prefer a bit more surface area for the chocolate to melt across, a gentle press with the back of a spoon is your best friend.
Essential Specifications for Baking Success
| Component | Role in the Bake | Pro Secret |
|---|---|---|
| low-fat Cottage Cheese | Fat and Moisture Source | Pulse until every single curd disappears for a "heavy cream" look |
| Oat Flour | Structural Backbone | Grind your own in a dry blender for a finer, more velvety texture |
| Vanilla Protein Powder | Texture and Flavor | Use a whey casein blend to prevent the cookies from becoming too rubbery |
| Dark Chocolate Chips | Flavor and Mouthfeel | Choose 70% cacao for a sophisticated bitterness that cuts the sweetness |
Getting the specs right is the difference between a "good for being healthy" cookie and a genuinely great one. The interaction between the oat flour and the protein powder is particularly interesting. Oat flour is naturally quite thirsty, so it drinks up the liquid from the blended cheese base.
If you let the dough sit for just five minutes before scooping, you will notice it thickens up significantly, making it much easier to handle.
This recipe is also incredibly forgiving when it comes to the "egg" factor. The cottage cheese provides so much stability that the egg really just acts as a final binder and a way to add a bit of richness to the crumb.
If you forget to take your egg out of the fridge to reach room temperature, just soak it in a bowl of warm water for five minutes. It makes a world of difference in how easily it emulsifies with the cold blended cheese.
Breaking Down the Ingredient Performance
Let's talk about the lineup. Every single item here has a job to do. We aren't just tossing things in a bowl; we are building a balanced snack that hits all the right notes of sweet, salty, and satisfying.
- 1 cup (225g) low-fat cottage cheese: The star of the show. It provides the creamy base and a massive protein boost. Why this? It replaces butter/oil while keeping the center incredibly moist and tender.
- 1/2 cup (120ml) pure maple syrup: This is our primary sweetener. Why this? The liquid form integrates perfectly into the blended cheese for a smooth batter.
- 1 large egg: Use a room temperature one if you can. Why this? It provides the structure needed to keep the cookies from being too crumbly.
- 2 tsp pure vanilla extract: Don't skimp here. Why this? It masks the slight tang of the cheese and highlights the chocolate.
- 2 cups (190g) oat flour: You can buy this or make it. Why this? It offers a nutty flavor and a softer texture than whole wheat flour.
- 1/2 cup (50g) vanilla protein powder: This adds flavor and "heft." Why this? It helps the cookies rise and provides a boost of amino acids.
- 1 tsp baking soda: Our leavening agent. Why this? It reacts with the slight acidity in the cheese to create lift.
- 1/2 tsp sea salt: Vital for balance. Why this? It makes the chocolate taste "more like chocolate" and balances the syrup.
- 3/4 cup (130g) dark chocolate chips: The heavy hitter. Why this? Dark chocolate melts beautifully and provides a necessary textural contrast.
If you find yourself missing an ingredient, don't panic. This dough is resilient, though changes will slightly alter that velvety mouthfeel we are aiming for. If you love the chewy, gluten-free vibe of this dough, you might also find a lot of joy in making a batch of Brazilian cheese bread which uses a similar high moisture logic to achieve a unique texture.
| Original Ingredient | Substitute | Why It Works |
|---|---|---|
| Pure Maple Syrup | Honey | Similar viscosity. Note: Honey is sweeter, so maybe use slightly less |
| Oat Flour | Almond Flour | Note: Results in a much denser, greasier cookie with less lift |
| Vanilla Protein Powder | Extra Oat Flour | Maintains structure. Note: Will be less sweet; add a dash more vanilla |
Adding a substitute like almond flour is a common move, but be prepared for a flatter cookie. Oats are fantastic at absorbing liquid, while nut flours tend to release oils. If you go the almond route, you might need to chill the dough for 30 minutes to keep it from spreading too much on the parchment paper.
The Right Tools for a Silky Dough
To get that "how is there cheese in this?" reaction from your friends, the equipment you use matters. You really need a high speed blender or a very good food processor. A standard hand mixer simply won't break down those curds, and you'll end up with little white flecks in your cookies.
While they still taste fine, you lose that "velvety" professional finish.
I also swear by a 1.5 tablespoon cookie scoop. This is a sticky dough much stickier than a traditional butter dough. Trying to use two spoons often ends in a messy, jagged edged cookie. A spring loaded scoop ensures every portion is identical, which means they all finish baking at the exact same 12 minute mark.
No burnt edges on the small ones while the big ones stay raw.
Finally,, don't forget the parchment paper or a silicone baking mat. Because of the maple syrup and the protein powder, these cookies have a tendency to want to bond with your metal baking sheet. A non stick surface is non negotiable here.
It also makes cleanup a breeze, which is a win in my book because I'd rather be eating cookies than scrubbing pans.
step-by-step Guide to Cookie Mastery
- Prep the wet base. Add the cottage cheese, maple syrup, and vanilla extract to a high speed blender. Pulse until the mixture is completely smooth and looks like heavy cream with no visible curds. Note: This is the most important step for a silky texture.
- Combine dry elements. In a large mixing bowl, whisk together the oat flour, vanilla protein powder, baking soda, and sea salt until well combined and free of clumps. Note: Whisking aerates the flour for a lighter cookie.
- Mix the wet and dry. Pour the blended cottage cheese mixture into the dry ingredients. Use a silicone spatula to gently fold the mixture until a sticky dough forms. Note: Stop as soon as the white streaks of flour disappear to avoid a tough texture.
- Introduce the chocolate. Fold in the dark chocolate chips until evenly distributed throughout the dough.
- Scoop the portions. Using a 1.5 tablespoon cookie scoop, drop rounded mounds of dough onto a baking sheet lined with parchment paper.
- Shape for the bake. Press down slightly on each mound. Note: Since these don't spread much, the shape they start with is the shape they will finish with.
- Bake to perfection. Place in a preheated oven at 350°F (180°C) and bake for 12 minutes until the bottoms are golden brown and the tops are set.
- Cool properly. Let the cookies sit on the hot baking sheet for 10 minutes before moving them. Note: This carryover heat finishes the setting process in the center.
Watching the chocolate chips begin to "shatter" and melt into the golden dough is the best part. I usually sprinkle a few extra chips on top right before they go into the oven. It gives them that classic, "impressive" bakery look that everyone loves. If you are a fan of that sweet and salty combo, I often serve these alongside some chocolate covered chips for a fun dessert board.
Fixing Texture Issues and Baking Blunders
Even the best of us hit a snag sometimes. The most common "fail" with this recipe is usually related to the moisture levels. If your cottage cheese was particularly watery, or your protein powder was super absorbent, your dough might feel like it's from a different planet.
Why Your Cookies Are Too Wet
If you pull the tray out and the cookies feel like sponges or "weep" liquid, the cottage cheese likely had too much whey. You can fix this by straining your cottage cheese through a fine mesh sieve for 5 minutes before blending next time.
For the current batch, try baking them for an extra 3 to 4 minutes, but keep a close eye on the bottoms so they don't burn.
Why Your Cookies Are Tough
This usually happens if you get a little too aggressive with the mixing. Once the liquid hits the oat flour, the fibers start to hydrate. If you stir and stir, you develop a more bread like structure rather than a tender cookie crumb.
Think of it like a muffin mix just until it's "just" combined and then walk away.
| Problem | Root Cause | Solution |
|---|---|---|
| Cookies are rubbery | Over mixing or too much protein powder | Fold gently; measure powder by weight, not packed scoops |
| Cookies are flat | Didn't use oat flour or over blended | Ensure you use oat flour; it provides the bulk to hold the shape |
| Chocolate sank to the bottom | Dough was too thin | Let the dough sit for 10 minutes to thicken before scooping |
Common Mistakes Checklist
- ✓ Always pat the egg dry after a warm water soak to avoid adding extra moisture.
- ✓ Ensure your baking soda is fresh; if it's over six months old, the cookies will be dense.
- ✓ Never skip the blending step; a hand mixed dough will be lumpy and unpleasant.
- ✓ Use a kitchen scale for the oat flour (190g) if possible; cups vary wildly by person.
- ✓ Don't overcrowd the tray; even though they don't spread much, they need airflow to set.
- ✓ Let them cool on the pan; moving them too soon can cause them to fall apart.
Flavor Variations to Match Your Sweet Tooth
If you want to move away from the classic vanilla chocolate combo, this dough is a fantastic blank canvas. You can easily pivot to a "Snickerdoodle" vibe by swapping the chocolate chips for a heavy dusting of cinnamon sugar. Or, for a tropical twist, add half a cup of shredded coconut and some white chocolate chips.
If you want a crunchier texture, add 1/4 cup of chopped walnuts. The fats from the nuts provide a nice contrast to the soft dough. If you want a deeper flavor, add 1/2 teaspoon of espresso powder. This doesn't make them taste like coffee; it just makes the chocolate taste richer and more intense.
If you want a "Double Chocolate" version, replace 1/4 cup of oat flour with cocoa powder. You will likely need an extra tablespoon of maple syrup to balance the bitterness of the cocoa.
Creating a Nutty Variation
I love adding a swirl of almond butter directly into the batter. Don't fully mix it in just a few turns of the spatula so you get these concentrated ribbons of nuttiness. It adds a whole new dimension to the "healthy" cookie experience.
Just be sure to use a "drippy" natural nut butter so it integrates smoothly without making the dough too stiff.
| Premium Mix In | Budget Alternative | Flavor Impact |
|---|---|---|
| Macadamia Nuts | Toasted Sunflower Seeds | Adds a buttery crunch for much less money |
| Cacao Nibs | Extra Dark Choc Chips | Provides a "shatter" without the added sugar |
| Freeze Dried Berries | Dried Cranberries | Adds a tart pop; dried fruit is much cheaper |
Adding these extras can change the cook time slightly. Generally, if you are adding "dry" things like nuts or seeds, you are safe. If you add "wet" things like fresh berries, you might find the cookies need an extra minute or two to firm up. I always recommend sticking to the dry variations for your first tray.
Keeping Your Sweet Treats Fresh Longer
Because these cookies are so high in moisture (thanks to our friend the cottage cheese), they don't have the same shelf life as a traditional dry, sugary ginger snap. They are essentially a "fresh" baked good.
If you leave them out on the counter in a bowl, they will stay soft for about 24 hours, but after that, they might start to feel a bit too damp.
- Storage
- Keep them in an airtight container in the fridge for up to 5 days. I actually think they taste better on day two once the flavors have had a chance to really settle and the oat flour has fully hydrated.
- Freezing
- These freeze like a dream! Wrap them individually in plastic wrap and toss them in a freezer bag. They stay good for 3 months.
- Reheating
- To get that "just baked" sizzle back, pop a cold cookie in the microwave for 10-15 seconds. The chocolate will go back to being a velvety puddle, and the dough will soften up beautifully.
Zero Waste Tip: If you have a few cookies that have gone a bit stale or you simply made too many, crumble them over a bowl of Greek yogurt or a smoothie bowl. The texture is similar to "cookie dough" pieces you'd find in ice cream, making it a brilliant high protein topping that prevents any food waste.
Creative Garnishes and Perfect Serving Ideas
Presentation is everything, especially when you are serving something that people might be skeptical of. To make these look truly impressive, we focus on a "Color Balance" strategy. You want to highlight the fact that these are chocolate chip cookies first, and "healthy" cookies second.
- ACCENT 1: The Dark Shatter (Dark Chocolate). Save about 2 tablespoons of your chocolate chips and press them into the tops of the dough mounds right before they go into the oven. This ensures that the first thing people see is a glossy, melted pool of chocolate.
- ACCENT 2: The Bright Spark (Flaky Sea Salt). As soon as the tray comes out of the oven, while the cookies are still "sizzling" slightly, sprinkle a tiny pinch of flaky sea salt (like Maldon) over the top. The white flakes against the dark chocolate look sophisticated and provide a vital flavor pop.
- ACCENT 3: The Golden Dust (Cinnamon). A very light dusting of cinnamon right before serving adds a beautiful matte finish and a warm, inviting aroma that hits before the first bite.
I love serving these on a wooden board with a cold glass of almond milk or even a hot cup of coffee. The contrast between the cold milk and the warm, melty chocolate is a classic for a reason. Because these are so high in protein, I often find myself grabbing two for a quick breakfast on the go.
They aren't just a dessert; they are a versatile part of your weekly meal prep that makes reaching for something sweet feel like a win.
Debunking the Cheese Myth
One of the biggest hurdles with this recipe is the "ew, cottage cheese" factor. Let's be clear: you cannot taste the cheese. Once it's blended and baked with vanilla, maple syrup, and dark chocolate, the "cheese" notes transform entirely into a milky, creamy background flavor.
It functions exactly like sour cream or yogurt does in a cake providing acidity and fat for a better crumb.
Another myth is that protein powder makes cookies dry and chalky. While that can be true, the massive amount of moisture from the blended base in this recipe acts as a safety net. The oat flour and protein powder drink up that liquid, creating a dense, satisfying texture that is the opposite of chalky.
It's all about the ratio, and this one is dialed in for maximum soft baked enjoyment. Trust the process, get that blender going, and get ready for your new favorite snack.

Recipe FAQs
Can you make cookies from cottage cheese?
Yes, cottage cheese serves as the primary moisture and protein source. When blended until completely smooth, it creates a creamy base that replaces traditional fats, resulting in a dense, chewy texture.
Is it true that Snoop Dogg has a famous cottage cheese cookie recipe?
No, this is a common misconception. There is no widely recognized or published cottage cheese cookie recipe attributed to him.
What does adding cottage cheese to baked goods do?
It increases the protein content while providing a moist, soft crumb. Blending the curds is essential; if you enjoy this method of creating healthier dessert profiles, see how we balance flavor and richness in our creamy Biscoff ice cream.
Which cookies are good for diabetics?
Look for recipes that prioritize high fiber flours and reduced sugar. These cookies use oat flour and maple syrup, though you should consult with a medical professional regarding your specific dietary needs.
How to ensure the cookies don't turn out lumpy?
Pulse the cottage cheese, maple syrup, and vanilla extract in a high speed blender until the mixture looks like heavy cream with no visible curds before adding to dry ingredients.
How to achieve the perfect cookie shape?
Drop 1.5 tablespoon scoops onto the parchment paper and press down slightly on each mound. Since these cookies do not spread significantly during the 12-minute bake time, the shape you create before baking is essentially the final shape.
How to store these cookies to maintain texture?
Cool the cookies completely on the baking sheet before moving them to prevent them from falling apart. Once cooled, store them in an airtight container to retain their moisture.
Cottage Cheese Chocolate Chip Cookies

Ingredients:
Instructions:
Nutrition Facts:
| Calories | 126 kcal |
|---|---|
| Protein | 5.8 g |
| Fat | 3.6 g |
| Carbs | 18.2 g |
| Fiber | 1.7 g |
| Sugar | 8.9 g |
| Sodium | 148 mg |
