Cookie Butter Peanut Cookies: Chewy Hybrid
- Time: Active 15 minutes, Passive 10 minutes, Total 25 minutes
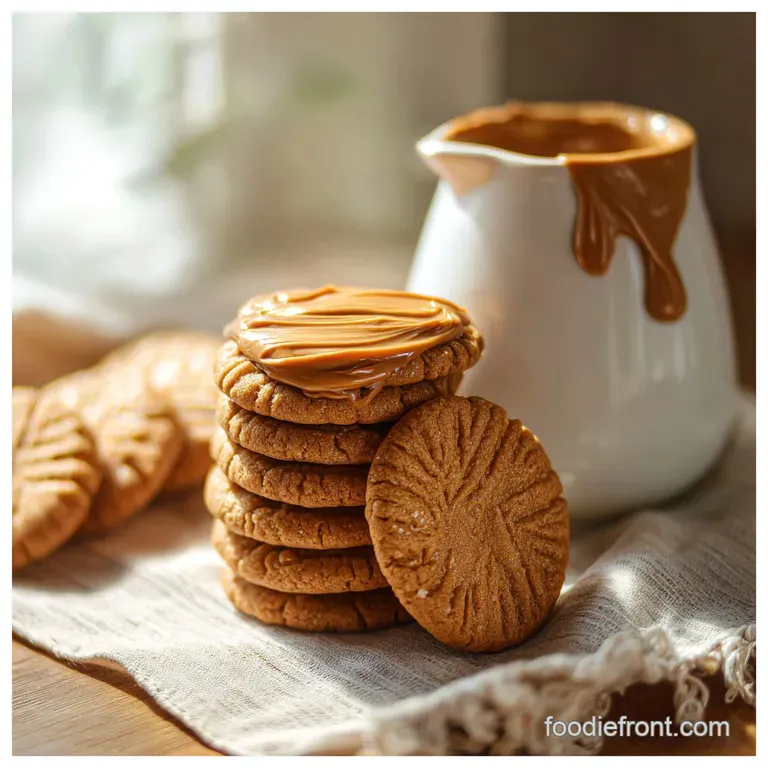
- Flavor/Texture Hook: A velvety, melt away center with crisp, crosshatched edges.
- Perfect for: Impressing guests at a holiday swap or satisfying a late night sweet tooth.
- Creating the Ultimate Cookie Butter Peanut Sensation
- Why This Recipe Works
- Component Analysis
- Gathering Your Premium Baking Essentials
- Essential Equipment for Successful Baking
- Stepping Through the Baking Process
- Pro Tips and Avoiding Common Pitfalls
- Tasty Variations and Smart Substitutions
- Freezing and Reheating Your Treats
- Final Touches for Stunning Presentation
- Recipe FAQs
- 📝 Recipe Card
Creating the Ultimate Cookie Butter Peanut Sensation
Imagine pulling a tray out of the oven where the air smells like caramelized cinnamon and roasted nuts. That first bite isn't just a cookie; it's a texture transition from a sugary, slight shatter on the rim to a center so soft it feels almost like fudge. I remember the first time I tried mixing these two spreads.
Honestly, I thought they might compete too much, but the salt in the peanut butter actually acts as a spotlight for the deep, molasses heavy notes of the cookie butter.
We've all been there where a recipe promises a "bakery style" result but leaves you with a dry, sandy puck. That usually happens when the fat ratios are off. By using both creamy peanut butter and the spiced Speculoos spread, we create a fat profile that stays pliable even after the cookies have cooled.
It’s a total game changer for anyone who finds standard peanut butter cookies a bit too one dimensional.
Trust me on this: the secret isn't just the ingredients, but how you handle the temperature. We aren't just making a snack; we're building a flavor bridge. This recipe is for when you want something that looks like you spent hours in a professional kitchen, but actually comes together in under half an hour.
Let's get into why this specific combo hits every single sensory requirement for a world class dessert.
Why This Recipe Works
Developing this specific cookie butter peanut balance required a bit of kitchen trial and error, but the results speak for themselves.
- The Dual Fat Emulsion: Combining 250g of peanut butter with 250g of cookie butter creates a complex fat structure. Peanut butter provides a high protein to fat ratio for structure, while the cookie butter adds oil based stabilizers that keep the crumb velvety for days.
- Inversion of Sugars: Using 200g of dark brown sugar alongside 100g of granulated white sugar ensures a soft, hygroscopic center. The molasses in the brown sugar draws moisture from the air, preventing that dreaded "stale" texture.
- Leavening Synergy: The 1 tsp of baking soda reacts specifically with the acidic molasses in the brown sugar, creating tiny air pockets. This results in a cookie that is dense but not heavy, providing that classic "lift" without becoming cake like.
- Starch Suspension: The 190g of all purpose flour is just enough to bind the fats without masking the flavors. It allows the starches to gelatinize during the short 10 minute bake, locking in the fats so they don't leak out on the pan.
| Method | Prep Time | Resulting Texture | Best For |
|---|---|---|---|
| Immediate Bake | 15 minutes | Soft, spreading, slightly thinner | Quick cravings |
| 1 Hour Chill | 1 hours 15 mins | Thicker, puffier, deeper spices | Impressive presentation |
| Overnight Chill | 24 hours | Complex, chewy, brown butter vibes | Gourmet flavor |
When you chill the dough, you allow the flour to fully hydrate and the fats to solidify. If you have the patience, the 1 hour chill makes these cookies look like they came from a high end boutique. However, the immediate bake method still produces a result far superior to any store-bought alternative.
Component Analysis
| Ingredient | Science Role | Pro Secret |
|---|---|---|
| Cookie Butter (250g) | Fat & Spice Base | Use the creamy version for a smoother mouthfeel; crunchy adds too much grit. |
| Dark Brown Sugar (200g) | Moisture Retention | Pack it hard into the cup to ensure the correct moisture to sugar ratio. |
| Vanilla Bean Paste (1 tsp) | Flavor Bridge | Paste contains the seeds which provide a "speckled" gourmet look and deeper aroma. |
| Sea Salt (0.5 tsp) | Flavor Enhancer | Fine sea salt dissolves faster than kosher, ensuring no "salty hotspots" in the dough. |
Before we start mixing, make sure your egg and butter are truly at room temperature. If the butter is too cold, it won't aerate during the creaming stage, and if the egg is cold, it will cause the fats in the peanut butter to seize up, leading to a lumpy dough.
Gathering Your Premium Baking Essentials
The beauty of this cookie butter peanut blend is that it relies on pantry staples, but the quality of those staples defines the outcome.
- 1 cup (250g) Cookie Butter (Speculoos spread): This is the soul of the recipe. It brings cinnamon, nutmeg, and cloves to the party. Why this? It provides a unique spiced caramel base that plain butter cannot mimic.
- 1 cup (250g) Creamy Peanut Butter: Avoid the "natural" stir style versions here. You need the stabilized kind (like Jif or Skippy) to ensure the dough doesn't get oily. Why this? Stabilizers prevent the cookie from spreading into a flat puddle.
- 1/2 cup (115g) Unsalted Butter, softened: high-quality European style butter has less water and more fat, which is ideal.
- 1 cup (200g) Dark Brown Sugar, packed: Provides that deep, toffee like undertone.
- 1/2 cup (100g) Granulated White Sugar: This gives the cookies those slightly crispy, caramelized edges.
- 1 large Egg, room temperature: The glue that holds the emulsion together.
- 1 tsp Vanilla Bean Paste: A massive upgrade over standard extract for that floral scent.
- 1.5 cups (190g) All Purpose Flour: The structural foundation.
- 1 tsp Baking Soda: Our primary lifting agent.
- 1/2 tsp Sea Salt: To balance the intense sweetness of the spreads.
If you find yourself missing Speculoos, you can try using a similar spread, but the flavor profile will shift. For more inspiration on nut butter bases, check out my Peanut Butter Cookies recipe which focuses on a more minimalist approach.
Essential Equipment for Successful Baking

You don't need a professional kitchen, but a few tools make this much easier. A stand mixer (like a KitchenAid) is the best way to get the creaming stage right. If you're doing this by hand, prepare for a workout!
- Stand Mixer or Electric Hand Mixer: Essential for incorporating the sugars into the fats until they are pale and fluffy.
- Large Baking Sheets: Use heavy duty pans that won't warp in the heat.
- Parchment Paper or Silicone Mats: Never grease the pan directly; it causes the bottoms to fry and the cookies to spread too much.
- Cookie Scoop (Medium): Consistency is key. A 1.5 tablespoon scoop ensures every cookie bakes at the same rate.
- Wire Cooling Rack: This allows air to circulate under the cookies so the bottoms don't get soggy from trapped steam.
Stepping Through the Baking Process
Phase 1: The High Speed Creaming
Preheat your oven to 350°F (175°C). In your mixer bowl, combine the 115g of softened butter, 200g of dark brown sugar, and 100g of white sugar.
Beat on medium high for at least 3 minutes until the mixture looks pale and has a cloud like texture. Note: This creates the micro bubbles needed for a soft bite.
Phase 2: Incorporating the Bind
Add the 250g of peanut butter and 250g of cookie butter to the creamed mixture. Beat for another minute. Once smooth, crack in the room temperature egg and add the 1 tsp of vanilla bean paste. Mix until the dough looks glossy and fully unified.
Phase 3: The Dry Folding
In a separate small bowl, whisk the 190g of flour, 1 tsp baking soda, and 0.5 tsp sea salt. Turn your mixer to the lowest setting and slowly add the dry ingredients. Mix only until no white streaks of flour remain.
Note: Overmixing at this stage develops gluten, making the cookies tough instead of tender.
Phase 4: Shaping and The "Crosshatch"
Scoop the dough into balls roughly the size of a golf ball. Place them on your lined baking sheets about 2 inches apart. Use a fork to press a "criss cross" pattern into the top of each ball. This isn't just for looks it flattens the dough slightly for an even bake.
Phase 5: The Flash Bake
Slide the trays into the oven. Bake for exactly 10 minutes. At 10 minutes, the edges should be just set and barely golden, while the centers will still look slightly underdone. This is vital! They will finish cooking on the hot pan once removed.
Phase 6: The Setting Period
Let the cookies rest on the baking sheet for 5 minutes until they are firm enough to move. Transfer them to a wire rack. If you try to move them too soon, they will fall apart because the fats are still liquid.
Pro Tips and Avoiding Common Pitfalls
The biggest mistake people make with a cookie butter peanut dough is over baking. Because the dough is dark to begin with (thanks to the Biscoff and brown sugar), it's hard to see when they are "browned."
Why Your Cookies Spread Too Much
If your cookies turned into one giant sheet pan pancake, the culprit is usually the butter temperature. If the butter was melted instead of softened, or if the kitchen was too hot, the structure collapses before it sets.
| Problem | Root Cause | Solution |
|---|---|---|
| Greasy Texture | Too much "natural" oil in peanut butter | Use a stabilized, no stir brand of peanut butter. |
| Dry/Crumbly | Too much flour or over baked | Measure flour by weight (190g) and pull from oven at 10 mins. |
| No Crosshatch Detail | Dough was too soft/warm | Chill the dough balls for 15 minutes before marking with the fork. |
Common Mistakes Checklist
- ✓ Ensure the egg is truly room temperature to prevent the fats from curdling.
- ✓ Use a kitchen scale to measure the flour; volume measurements are often inaccurate.
- ✓ Don't skip the salt; it's the only thing that balances the high sugar content.
- ✓ Check your baking soda's expiration date; if it's old, the cookies will be flat and heavy.
- ✓ Allow the baking sheet to cool completely between batches so the next round of dough doesn't start melting instantly.
Tasty Variations and Smart Substitutions
If you're looking to change things up, this base is incredibly forgiving. If you're in the mood for something even easier, you might enjoy my No Bake Chocolate Cookies recipe, but if you're sticking with the oven, try these tweaks:
| Original Ingredient | Substitute | Why It Works |
|---|---|---|
| Dark Brown Sugar | Light Brown Sugar | Slightly less molasses flavor, but still provides moisture. |
| Vanilla Bean Paste | 1.5 tsp Vanilla Extract | Same aroma, though you lose the visual bean specks. |
| All Purpose Flour | gluten-free 1:1 Blend | Works well due to the high fat content, though they may be more fragile. |
Chef's Tip: For a "Cookie Butter Peanut Butter Blossom" effect, press a chocolate kiss into the center immediately after taking them out of the oven. The residual heat will melt the bottom of the chocolate, locking it in place as it cools.
Cookie Butter Peanut Butter Chocolate Chip Cookies
Simply fold in 1 cup of semi sweet chocolate chips at the very end of Phase 3. The bitterness of the chocolate cuts through the sweet Speculoos beautifully.
Healthy Cookie Butter Peanut Butter Cookies (Vegan Swap)
Replace the egg with a "flax egg" (1 tbsp ground flax + 3 tbsp water, let sit for 5 mins). Use a vegan certified cookie butter and plant based butter sticks. The texture will be slightly chewier but just as rich.
Freezing and Reheating Your Treats
These cookies are fantastic for meal prep because the dough freezes beautifully. I often keep a bag of pre rolled dough balls in the freezer for "emergency" cookie needs.
- Room Temp
- Keep in an airtight container for up to 5 days. Adding a piece of white bread to the container will keep them soft for even longer.
- Fridge
- Not recommended, as the fridge tends to dry out the starches.
- Freezer
- Once baked, they last for 3 months. Wrap them individually in plastic wrap then place in a freezer bag.
Reheating: To get that "just out of the oven" experience, pop a cookie in the microwave for 10-12 seconds. Don't go longer, or the sugar will burn your tongue! Alternatively, use a toaster oven at 300°F for 3 minutes to crisp the edges back up.
Zero Waste Tip: If you have leftover cookie crumbs at the bottom of the container, don't throw them away! Save them to sprinkle over vanilla ice cream or fold them into a cheesecake crust for an extra layer of flavor.
Final Touches for Stunning Presentation
Since we're going for that "easy and impressive" vibe, the garnish is where you really win. You want people to see these and think they came from a bakery window.
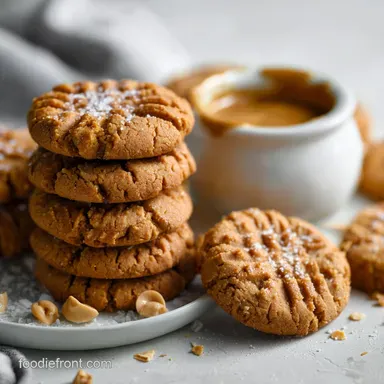
- The Color Accent (Sea Salt): Immediately after baking, sprinkle a few flakes of Maldon sea salt on top. The white flakes against the deep amber cookie look sophisticated and brighten the flavor.
- The Texture Accent (Crushed Biscoff): Take two extra Biscoff biscuits, crush them into fine dust, and sprinkle them over the cookies while the fork marks are still warm.
- The Drizzle: If you're feeling fancy, melt 1/4 cup of white chocolate and use a spoon to create thin, wispy lines across the cooled cookies. The white against the brown creates a beautiful contrast.
If you want a thicker cookie, chill the dough for 2 hours. If you want a crispier cookie, add 2 extra minutes to the bake time.If you want a fudgier center, pull them out when they still look "wet" in the middle.
This cookie butter peanut masterpiece is all about the balance of salty and sweet. It’s the kind of recipe that makes people ask for the link before they’ve even finished their first one. Enjoy every velvety, spiced bite!

Recipe FAQs
What is the difference between cookie butter and peanut butter?
Cookie butter is made from ground, spiced shortbread cookies, while peanut butter is ground roasted peanuts. Cookie butter contains spices like cinnamon and nutmeg and has a higher sugar content than most peanut butters. Peanut butter primarily offers a nutty flavor and higher protein content.
Is Biscoff cookie butter peanut butter?
No, Biscoff cookie butter is not peanut butter. Biscoff is made from caramelized speculoos cookies, which contain wheat flour, sugar, and spices. It lacks the legumes required to be classified as peanut butter.
Can you use cookie butter in place of peanut butter in recipes?
Yes, you can usually substitute them in equal measure, but expect a flavor change. Cookie butter is higher in fat and sugar, which can cause your baked goods to spread more than usual. If you master the fat balance in this recipe, you'll see how adjusting ratios impacts final texture, similar to the science behind perfecting our Chocolate Almond Bark recipe.
What is a peanut butter cookie?
A dense, rich cookie traditionally made with peanut butter, sugar, egg, and flour. Classic versions often feature the signature crisscross fork pattern to help flatten the dough. This pattern ensures even baking across the higher fat content typical of peanut butter doughs.
How do I prevent my cookie butter peanut cookies from spreading too thin?
Chill the dough for at least one hour before baking. The high fat content in both spreads means the dough needs to firm up so the structure can set quickly in the oven. If you enjoy working with high hydration doughs, see how we adapt the principle of fat solidification in our White Chocolate Pretzels recipe.
Can I use crunchy peanut butter instead of creamy?
Yes, but be aware it will alter the final texture. Crunchy peanut butter adds distinct nut pieces throughout the cookie, giving it more chewiness and grit. For a smoother, more velvety center, stick with creamy spreads in this hybrid recipe.
Why do my cookies taste heavy instead of tender?
This usually means you overdeveloped the gluten by overmixing the flour. Mix the dry ingredients in on the lowest speed only until they are just incorporated. If you're struggling with tough gluten development in general, review the creaming stage steps, as proper aeration there is crucial for a tender crumb.
Cookie Butter Peanut Cookies
Ingredients:
Instructions:
Nutrition Facts:
| Calories | 236 kcal |
|---|---|
| Protein | 4.0 g |
| Fat | 13.3 g |
| Carbs | 26.4 g |
| Fiber | 1.1 g |
| Sugar | 19.1 g |
| Sodium | 92 mg |
