My Goto Ultimate 7 Layer Dip: Crowd-Pleasing Snack

- Time: Active 20 minutes, Passive 0 minutes, Total 20 minutes
- Flavor/Texture Hook: Velvety cream meets a crisp, sharp cheddar finish
- Perfect for: Game day gatherings or family potlucks
- How to Make My GoTo Ultimate 7 Layer Dip
- Why This Hearty Dip Works
- Key Metrics for Serving Success
- Analyzing Every Essential Ingredient
- Tools Needed for Fast Prep
- Assembling the Ultimate Platter
- Fixing Common Dip Problems
- Budget Friendly Flavor Swaps
- Storing and Reusing Leftovers
- Plating for a Crowd
- Common Myths About Layered Dips
- Recipe FAQs
- 📝 Recipe Card
How to Make My GoTo Ultimate 7 Layer Dip
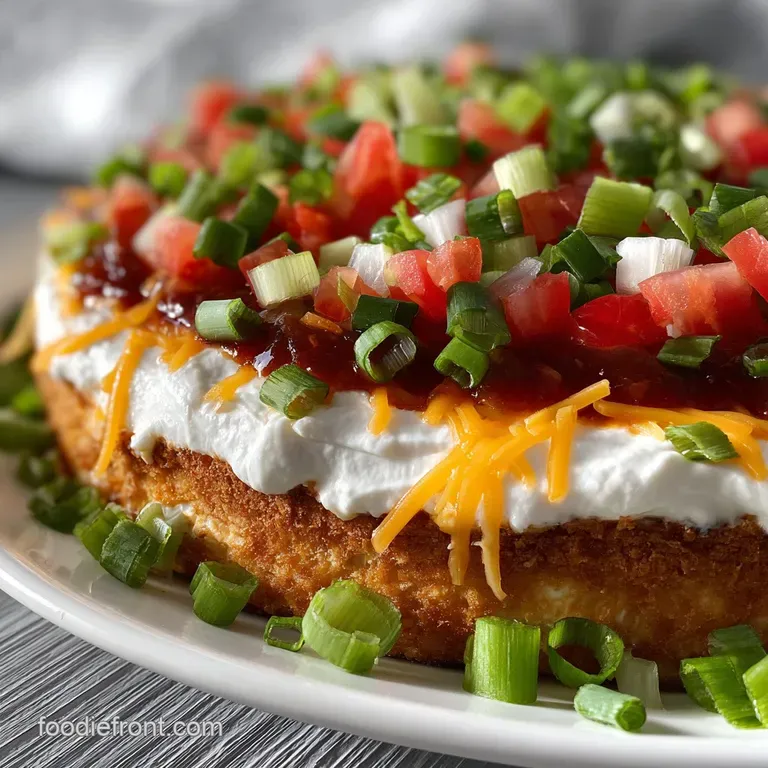
The scent of warm refried beans hitting a bowl, mixed with that earthy punch of ground cumin, always takes me back to my first big family potluck. I remember watching my aunt carefully spread a thick, white layer over the beans, and the way the room suddenly got quiet when the first chip hit the platter.
There is something about the way the colors pop against each other - the deep red of the salsa, the bright green of the scallions - that just makes people hungry. This crowd pleasing, seven layer dip recipe with refried beans will quickly become your ultimate go to.
I've spent years figuring out why some dips turn into a watery soup after twenty minutes while others stay firm and dip worthy. It usually comes down to how you handle the moisture in the salsa and the fat content in the dairy.
We've all been there, staring at a puddle in the middle of the dish, but trust me, we can fix that. You'll get that satisfying "clunk" as your chip hits the bottom of the dish without it breaking into a million pieces.
This recipe isn't about fancy techniques or hard to find ingredients. It is about building a solid foundation and picking the right textures to create a hearty, comforting snack. Whether you are feeding a group of rowdy teenagers or bringing a side to a neighbor's house, this is the one they will ask for every single time.
Let's get into the details of how to make this stand out.
Why This Hearty Dip Works
- Hydrophobic Barrier: The fat heavy cream cheese and sour cream layer acts as a waterproof seal, preventing the watery salsa from soaking into the bean base.
- Starch Stability: Refried beans contain mashed cellular structures that provide a dense, structural anchor for the lighter, more liquid toppings above.
- Acidic Brightness: Lime juice breaks down the heavy fats in the guacamole and sour cream, ensuring the flavor profile remains sharp rather than muddy.
The Physics of the Barrier
By mixing cream cheese with sour cream, you create a high viscosity middle layer. This prevents the moisture from the salsa from migrating downward, keeping each layer distinct and visible through the glass.
| Premium Ingredient | Budget Alternative | Flavor Impact | Savings |
|---|---|---|---|
| Sharp Cheddar Block | Pre shredded Blend | Slightly less melt but faster prep | Save $1.50 |
| Fresh Avocados | Frozen Guac Mix | Less chunky texture | Save $2.00 |
| Cream Cheese | Extra Sour Cream | Softer structure, more tang | Save $1.20 |
Using a budget friendly pre shredded cheese still works well because we aren't melting it. The cellulose coating on bagged cheese actually helps keep the shreds separate and adds a nice little bite.
Key Metrics for Serving Success
Success with this dish comes down to a few specific numbers that I've learned the hard way. First, you want to make sure your cream cheese is at exactly room temperature - usually about 20°C - before you try to whip it.
If it's cold, you'll end up with lumps that look like tiny white pebbles in your dip.
Second, the weight of the bean layer is crucial. We use one full 16 oz can because it needs to be heavy enough to support about two pounds of toppings. If the base is too thin, the whole thing slides around when people start dipping. Finally, keep an eye on the clock.
While it's tempting to make this a day early, the 4 hour mark is your limit before the veggies start to lose their "shatter" and turn soft.
Chef's Tip: Freeze your block of cheddar for 10 minutes before grating. It makes the cheese firmer and prevents it from clumping into a mushy ball as you shred.
Analyzing Every Essential Ingredient
- Refried Beans (16 oz): The anchor of the dish. Why this? Provides the structural weight needed to support multiple heavy layers without collapsing.
- Sour Cream (1 cup): Adds the signature velvety tang. Why this? Cools the palate and balances the spice from the taco seasoning.
- Cream Cheese (4 oz): The stabilizer. Why this? Thickens the sour cream so it doesn't run into the salsa layer.
- Cheddar Cheese (2 cups): For a sharp, salty finish. Why this? Provides a firm top crust that protects the softer ingredients underneath.
| Ingredient | Science Role | Pro Secret |
|---|---|---|
| Lime Juice | pH Balancer | Prevents guacamole from turning brown via oxidation. |
| Taco Seasoning | Flavor Catalyst | Bloom it in the sour cream for 5 minutes before spreading. |
| Strained Salsa | Moisture Control | Removing liquid prevents the dip from becoming a "soup" bowl. |
When you are picking out your ingredients, look for a chunky salsa rather than a smooth one. The larger pieces of tomato and onion provide much needed texture that contrasts with the smooth beans. If you happen to be serving this alongside something spicy, like my Cajun Butter Sauce recipe, the cooling nature of the cream layer will be a welcome relief for your guests.
Tools Needed for Fast Prep
You don't need a professional kitchen for this, but a few specific tools make it much easier. A 9x9 inch glass baking dish is my go to because seeing the layers from the side is half the fun. If you use a ceramic dish, nobody sees the work you put into the stacking!
A sturdy rubber spatula is essential for getting those smooth, even layers. You'll also want a fine mesh strainer. This is the "secret weapon" for the salsa. If you skip straining, you're basically adding half a cup of water to your dip, which is a recipe for disaster.
Finally, a sharp chef's knife for dicing those Roma tomatoes will make sure they stay chunky rather than turning into a pulpy mess.
Assembling the Ultimate Platter
- Prep the beans. Open the refried beans and place them in a small bowl. Mix in the diced green chiles and ground cumin until the spices are evenly distributed.
- Lay the foundation. Spread the bean mixture into the bottom of a 9x9 glass dish. Note: Push the beans all the way to the edges to create a seal.
- Whip the cream. In a separate bowl, beat the softened cream cheese, sour cream, and taco seasoning until completely smooth and velvety.
- Add the lime. Stir 1 tablespoon of lime juice into the cream mixture. Spread this over the beans using a spatula to create a flat surface.
- Layer the green. Spread the chunky guacamole over the cream layer. Smooth it gently so you don't mix the two colors together.
- Strain the salsa. Pour the salsa into a mesh strainer and let it sit for 2 minutes. Spread the solids over the guacamole until it forms an even red blanket.
- Add the cheese. Sprinkle the shredded cheddar cheese evenly over the salsa. Press down lightly with your palms to help it stick.
- Prep the toppings. Dice the Roma tomatoes and thinly slice the green onions. Scatter them over the cheese along with the drained olives.
- The final touch. Sprinkle the fresh cilantro over the top. Drizzle the remaining lime juice over the fresh veggies to keep them bright.
- Chill briefly. Let the dish sit in the fridge for at least 15 minutes until the layers have set and firmed up.
Engineering Structural Integrity
When you spread the bean layer, try to make it slightly higher at the edges than in the middle. This creates a "bowl" shape that holds the more liquid layers like salsa and guacamole in place, preventing them from leaking down the sides of the glass.
Mastering Moisture Control
The most common mistake is using tomatoes with all their seeds and "guts." When dicing your Roma tomatoes, scoop out the watery centers first. This ensures you only get the firm, fleshy parts, which stay crisp and don't leak juice into your cheese.
Fixing Common Dip Problems
Why Your Dip Is Watery
If you see a pool of liquid at the bottom, it's almost always the salsa or the tomatoes. Salsa is mostly water, and as it sits, gravity pulls that liquid down through the layers. Always strain your salsa through a fine mesh sieve for at least two minutes.
It might seem like you are losing flavor, but you are actually concentrating it.
Why the Chips Keep Breaking
If your guests are struggling with broken chips, your bean layer is likely too cold or too packed. Refried beans can become very stiff when refrigerated. If you find the beans are too hard, stir in a teaspoon of water or lime juice before spreading to loosen the texture just enough for a chip to glide through.
| Problem | Root Cause | Solution |
|---|---|---|
| Brown Guacamole | Air Exposure | Seal the guac layer completely with the salsa and cheese layers. |
| Lumpy Cream Layer | Cold Cream Cheese | Microwave cream cheese for 15 seconds before mixing with sour cream. |
| Sliding Layers | Too much liquid | Blot the top of the guacamole with a paper towel before adding salsa. |
- ✓ Always strain your salsa for at least 2 minutes (prevents the "soup" effect).
- ✓ Seed your tomatoes before dicing (keeps the top layer crisp).
- ✓ Soften cream cheese completely to avoid white lumps.
- ✓ Use a glass dish so you can monitor layer separation.
- ✓ Pat the sliced olives dry with a paper towel before adding.
Budget Friendly Flavor Swaps
If you are looking to save a few dollars, you can easily make your own bean base. Instead of buying "taco" style refried beans, buy the cheapest plain store brand. By adding your own cumin and green chiles, you're creating a better flavor profile for about half the cost.
It's a small win, but those add up when you're hosting a big group.
Another smart swap is the cheese. While I love sharp cheddar, a "Mexican blend" from the grocery store is often on sale and works perfectly. The variety of colors in the blend actually adds to the visual appeal of the dish.
If avocados are too expensive, you can double the bean and cream layers to fill the space, or even add a layer of corn salad for extra bulk.
| Original Ingredient | Substitute | Why It Works |
|---|---|---|
| Fresh Cilantro | Chopped Parsley | Provides green color. Note: Lacks the citrus punch but is cheaper and more widely liked. |
| Roma Tomatoes | Canned Diced Tomatoes (Drained) | Similar texture. Note: Ensure they are "fire roasted" for better flavor. |
| Sharp Cheddar | Monterey Jack | Melts better on the tongue and has a milder, buttery finish. |
If you're making a big spread and need more hearty sides, this dip pairs beautifully with my Crispy Roasted Garlic Potatoes recipe. The warm, garlicky crunch of the potatoes is a fantastic contrast to the cold, creamy layers of the dip.
Storing and Reusing Leftovers
This dip is best enjoyed the day it's made, but you can keep it in the fridge for up to 2 days. The main issue with storage is the guacamole; even with lime juice, it will eventually start to oxidize and turn a muddy brown.
If you know you'll have leftovers, try to keep the dish tightly covered with plastic wrap, pressing the wrap directly onto the surface of the dip to keep air out.
Don't even think about freezing this. The sour cream and cream cheese will break and become grainy once thawed, and the tomatoes will turn into mush. If you find yourself with a small amount of leftover dip that isn't enough for a party, stir it into some cooked pasta or use it as a filling for a quick quesadilla.
The beans and cheese melt down into a delicious, messy sauce that is perfect for a Monday lunch.
For zero waste, save the liquid you strained from the salsa! It’s packed with flavor and works great as a base for a marinade or even stirred into a pot of rice for a bit of extra zing.
Plating for a Crowd
When you're ready to serve, don't just put a bag of chips next to the bowl. I like to arrange the chips in a circle around the dish on a large wooden board. This makes it easier for people to grab a chip from any side without reaching over each other.
If you want to get fancy, use a mix of yellow, white, and blue corn chips to match the vibrant colors of the layers.
| Servings | Dish Size | Bean Quantity | Prep Time |
|---|---|---|---|
| 6 People | 8x8 inch | 1/2 can | 15 minutes |
| 12 People | 9x9 inch | 1 can | 20 minutes |
| 24 People | 9x13 inch | 2 cans | 30 minutes |
If you find the top of the dip looks a little flat, add the toppings in "zones" instead of mixing them. Put the olives in the center, surrounded by a ring of tomatoes, then a ring of green onions. It gives the dish a professional, organized look that makes people think you spent hours on it.
Trust me, it’s the little visual details that turn a simple snack into the star of the table.
Common Myths About Layered Dips
One major myth is that you need to cook the beans. You don't! Canned refried beans are already fully cooked. Heating them actually makes them more liquid, which can cause your layers to mix. Keep them at room temperature for the best structural integrity.
Another misconception is that the "7 layers" are set in stone. The "7" is more of a guideline. Some people count the taco seasoning as a layer, while others add things like corn or jalapeños. As long as you have the basic structure beans, cream, and veg you can call it whatever you like.
The goal is the flavor, not the math.
Finally,, people often think you need to buy "taco ready" sour cream. Honestly, don't even bother with that. Regular, full fat sour cream is much better. Those "ready" versions often have added thickeners and artificial flavors that can give the dip a chemical aftertaste.
Stick to the basics, and the results will always be superior.

Recipe FAQs
What is the maximum recommended make-ahead time for this dip?
Four hours is the limit. Assembling up to four hours before serving ensures peak freshness, as ingredients start to lose texture past that point.
How do I prevent the salsa from making the bean layer soggy?
Strain the salsa thoroughly before applying. Pour the salsa into a fine mesh strainer and allow it to sit for at least two minutes to drain excess liquid.
Why are my chips breaking when scooping the bottom layer?
The bean layer is likely too stiff or too cold. Stir a teaspoon of water or lime juice into the refried beans before spreading to loosen the texture slightly.
What is the purpose of mixing cream cheese with the sour cream?
It creates a high viscosity barrier layer. The fat content thickens the sour cream, preventing moisture migration from the salsa layer above into the beans below.
How should I prepare the cream cheese before mixing it?
It must be at room temperature (around 20°C) before whipping. Cold cream cheese will result in lumps that remain visible in the smooth middle layer.
Is it true that you must cook the refried beans before layering?
No, canned refried beans are already cooked. Heating them before assembly is counterproductive as it introduces unnecessary moisture and softens the structural anchor.
How can I keep the guacamole layer looking bright green?
Seal the layer completely and use lime juice. Smooth the guacamole layer carefully, and cover it immediately with the salsa so air exposure is minimized.
Ultimate 7 Layer Dip Recipe

Ingredients:
Instructions:
Nutrition Facts:
| Calories | 268 kcal |
|---|---|
| Protein | 8.7 g |
| Fat | 19.8 g |
| Carbs | 14.2 g |
| Fiber | 4.2 g |
| Sugar | 3.1 g |
| Sodium | 545 mg |
