Pancake Recipe Using Self Rising Flour
- Time: Active 5 minutes, Passive 10 minutes, Total 15 minutes
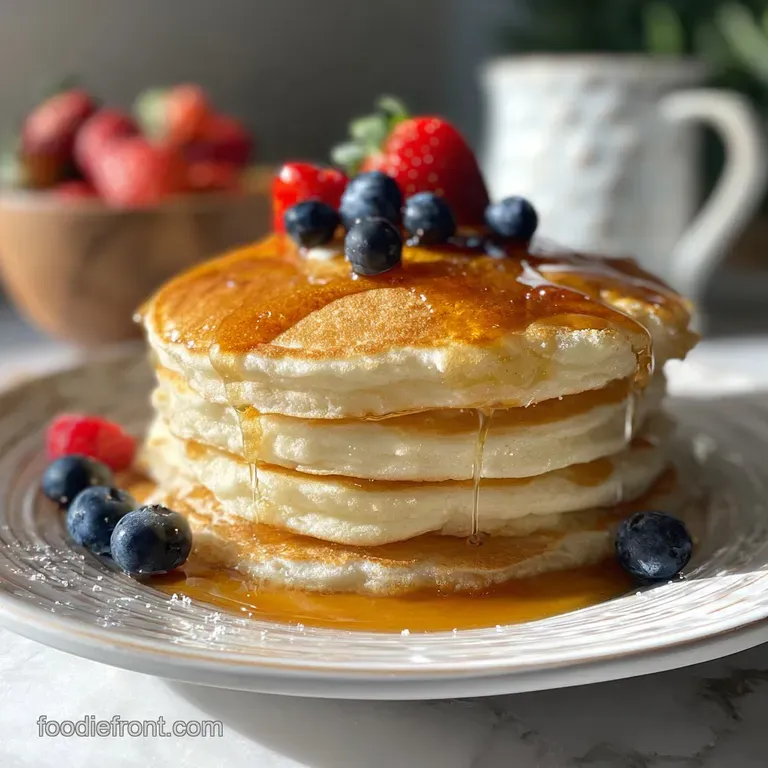
- Flavor/Texture Hook: Golden brown buttery edges with a velvety, cloud like center
- Perfect for: Slow Saturday mornings or quick weeknight "breakfast for dinner"
- Create a Hearty Pancake Recipe Using Self Rising Flour
- Essential Details for Your Quick Morning Breakfast
- Pantry Staples That Create a Fluffy Foundation
- Basic Tools for Stress Free Weekend Griddle Success
- Simple Steps for Achieving That Classic Golden Flip
- Fixing Common Flubs for Reliable Breakfast Results
- Feeding a Crowded Breakfast Table
- Kitchen Tales We Should Stop Believing
- Creative Ways to Customize Your Family Brunch
- Storage Guidelines for Busy Weekday Mornings
- Toppings That Make Your Hearty Meal Complete
- High in Sodium
- Recipe FAQs
- 📝 Recipe Card
Create a Hearty Pancake Recipe Using Self Rising Flour
There is nothing quite like the sound of that first ladle of batter hitting a hot, buttered cast iron skillet. That initial sizzle is the signal that a comforting morning is officially underway. I remember the first time I ran out of boxed mix and panicked, thinking I’d let the kids down.
I grabbed a bag of self rising flour, hoped for the best, and honestly, we never looked back. The result was lighter and more flavorful than anything from a cardboard box.
The kitchen quickly fills with that sweet, warm aroma of vanilla and toasted butter, which is better than any alarm clock. These aren't those flat, rubbery things you get at a diner. We are talking about thick, pillowy discs that soak up syrup just right.
It’s a simple joy that makes a house feel like a home, and I’m so happy to share my little tricks with you today.
Right then, let's get into why this method is a total keeper for your family cookbook. We've stripped away the complicated steps to focus on what actually matters: texture and ease. You don't need a degree in pastry arts to nail this; you just need a few basic ingredients and a bit of love.
Essential Details for Your Quick Morning Breakfast
The Physics of the Lift: Self rising flour contains a built in, even distribution of leavening agents that react instantly to the moisture and heat. This creates a rapid release of carbon dioxide, ensuring the batter puffs up into a velvety crumb rather than staying dense.
- Fat Distribution: Melted butter adds richness and coats the flour proteins, which helps limit gluten development for a tender bite.
- Protein Structure: The single egg acts as the "glue," providing enough structure to hold those air bubbles in place without making the cakes tough.
- Sugar Caramelization: A small amount of sugar helps the edges shatter slightly when they hit the fat, giving you those coveted crispy borders.
| Method | Time | Texture | Best For |
|---|---|---|---|
| Stovetop (Skillet) | 10 minutes | Crispy edges, moist center | Traditional breakfast vibes |
| Oven (Sheet Pan) | 15 minutes | Uniformly soft and cake like | Feeding 8+ people at once |
| Electric Griddle | 8 minutes | Even browning, no hot spots | Making large batches quickly |
If you are looking for a denser, more substantial bite, you might find my Whole Grain Pancake Mix recipe a better fit for your Sunday brunch. But for that classic, airy feel, sticking with the self rising flour is the way to go.
Pantry Staples That Create a Fluffy Foundation
| Component | Science Role | Pro Secret |
|---|---|---|
| Self rising flour | Provides starch and lift | Never sift; just fluff it with a fork before measuring. |
| Whole Milk | Hydrates proteins and adds fat | Use room temperature milk to keep the butter melted. |
| Granulated Sugar | Breaks up gluten bonds | Don't skip it; it’s vital for that golden brown color. |
For the Main Batter
- 2 cups self rising flour (250g): This is your base. Why this? It already has the salt and baking powder mixed in perfectly.
- Substitute: 2 cups AP flour + 3 tsp baking powder + 1/2 tsp salt.
- 1.5 cups whole milk (350ml): Provides the moisture. Why this? Whole milk offers a richer flavor than skim or 2%.
- Substitute: Buttermilk (but add 1/4 tsp baking soda to the flour).
- 1 large egg: The binder.
- Substitute: 1/4 cup applesauce (yields a denser, moister cake).
- 2 tablespoons granulated sugar (25g): For sweetness and browning.
- Substitute: Honey or maple syrup (add to the wet ingredients).
- 3 tablespoons unsalted butter (42g): Melted and slightly cooled.
- Substitute: Neutral oil like canola or melted coconut oil.
- 1 teaspoon vanilla extract: For that "bakery" scent.
- Substitute: Almond extract (use only 1/4 tsp).
Basic Tools for Stress Free Weekend Griddle Success
You don't need a fancy kitchen to make these. A simple bowl and a whisk will get the job done. I prefer using a heavy bottomed skillet like a cast iron pan because it holds heat so well. This ensures that every pancake in the batch cooks at the same speed.
If you have a flat top griddle, even better, as you can flip three or four at a time without them bumping into each other.
Chef's Tip: Use a spring loaded cookie scoop or a measuring cup to pour your batter. It keeps the sizes consistent so they all finish cooking at the same time.
Make sure your spatula is thin and flexible. There is nothing worse than trying to flip a delicate pancake with a thick, clunky turner and accidentally squishing the air out of it. A thin metal or silicone spatula slides right under the sizzle and makes the flip effortless.
Simple Steps for Achieving That Classic Golden Flip
- Whisk the dry ingredients. Combine the 2 cups of self rising flour and 2 tablespoons of sugar in a large bowl. Note: This ensures the sugar is distributed before adding liquids.
- Mix the wet ingredients. In a separate jug, beat the egg, then stir in the 1.5 cups of milk, melted butter, and vanilla.
- Combine gently. Pour the wet mixture into the flour. Stir until just combined. Note: Lumps are your friend here; don't overwork it.
- Rest the batter. Let the bowl sit for 5 minutes. Watch for small bubbles forming on the surface.
- Preheat the pan. Set your burner to medium low. Wait until a drop of water dances on the surface.
- Grease the surface. Lightly coat with butter or oil. Wipe away excess with a paper towel for a matte finish.
- Pour the batter. Use 1/4 cup of batter per pancake. Leave space between each one to allow for expansion.
- Wait for bubbles. Cook for about 2-3 minutes until the edges look set and dry.
- The big flip. Carefully slide the spatula under and turn. Cook for 1-2 more minutes until golden.
- Keep them warm. Place finished cakes on a wire rack in a low oven (200°F). Note: Stacking them directly on a plate causes steam and sogginess.
Fixing Common Flubs for Reliable Breakfast Results

Preventing a Rubber Texture
If your pancakes feel tough or chewy, you likely over mixed the batter. When you stir flour and liquid, gluten starts to develop. For bread, that's great. For pancakes, it’s a disaster. Stop stirring as soon as the white streaks of flour disappear.
Those lumps will actually steam and disappear during the cooking process, leaving you with a much lighter result.
Managing a Raw Center
This usually happens when the heat is too high. The outside browns (or burns) before the middle has a chance to set. If you see smoke or the butter is turning black, turn it down! You want a steady, gentle heat.
It's much better to cook them slightly longer on a lower setting than to rush the process and end up with a doughy middle.
| Problem | Root Cause | Solution |
|---|---|---|
| Flat Pancakes | Old flour or over mixing | Check flour expiration; stir less. |
| Uneven Browning | Pan too hot or not enough fat | Lower heat; use a thin layer of oil. |
| Tough Edges | Too much butter in the pan | Wipe the pan after greasing for a cleaner fry. |
The chemistry here is quite similar to what happens in a Pound Cake Mix recipe, where the balance of fat and air determines the final crumb.
Common Mistakes Checklist:
- ✓ Stop stirring while you still see some small lumps in the batter.
- ✓ Let the batter rest for 5 minutes to allow the flour to fully hydrate.
- ✓ Test the pan heat with a tiny drop of batter before committing to a full pancake.
- ✓ Only flip once; flipping back and forth makes the interior heavy.
- ✓ Avoid pressing down on the pancake with your spatula after the flip.
Feeding a Crowded Breakfast Table
When you need to scale this recipe up for a family reunion or a big holiday breakfast, it’s fairly straightforward. To double the recipe (8 servings), you can use 4 cups of flour and 3 cups of milk. However, don't just double the eggs blindly; 2 large eggs are perfect for a double batch.
If you are going up to a triple batch, keep the vanilla and sugar at about 2.5 times the original amount to avoid it becoming overly sweet or floral.
| Servings | Flour | Milk | Butter | Pan Size |
|---|---|---|---|---|
| 2 People | 1 cup | 3/4 cup | 1.5 tbsp | 10 inch skillet |
| 4 People | 2 cups | 1.5 cups | 3 tbsp | 12 inch skillet |
| 8 People | 4 cups | 3 cups | 6 tbsp | Large Griddle |
For larger groups, I highly recommend the oven method. Pour the entire batter into a greased sheet pan and bake at 425°F for about 15 minutes. It saves you from standing over the stove for an hour while everyone else is eating.
Kitchen Tales We Should Stop Believing
A big myth is that you need buttermilk to get a high rise. While buttermilk is lovely, self rising flour has plenty of lifting power on its own. The acidity in buttermilk helps activate baking soda, but since self rising flour uses baking powder (which has its own acid built in), regular whole milk works perfectly fine for a massive rise.
Another misconception is that the first pancake "has" to be bad. That’s usually just because the pan wasn't preheated correctly! If you give your skillet a full 3-5 minutes to get to a steady medium low heat and grease it properly, that first one will be just as beautiful as the last.
Creative Ways to Customize Your Family Brunch
- Fruit Burst: Gently fold in 1/2 cup of fresh blueberries or diced strawberries after the batter has rested.
- Chocolate Chip: Sprinkle mini chocolate chips onto the wet side of the pancake right after pouring it into the pan. This prevents them from burning on the bottom.
- Lemon Poppy Seed: Add the zest of one lemon and 1 tablespoon of poppy seeds to the dry mix for a bright, zesty twist.
- dairy-free: Use unsweetened almond milk and melted coconut oil. The texture will be slightly crispier but still very light.
Storage Guidelines for Busy Weekday Mornings
If you have leftovers, don't you dare throw them out. These stay fresh in the fridge for up to 3 days. Just place them in a sealed container with a piece of parchment paper between each layer to keep them from sticking.
For long term storage, they freeze beautifully for up to 2 months. I like to "flash freeze" them on a baking sheet for an hour before tossing them into a freezer bag. When you're ready to eat, skip the microwave it makes them rubbery. Instead, pop them in the toaster on a medium setting.
They come out hot and slightly crisp on the outside, just like they were fresh off the griddle.
Toppings That Make Your Hearty Meal Complete
While maple syrup is the gold standard, don't be afraid to get creative. A dollop of whipped cream or even some leftover Cool Whip Pudding recipe can turn these into a decadent dessert style breakfast. For something more savory, try a smear of peanut butter and sliced bananas.
If you are serving these for a special occasion, try making a quick berry compote by simmering frozen berries with a splash of orange juice. It cuts through the richness of the butter and makes the whole meal feel a bit more "fancy" without much extra effort.
Trust me, your family will be asking for these every single weekend!

High in Sodium
808 mg mg of sodium per serving (35% % of daily value)
The American Heart Association recommends limiting sodium intake to no more than 2,300mg per day for most adults.
Tips to Reduce Sodium in Your Pancakes
-
Use All-Purpose Flour-25%
Replace the self rising flour with all-purpose flour. Self rising flour contains added salt. This simple swap can significantly lower the sodium content. You will also need to add baking powder (approximately 1 tsp per cup of flour).
-
Low Sodium Milk-10%
Consider using a low-sodium milk alternative, or regular milk that is labeled as low in sodium. While milk naturally contains sodium, the levels can vary. Check the nutrition label and choose the option with the lowest amount.
-
Unsalted Butter Only
You are already using unsalted butter, which is great! Ensure you are always using truly unsalted butter, as some may have a small amount of sodium. Avoid salted butter at all costs.
-
Enhance with Spices
Use other spices to enhance the flavor! Consider adding a dash of cinnamon, nutmeg, or cardamom to boost the flavor without adding sodium. These additions can complement the vanilla extract beautifully.
Recipe FAQs
Can I make pancakes out of self rising flour?
Yes, absolutely. Self rising flour is formulated with leavening agents already mixed in, making it ideal for quick, fluffy pancakes.
Can I use self raising flour instead of all-purpose flour for crepes?
No, I advise against it for traditional crepes. Self raising flour contains baking powder, which will cause the thin crepe batter to puff up too much, resulting in a cake like texture rather than a delicate wrap.
Can I use self rising flour instead of baking powder for pancakes?
Yes, it replaces the need for additional baking powder. Self rising flour contains baking powder and salt; simply substitute the all-purpose flour with the self rising variety in your recipe measurements.
Do I need baking powder for pancakes if I use self raising flour?
No, you do not need extra baking powder. Since self raising flour already contains the leavening agent, adding more powder will cause the pancakes to rise too quickly and collapse, leading to a dense texture.
What is the most crucial step when mixing self rising flour batter?
Stir the batter only until just combined; lumps are desirable. Overmixing develops gluten in the self rising flour, resulting in tough, chewy pancakes instead of light and tender ones.
How hot should the skillet be when cooking pancakes made with self rising flour?
Preheat the skillet to medium low heat and wait until a water drop dances. If the heat is too high, the outside will burn before the internal lift from the self rising flour has time to set the center properly.
If I make a large batch of self rising flour pancakes, can I reheat them in the toaster?
Yes, toasting is the best method for reheating. Avoid the microwave, which introduces too much moisture and makes them rubbery. Toasting restores a desirable slight crispness to the edges, similar to the finishing texture we achieve when making our No Bake Chocolate Cookies recipe.
Self Rising Flour Pancakes
Ingredients:
Instructions:
Nutrition Facts:
| Calories | 391 kcal |
|---|---|
| Protein | 10.7 g |
| Fat | 13.2 g |
| Carbs | 56.4 g |
| Fiber | 1.9 g |
| Sugar | 10.6 g |
| Sodium | 808 mg |
