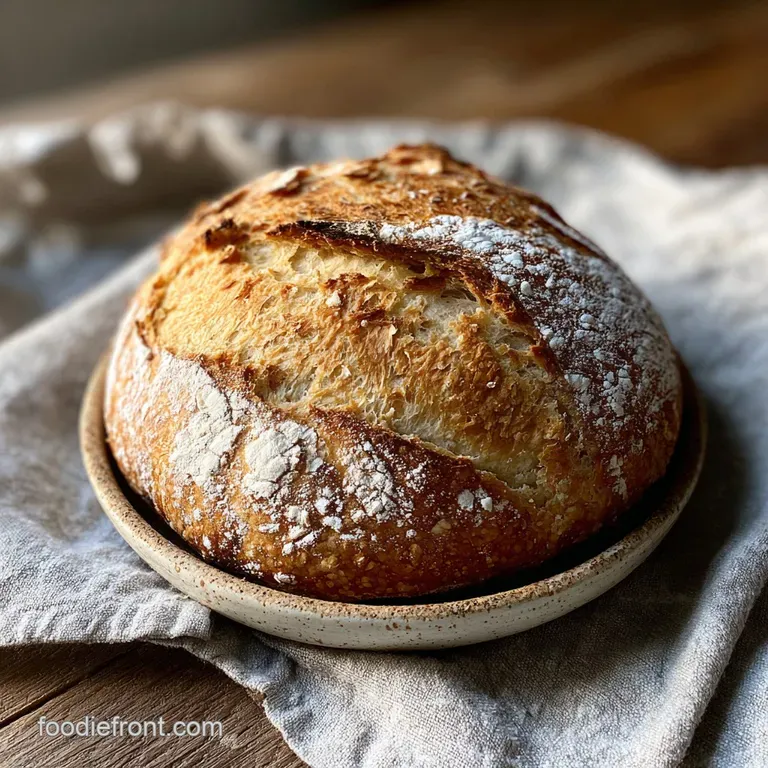
Potato Flake Sourdough Starter
- Time: Active 10 minutes, Passive 120 hours, Total 120 hours 10 mins
- Flavor/Texture Hook: Sweet, yeasty aroma with a silky soft bread texture
- Perfect for: Busy families wanting sourdough flavor without the high maintenance schedule
- Start Your Potato Flake Sourdough Starter Today
- Fermentation Science and Key Techniques
- Essential Ingredients for Sweet Success
- Best Equipment for Fermenting Starters
- Step-by-Step Fermentation and Care
- Solving Common Starter Growth Problems
- Easy Dietary and Ingredient Swaps
- Storage Tips and Freezing Methods
- Serving and Presentation Ideas
- Common Myths Debunked
- Potato Flake Sourdough Starter FAQs
- 📝 Recipe Card
Ever walked into a kitchen and been hit by that cozy, yeasty scent that feels like a warm hug? That’s what this starter brings to your home. I remember my first attempt at a traditional flour starter; I felt like I was failing a chemistry test every morning, weighing out grams of flour and throwing away "discard" like it was my second job.
It was exhausting, and honestly, our family schedule just didn't have room for a pet that lived in a jar.
Then my neighbor handed me a jar of what looked like murky water with some sediment at the bottom. She called it a "sweet starter." I was skeptical until I tasted the bread. It was soft, slightly sweet, and didn't have that mouth puckering sourness that my kids usually pushed away.
It was a total game changer for our Sunday dinners.
We're going to use instant potato flakes yes, the kind from the box to feed the yeast. It sounds unconventional, but it creates a culture that is incredibly hardy. If you forget to feed it for a week, it doesn't throw a tantrum. It just waits for you.
We’re going to get that bubbly, active life going so you can bake bread that makes the whole neighborhood jealous.
Start Your Potato Flake Sourdough Starter Today
The magic of this method lies in how we manage the yeast population. Instead of a thick paste, we are creating a liquid environment where the yeast can move freely and access nutrients quickly.
The Science of Why it WorksStarch Bioavailability: Instant potato flakes provide pre gelatinized starches that the yeast enzymes can break down into simple sugars almost instantly.
Osmotic Regulation: The high concentration of granulated sugar acts as a controlled fuel source, favoring specific "sweet loving" yeast strains that produce carbon dioxide without excessive lactic acid.
Chef's Tip: Use filtered water or let your tap water sit out for 2 hours before starting. Chlorine is meant to kill bacteria, but it can also stunt your yeast’s growth during the sensitive first 24 hours.
Fermentation Science and Key Techniques
When you look at the jar, you’ll see bubbles dancing to the surface. That’s your active dry yeast coming to life and off gassing. Unlike flour based starters, the liquid consistency here means the bubbles don't get trapped as easily, so don't expect a massive "rise" in the jar itself.
Look for the "fizz" instead.
| Component | Science Role | Pro Secret |
|---|---|---|
| Instant Potato Flakes | Complex Carbohydrate | Use plain flakes; flavored versions (like buttery garlic) contain oils that go rancid. |
| Granulated Sugar | Primary Energy Source | If your kitchen is cold, dissolve the sugar in the warm water first to prevent "shocking" the yeast. |
| Active Dry Yeast | Biological Leavening | Check the expiration date; if it doesn't foam in the warm water within 5 mins, start over. |
You might notice a clear or slightly dark liquid forming on top after a few days. Don't panic! This is just "hooch," a natural byproduct of fermentation. It’s the starter’s way of saying it’s hungry. You can stir it back in for a sharper flavor or pour it off if you want a milder loaf, similar to how we manage the moisture in my Creamy Mashed Potatoes recipe for that velvet finish.
Essential Ingredients for Sweet Success
To get this culture thriving, you only need four things. Accuracy matters here because we are setting the "baseline" for your future loaves. If the balance of sugar to flakes is off, the yeast might grow too fast and exhaust its food supply before you're ready to bake.
- 1 packet (7g) active dry yeast: This is your "seed" colony that starts the whole process.
- 0.75 cup (150g) granulated white sugar: Provides the high octane fuel for the yeast.
- 3 tbsp (15g) instant potato flakes: Acts as the stabilizer and nutrient dense base. Why this? It provides minerals and starches that sugar alone lacks.
- 1 cup (240ml) warm water: The medium for all biological activity.
For the Initial "Birth"
When you first combine these, the mixture will look thin and unappealing. Trust the process. The 120 hour wait time is non negotiable because we need the yeast to acclimate to the potato environment. This "lag phase" is where the most flavorful compounds are created.
For the Weekly Feeding
Once your starter is established, you'll feed it the same ratio (minus the yeast packet). The existing colony in your jar will take over. If you find yourself with extra potato flakes, they are actually a secret weapon for creating the Crispy Roasted Garlic Potatoes recipe by acting as a starchy coating.
Best Equipment for Fermenting Starters
You don't need fancy gear, but the material of your container is vital. Since the fermentation process is acidic, you want to avoid reactive metals like aluminum or copper, which can leach a metallic taste into your bread.
- Glass Jar (1 quart or larger): Allows you to see the activity levels and is easy to sanitize.
- Wooden or Plastic Spoon: Better for stirring than metal to keep the environment stable.
- Breathable Cover: A coffee filter or a clean tea towel secured with a rubber band works best.
- Thermometer: To ensure your water is between 105°F and 110°F (40°C - 43°C).
Chef's Tip: If you use a jar with a lid, don't screw it on tight! The gas buildup can actually shatter the glass. Just rest the lid on top or use the cloth method mentioned above.
step-by-step Fermentation and Care
Follow these steps exactly for your first batch. The timing is designed to allow the yeast to reach peak activity right when you're ready to bake.
Phase 1: The Initial Wake Up Call
- Warm the water. Ensure the 1 cup (240ml) of water is warm to the touch but not hot.
- Dissolve the yeast. Pour the 7g packet into the water and let it sit for 5 minutes until it looks foamy and creamy.
- Combine solids. In your glass jar, whisk together the 150g sugar and 15g potato flakes.
- Merge the mixtures. Pour the yeast water into the jar and stir with a wooden spoon until no dry clumps remain.
Phase 2: The Five Day Ferment
- Cover loosely. Place your cloth or coffee filter over the top and secure it.
- Find a "Goldilocks" spot. Keep the jar at room temperature (around 70°F/21°C) until you see consistent bubbling. Note: Avoid direct sunlight, which can overheat the jar.
- Wait 5 days. Do not stir it during this time. You’ll see the flakes settle and then rise as they catch air.
- Refrigerate. After the fifth day, your starter is "born." Put a lid on it and move it to the fridge.
Phase 3: The Maintenance Rhythm
- Feed and bleed. When you want to bake, take it out, feed it the sugar/flake/water mixture, and let it sit out for 8 hours until it is active and fizzy.
- Keep the reserve. Always leave at least 1 cup of starter in the jar to keep the colony going for next time.
Solving Common Starter Growth Problems
Most issues with a potato flake sourdough starter come down to temperature or contamination. Because this is a liquid starter, it responds very quickly to its environment. If your house is chilly, the yeast will go into a "hibernation" mode.
Why Your Starter Isn't Bubbling
If it has been 48 hours and you see zero movement, your water might have been too hot, killing the yeast, or too cold, keeping it dormant. Move the jar to a warmer spot, like on top of the refrigerator, to give it a gentle nudge.
| Problem | Root Cause | Solution |
|---|---|---|
| Separation | Natural settling of solids | Give it a vigorous stir with a clean wooden spoon. |
| Pink or Orange Tint | Harmful bacterial growth | This is unsafe. Toss the batch, sanitize the jar, and start over. |
| Acetone Smell | Starving yeast | The yeast is eating its own waste. Feed it immediately with fresh sugar and flakes. |
3 Signs of a "Dead" Starter
- Fuzzy Mold: If you see white, black, or green fuzz on the surface or the rim, the starter is compromised.
- Zero Bubbles After Feeding: If you feed it and it stays completely still for 12 hours at room temperature, the yeast colony has likely collapsed.
- Putrid Odor: A healthy starter smells like beer or sourdough; a dead one smells like rotting trash.
Easy Dietary and Ingredient Swaps
While the standard recipe is reliable, you can tweak the inputs depending on what’s in your pantry. Just keep in mind that the yeast is "trained" on certain sugars, so transitions should be gradual.
| Original Ingredient | Substitute | Why It Works |
|---|---|---|
| Granulated Sugar (150g) | Honey (150g) | High natural sugar content. Note: Bread will brown faster and may have a floral aroma. |
| Potato Flakes (15g) | Finely Grated Raw Potato (20g) | Provides similar starch. Note: Must be strained out before baking to keep bread texture smooth. |
| Active Dry Yeast | Fresh Yeast (21g) | Same biological function. Note: Requires a shorter proofing time for the initial start. |
If you are looking for a completely different flavor profile for your family meals, you might enjoy the hearty nature of my Pinto Beans Slow recipe, which uses similar "set it and forget it" logic. Just remember that switching to a sugar substitute like Stevia will NOT work here; the yeast cannot ferment it, and your starter will die.
Storage Tips and Freezing Methods
Keeping your starter alive is much easier than a traditional sourdough. Since it lives in the fridge, it only needs attention once a week or whenever you want to bake.
- Fridge Storage: Keep it in the back of the fridge where the temperature is most stable. It can last 7 to 10 days between feedings without any trouble.
- Freezing: You can freeze this starter! Pour 1 cup into a freezer safe bag. It will stay viable for up to 3 months. To revive it, thaw in the fridge, then let it come to room temperature and feed it twice before baking.
- Zero Waste Tip: If you have too much starter (the "discard"), don't toss it. Add it to pancake batter or waffle mix. It won't provide a huge lift, but the flavor it adds is incredible tangy, sweet, and complex.
Serving and Presentation Ideas
When you finally bake your bread using this culture, the crust will be softer and the crumb tighter than a "wild" sourdough. This makes it the perfect vessel for sandwiches or French toast.
The Visibility Factor
I love using clear Weck jars for my starter. Not only do they look beautiful on the counter, but they make it easy to see exactly when the mixture is active. Label the jar with the date of the last feeding using a dry erase marker so you never have to guess.
Creative Breads
Don't stop at plain loaves. This starter loves additions. Fold in some cinnamon and raisins for a breakfast treat, or add dried herbs to create a savory loaf that pairs beautifully with Beef Breakfast Sausage recipe. The sweetness of the starter acts as a bridge for both savory and sweet flavor profiles.
- Decision Shortcut
- If you want X, do Y
- For a more sour taste
- Let the fed starter sit at room temperature for a full 12 hours before refrigerating.
- For a faster rise
- Use 1.5 cups of starter in your bread recipe instead of 1 cup (adjusting flour accordingly).
- For a thinner crust
- Brush the top of your loaf with melted butter immediately after it comes out of the oven.
Common Myths Debunked
Myth: You must use "Potato Water" to keep it alive. While old school recipes often called for the water left over from boiling potatoes, instant flakes are much more consistent.
They provide the same starch without the risk of adding too much salt or unpredictable enzymes from different potato varieties.
Myth: Metal spoons will kill the starter instantly. A quick stir with a stainless steel spoon won't hurt anything. The "no metal" rule comes from old times when spoons were made of reactive metals like tin or copper.
Modern stainless steel is perfectly fine for a quick mix, though wood is still the traditional favorite for a reason it feels more "homey."
Myth: This starter is the same as a "Friendship Bread" starter. Not quite. Friendship bread (like Amish Friendship Bread) usually involves milk and flour in the base.
This potato flake version is dairy-free and relies on the unique interaction between potato starch and sugar, resulting in a cleaner, more versatile flavor.

Potato Flake Sourdough Starter FAQs
Why use potato flakes in sourdough starter?
For enhanced starch and nutrients. Potato flakes provide pre-gelatinized starches and minerals that the yeast can easily access, promoting a vigorous and consistent fermentation.
Can you feed sourdough starter potato flakes?
Yes, with specific preparation. This starter is designed to be fed with a mixture including instant potato flakes, sugar, and water, creating a liquid, nutrient rich environment for the yeast.
Is potato flake sourdough real sourdough?
Yes, it is a variation of sourdough. It relies on yeast and bacterial fermentation, producing a tangy flavor and leavening properties similar to traditional starters, though often with a milder tang and softer crumb.
How to maintain a potato flake sourdough starter?
Feed it weekly and refrigerate between uses. Take it out of the fridge, feed it with the sugar/flake/water mixture, let it activate at room temperature for about 8 hours, then return it to the fridge after reserving at least 1 cup.
Can I use flavored potato flakes?
No, stick with plain flakes. Flavored versions often contain oils, butter, or seasonings that can go rancid or interfere with the delicate fermentation process, negatively impacting the starter's health and flavor.
What if my starter separates and has hooch?
Stir it back in or pour it off. The clear liquid, known as "hooch," is a byproduct of fermentation indicating the starter is hungry. Stirring it back in adds a sharper flavor, while pouring it off results in a milder taste.
How long does it take to make the initial starter?
Five days for the initial ferment. After combining the initial ingredients, the starter needs to sit undisturbed at room temperature for five days to establish a healthy, active yeast culture before being refrigerated.
Potato Flake Starter

Ingredients:
Instructions:
Nutrition Facts:
| Calories | 21 calories |
|---|---|
| Protein | 0.1 g |
| Fat | 0 g |
| Carbs | 5.2 g |
| Fiber | 0.1 g |
| Sugar | 4.7 g |
| Sodium | 1 mg |
