Dutch Oven Pumpkin Bread: Rustic and Moist
- Time: Active 45 minutes, Passive 140 minutes, Total 185 minutes
- Flavor/Texture Hook: Shatter crisp mahogany crust with a velvety, spiced interior
- Perfect for: Impressive weekend brunch or a cozy autumn gift
- Secrets to Achieving the Perfect Dutch Oven Pumpkin Bread
- Understanding the Internal Texture and Crust Dynamics
- Component Analysis and Ingredient Roles
- Essential Gear for Bread Success
- The Alchemy of the Pumpkin Bread Elements
- Mastering the Two Stage Baking Process
- Navigating Texture and Rise Issues
- Adapting the Loaf for Different Needs
- Debunking Bread Baking Fallacies
- Smart Preservation and Zero Waste Tips
- Color Balance and Final Presentation
- Ideal Pairings for Your Loaf
- Recipe FAQs
- 📝 Recipe Card
Secrets to Achieving the Perfect Dutch Oven Pumpkin Bread
Have you ever noticed how the air in the kitchen changes the second you lift the heavy lid off a hot cast iron pot? It isn't just the heat; it is that immediate, intoxicating rush of toasted spices and caramelized sugars that hits you right in the face.
I remember the first time I tried this, I was skeptical that a wet, shaggy dough could actually turn into something so stately. But then I heard it the "bread song." That faint, crackling sound the crust makes as it cools and contracts.
It’s a sensory experience that no standard loaf pan can ever replicate.
The real magic here lies in the contrast. We are looking for a crust that is bold, dark, and almost bark like, protecting a center that feels like a warm hug. It is a rustic, yeast leavened bread, not a cake, so don't expect a crumbly muffin texture.
Instead, you get this beautiful, stretchy crumb that is just begging for a thick swipe of salted butter. If you’ve been sticking to quick breads, this is the moment you graduate to something truly impressive without actually adding much extra work.
We are going to focus on a few key things: moisture control, heat management, and that signature color. Because let's be honest, a pumpkin loaf should look as vibrant as a fall leaf.
By the time we’re done, you’ll have a loaf that looks like it belongs in a high end boulangerie window, but it actually came out of your own oven while you were probably still in your pajamas.
Understanding the Internal Texture and Crust Dynamics
Before we start mixing, we need to talk about why this specific method produces such a different result than a standard tin. The Dutch oven acts as a tiny, pressurized bread oven, trapping every bit of moisture that escapes the dough.
This is what keeps the outside from setting too early, allowing the bread to expand to its full potential before the crust hardens into that glorious, crackling shell.
Steam Retention: The heavy lid keeps moisture locked in, which gelatinizes the starches on the surface of the dough for a glossy, thin, and crispy exterior.
Radiant Heat: Cast iron provides a steady, even heat that mimics a professional stone deck oven, ensuring the bottom doesn't burn before the center is cooked.
Hydration Balance: The pumpkin puree adds significant moisture and weight, so we use a specific flour to liquid ratio to ensure the dough remains manageable rather than a puddle.
Fermentation Depth: Allowing the yeast to work slowly with the brown sugar creates complex flavor notes that balance the sweetness of the pumpkin.
| Method | Total Time | Crust Texture | Best For |
|---|---|---|---|
| Fast (Quick Bread) | 70 minutes | Soft, cake like | Last minute snacks |
| Classic (Yeast Loaf) | 185 minutes | Shatter crisp, chewy | Impressive brunch / Gifting |
| No Knead Overnight | 12 hours | Thick, rustic | Maximum flavor depth |
Choosing the right path depends on your schedule, but for that signature crunch and airy crumb, the 185 minutes version is the sweet spot. It gives the yeast enough time to wake up and move through the heavy pumpkin puree without making you wait all day.
Component Analysis and Ingredient Roles
The success of this loaf depends on how these specific ingredients interact. We aren't just tossing things in a bowl; we are building a structural framework that can support the density of the pumpkin.
If you've ever had a pumpkin bread that felt like a lead weight, it was likely because the flour couldn't stand up to the moisture.
| Ingredient | Science Role | Pro Secret |
|---|---|---|
| 450g All Purpose Flour | Provides gluten structure | Weigh it! Volume measures vary too much for bread. |
| 240g Pumpkin Puree | Adds moisture and fiber | Use pure pumpkin, not pie filling which has extra water/sugar. |
| 7g Active Dry Yeast | Leavening agent | Bloom in 115°F water to ensure it's alive and kicking. |
| 50g Brown Sugar | Food for yeast + caramelization | The molasses in the sugar helps deepen the crust color. |
When you are picking your pumpkin, make sure it is the thick, matte puree. If it looks watery, your dough will be a nightmare to handle. We need that concentrated squash flavor and the pectin it provides to keep the loaf velvety.
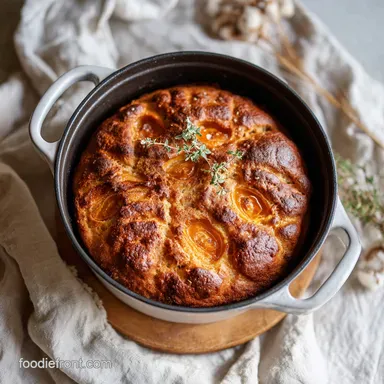
Essential Gear for Bread Success
You don't need a professional bakery, but a few specific tools make this process infinitely smoother. The star of the show is, of course, the Dutch oven. A 5 to 7 quart pot is the ideal size. If it is too large, the bread will spread out too much; too small, and it won't have room to rise.
- Cast Iron Dutch Oven: Essential for heat retention and steam.
- Parchment Paper: This is your "sling" to get the dough in and out of the screaming hot pot safely.
- Large Mixing Bowl: Plenty of room for the 1.5 to 2 hours rise.
- Digital Scale: For that 450g of flour precision.
- Kitchen Thermometer: To check your 105°F-115°F water.
Chef Note: If you don't have a Dutch oven, a heavy lidded ceramic casserole dish can work in a pinch, but you won't get that same "shatter" on the crust because ceramic doesn't hold heat quite like cast iron does.
The Alchemy of the Pumpkin Bread Elements
For this perfect dutch oven pumpkin bread, we are using specific measurements to ensure the crumb stays light. If you find yourself missing an item, here is how to swap without ruining the bake.
- 450g All Purpose Flour: You can use Bread Flour for a chewier, more "artisan" feel. Why this? The protein in AP flour keeps the crumb tender and velvety.
- 1 tsp Fine Sea Salt: Table salt works, but use a bit less as it's finer. Why this? Salt tightens the gluten and prevents the bread from being bland.
- 1 tbsp Pumpkin Pie Spice: Make your own with cinnamon, ginger, cloves, and nutmeg. Why this? It provides that iconic autumnal aroma we crave.
- 240g Pure Pumpkin Puree: Well mashed sweet potato puree is a great alternative. Why this? It adds the characteristic orange hue and dense moisture.
- 60ml Warm Water: Milk can be used for a softer, richer crumb. Why this? Water at 115°F is the "goldilocks" temp for yeast activation.
- 50g Brown Sugar: Maple syrup or honey works well too. Why this? Brown sugar adds moisture and a hint of caramel flavor.
- 7g Active Dry Yeast: Instant yeast can be used; just skip the 5 minute bloom. Why this? This is our primary engine for that 2 hour rise.
- 15ml Melted Butter: Neutral oil or coconut oil is a fine swap. Why this? A little fat prevents the bread from being too "rubbery."
| Original Ingredient | Substitute | Why It Works |
|---|---|---|
| Pumpkin Pie Spice | Cinnamon + Nutmeg | Provides the warm notes. Note: Lacks the "bite" of ginger. |
| Brown Sugar | Honey (same weight) | Adds sweetness. Note: Will brown the crust even faster. |
| Melted Butter | Coconut Oil | Same fat content. Note: Adds a very faint tropical aroma. |
Mastering the Two Stage Baking Process

- Whisk the 450g flour, sea salt, and pumpkin spice in a large bowl. Note: This ensures no clumps of spice in the final loaf.
- Combine the 60ml warm water (aim for 110°F), 7g yeast, and 50g brown sugar in a jug.
- Wait 5 minutes until the top is thick and bubbly like a latte.
- Stir the 240g pumpkin puree and 15ml melted butter into that frothy yeast mixture.
- Fold the liquids into the flour until a shaggy, sticky ball forms.
- Cover and let rise for 1.5 to 2 hours until the dough has doubled and looks airy.
- Preheat the Dutch oven inside the oven at 400°F (200°C) for at least 30 minutes.
- Lift the dough onto parchment, score the top with a knife, and drop it into the hot pot.
- Bake with the lid on for 30 minutes until the bread has fully risen and set.
- Remove the lid and bake for 15 minutes until the crust is dark mahogany and sounds hollow when tapped.
Navigating Texture and Rise Issues
Bread baking can be finicky, especially when you are introducing the weight of pumpkin. If things aren't looking right, don't panic. Most issues happen during the proofing stage or because the oven wasn't hot enough.
Why Your Loaf Is Gummy
If the center feels damp or sticky even after 45 minutes, it usually means the pumpkin had too much water or the loaf wasn't cooled properly. Steam continues to cook the bread after it leaves the oven, so cutting it while hot is the biggest mistake you can make.
It traps that moisture inside, turning the crumb into a gummy mess.
A Flat and Dense Result
This usually points back to the yeast. If your water was over 120°F, you might have accidentally killed the yeast. Alternatively, if the kitchen was too cold, the dough might have needed an extra 30 minutes to really double in size. If you're looking for other cozy bakes to master, you might find my Rich Pecan Zucchini Bread Bundt Cake a bit more forgiving for beginners since it's a batter based cake.
| Problem | Root Cause | Solution |
|---|---|---|
| Burnt Bottom | Pot was too close to heat | Place a baking sheet on the rack below the pot. |
| No Crust Crackle | Lid was removed too late | Ensure at least 15 minutes of "lid off" time. |
| Pale Color | Oven temp too low | Verify oven with a thermometer; use the 400°F (200°C) setting. |
Common Mistakes Checklist:
- ✓ Always preheat the Dutch oven; putting dough in a cold pot leads to sticking.
- ✓ Pat the pumpkin puree if it looks watery to avoid a heavy dough.
- ✓ Don't skip the "bloom" for active dry yeast; it's your insurance policy.
- ✓ Wait at least 1 hour before slicing; the "carryover" cooking is vital.
- ✓ Score the top deeply (about 1/2 inch) to give the steam a clear exit path.
Adapting the Loaf for Different Needs
If you want a bit of crunch, adding 100g of toasted pecans or walnuts to the dry ingredients is a brilliant move. If you're out of pumpkin, this method actually works beautifully for other squash too. For instance, if you happen to have leftovers from making a Pumpkin Pie From Sugar Pumpkins, you can easily use that same fresh puree here for a more vibrant, homegrown flavor.
To scale this recipe down for a mini Dutch oven, just halve all the ingredients. However, be careful with the yeast use about 4g so it doesn't over proof. For doubling the recipe, I highly recommend baking in two separate pots rather than one giant loaf, as the center of a double sized pumpkin loaf often struggles to cook through before the outside burns.
Debunking Bread Baking Fallacies
One major myth is that "the more you knead, the better the bread." With this high moisture pumpkin dough, over handling actually makes it tough. The long rise time does most of the "kneading" for you through autolysis. Another common misconception is that you must use bread flour for a good crust.
While bread flour adds chew, all purpose flour provides a much more velvety interior that complements the pumpkin perfectly.
Finally, many people think the Dutch oven needs to be greased. Never grease it! The high heat will just cause the oil to smoke and polymerize. The parchment paper sling is all you need to prevent sticking and ensure a clean release every single time.
Smart Preservation and Zero Waste Tips
This bread is at its absolute peak about 2 hours after baking, but you can keep it in a paper bag at room temperature for up to 2 days. Avoid plastic bags, as they will turn that beautiful crust soft and rubbery within hours.
If you find the loaf getting a bit stale, it makes the most incredible French toast you've ever had in your life.
For long term storage, slice the loaf completely and freeze the slices with small pieces of parchment in between. You can pop a frozen slice directly into the toaster, and it will taste just as fresh as the day it was baked.
If you have leftover pumpkin puree from the 240g used here, stir it into oatmeal or use it as a base for a quick pasta sauce never let that liquid gold go to waste!
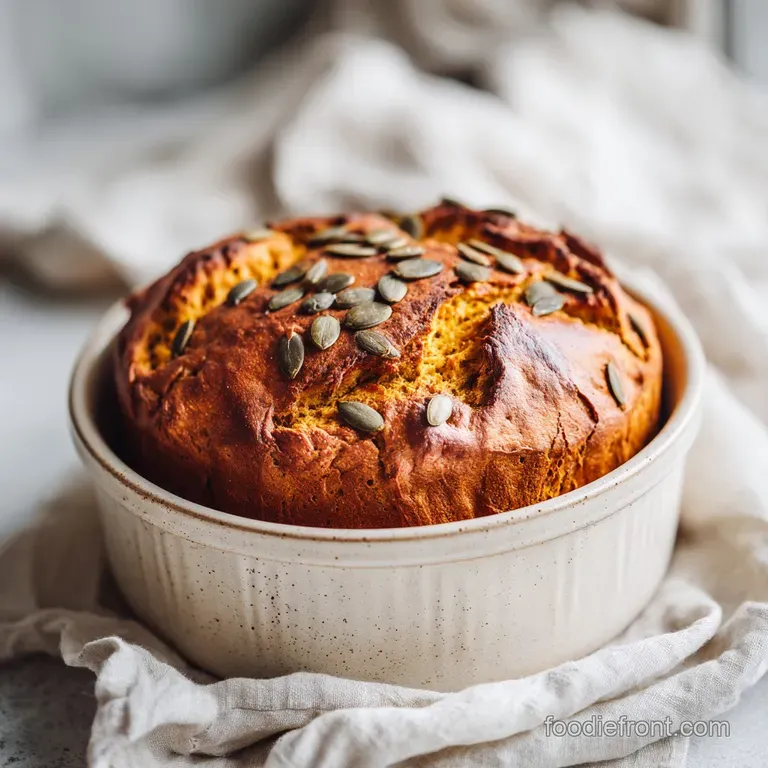
Color Balance and Final Presentation
To make this loaf look truly impressive, we want to focus on three specific color accents that highlight the "perfect dutch oven pumpkin bread" vibe.
- The Mahogany Crust: This is achieved by that final 15 minute uncovered bake. It provides a dark, earthy backdrop.
- Toasted Green Pepitas: Press these into the top of the dough right before it goes into the oven. The forest green pops beautifully against the orange bread.
- Snow White Flaky Salt: A tiny sprinkle of Maldon salt right as it comes out of the oven adds a crystalline sparkle that screams "professional."
Ideal Pairings for Your Loaf
This bread isn't just for eating plain. Because it’s a yeast bread and not overly sweet, it plays well with both sweet and savory accompaniments.
- Whipped Salted Honey Butter: Beat 115g softened butter with 1 tbsp honey and a pinch of sea salt. The salt cuts through the pumpkin richness.
- Savory Goat Cheese Spread: Tangy goat cheese smeared on a toasted slice is a game changer for a quick lunch.
- Apple Cider Jam: The acidity of the apples brightens the deep spices of the loaf.
Whether you're serving this alongside a hot cup of coffee or as a side to a hearty autumn soup, the texture is what will keep people coming back. It's robust enough to handle a heavy spread but light enough to eat slice after slice.
Enjoy the process the smell alone is worth the 185 minutes of wait time!

Recipe FAQs
Is it necessary to use a Dutch oven for this recipe?
Yes, the Dutch oven is critical. The heavy lid traps steam released from the dough, which allows the loaf to rise fully before the crust sets, creating that essential bakery style texture.
How to ensure the dough rises properly?
Place the bowl in a warm, draft free spot for 1.5 to 2 hours. Ensuring your warm water is between 105°F and 115°F is the key to activating the yeast; if you enjoyed perfecting this proofing technique, you can apply the same temperature logic when preparing our Crustless Chicken Pot Pie Skillet.
Is it true the dough should look smooth before rising?
No, this is a common misconception. The dough should be shaggy and sticky with no dry flour streaks remaining, which is perfectly normal for this high moisture recipe.
How to achieve the signature mahogany crust?
Remove the Dutch oven lid for the final 15 minutes of the 45-minute bake. This releases the trapped steam, allowing the intense, radiating heat to caramelize the exterior into a shatter crisp finish.
Can I speed up the rising process?
No, avoid rushing the rise. The 140 minutes of passive time is necessary for the yeast to develop the structure and flavor required for a proper artisan loaf.
How to tell if the bread is finished baking?
Look for a deep, mahogany colored crust after the 45-minute total bake time. The bread should sound hollow when tapped on the bottom, indicating a fully set, airy interior.
Is it possible to prepare the dough in advance?
Yes, you can proof the dough in the refrigerator for up to 12 hours. This slow, cold fermentation adds significant depth to the final flavor of the bread.
Perfect Dutch Oven Pumpkin Bread
Ingredients:
Instructions:
Nutrition Facts:
| Calories | 166 kcal |
|---|---|
| Protein | 4.3 g |
| Fat | 1.3 g |
| Carbs | 34.1 g |
| Fiber | 1.5 g |
| Sugar | 4.2 g |
| Sodium | 194 mg |
