St. Louis Ribs: Low and Slow Oven Bake
- Time: Active 20 minutes, Passive 6 hours, Total 6 hours 20 mins
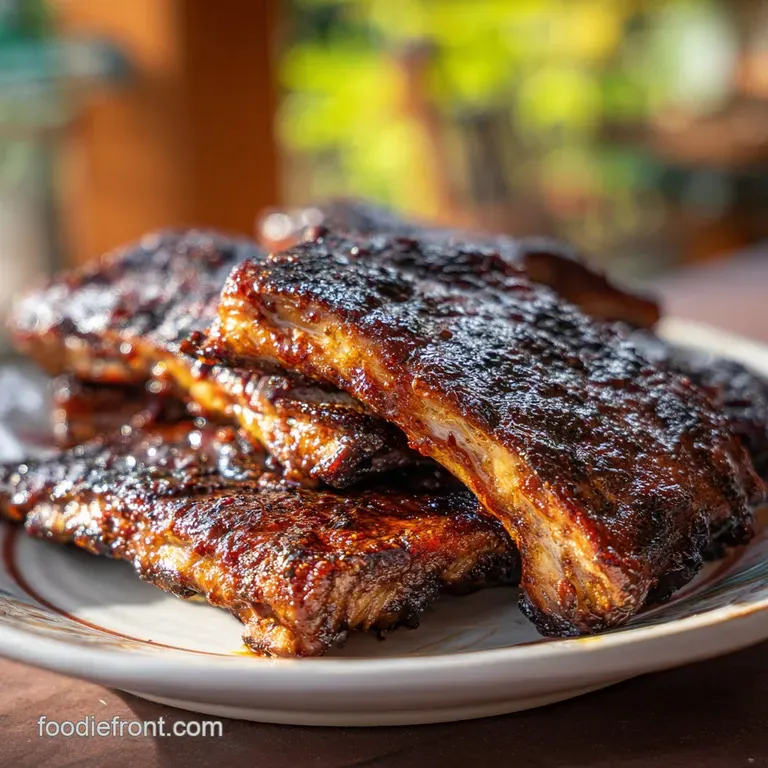
- Flavor/Texture Hook: A balance of smoky, sweet and spiced bark that gives way to velvety, pull apart meat.
- Perfect for: Stress free Sunday family dinners or showing off at a summer garden party.
- Master the Art of St. Louis Ribs
- What Makes These Ribs Worth the Wait
- Selecting the Finest Components for Your Rack
- Shopping List for Your St. Louis Ribs
- Simple Tools for Stress Free Barbecue Success
- Step-by-Step Path to Low and Slow Bliss
- Solving Common Problems for Better Bark
- Adjusting Quantities for Every Sized Family
- Debunking Barbecue Tall Tales and Mistakes
- Keeping Your Leftovers Juicy and Flavorful
- Adding Personal Flair with Spice Swaps
- Completing the Meal with Hearty Sides
- Very High in Sodium
- Recipe FAQs
- 📝 Recipe Card
Master the Art of St. Louis Ribs
There is nothing quite like the sizzle when you brush that final layer of glaze onto a hot rack of ribs. I still remember the first time I got this right; the kitchen was filled with the heavy, sweet aroma of smoked paprika and coconut sugar, and the meat pulled away from the bone with just a gentle nudge from a fork.
It was a far cry from my early attempts that ended up more like shoe leather than dinner. We’ve all been there, hovering over the oven, hoping for the best, but today we’re moving past hope and into high definition flavor.
Right then, let's get one thing straight: you don't need a thousand dollar offset smoker to make people cry happy tears over pork. This recipe is all about the low and slow dance in a humble oven. We're going to use the St.
Louis cut because it’s uniform, it cooks evenly, and honestly, the extra fat content compared to baby backs makes it much more forgiving for us home cooks. Trust me on this, once you see that mahogany bark develop, you'll never look at a restaurant menu the same way again.
What Makes These Ribs Worth the Wait
The secret to why this works so well isn't magic, it's just basic physics and a bit of patience. When we keep the heat low, around 135°C (approx. 275°F), we allow the magic of the Maillard reaction to happen slowly without burning the sugars in our dry rub.
This creates that dark, flavorful crust that every barbecue enthusiast dreams about.
The Physics of the Pull: Sustained heat at 95°C (internal) converts tough collagen into silky gelatin, creating a velvety texture. This transformation requires hours of steady temperature to ensure the meat doesn't dry out before it becomes tender.
- Moisture Retention: Using a mustard binder creates a seal that prevents meat juices from evaporating during the long cook.
- Bark Formation: The coconut sugar and paprika react with the heat to form a complex, savory sweet exterior shell.
- Acid Balance: Spritzing with apple cider vinegar mid way through cuts through the heavy fat, keeping the palate fresh.
- Carryover Cooking: Resting the meat allows the internal pressure to drop, pulling those juices back into the fibers for a succulent bite.
| Thickness | Internal Temp | Rest Time | Visual Cue |
|---|---|---|---|
| 1 inch (2.5 cm) | 93°C - 95°C | 15 minutes | Meat pulls back 1 cm from bone |
| 1.5 inches (4 cm) | 95°C - 97°C | 20 minutes | Surface "shatters" when bent gently |
| 2 inches (5 cm) | 97°C | 25 minutes | Bone slides out with zero resistance |
If you are looking for a different protein to try with similar braising techniques, you might enjoy my Beef Ribs Recipe which uses a very similar low and slow approach for a different flavor profile. It's just as hearty and family friendly for a big weekend meal.
Selecting the Finest Components for Your Rack
When you're at the butcher, look for a rack that has consistent thickness from one end to the other. If one side is paper thin and the other is a mountain of meat, they won't cook at the same rate, and you'll end up with one side dry and the other underdone.
I always look for a rack with plenty of white "marbling" streaks through the red meat that’s where all your flavor lives.
| Ingredient | Science Role | Pro Secret |
|---|---|---|
| Yellow Mustard | Emulsifying Binder | Doesn't add flavor; it just helps the spices stick to the meat. |
| Coconut Sugar | Caramelization | Lower burn point than white sugar, creating a deeper, darker bark. |
| Smoked Paprika | Color & Flavor | Provides the "fake" smoke flavor that makes oven ribs taste like a pit. |
| Apple Cider Vinegar | pH Balancer | Breaks down surface proteins for a more tender exterior bite. |
Before you start rubbing the meat, make sure you pat it bone dry with paper towels. Any surface moisture will turn your dry rub into a paste, which prevents that beautiful crust from forming. I’ve made the mistake of rushing this step before, and I ended up with "steamed" ribs rather than baked ones.
Not a mistake you want to repeat!
Shopping List for Your St. Louis Ribs
Don't be intimidated by the list; most of these are pantry staples that you probably already have tucked away in your spice drawer. If you're missing something, don't panic I've included swaps that won't ruin your dinner.
- 2 racks St. Louis Style Pork Ribs (approx. 3 lbs / 1.4 kg each): Why this? More fat and uniform shape leads to a more succulent, even cook.
- Substitute: Baby Back Ribs (reduce cook time by 1 hour 30 mins).
- 2 tbsp Yellow Mustard: Why this? The vinegar in mustard helps tenderize the surface and hold the rub.
- Substitute: Olive oil or a thin coating of water.
- 1/4 cup Smoked Paprika: Why this? Essential for that deep red color and smoky aroma.
- Substitute: Standard paprika with a drop of liquid smoke in the spritz.
- 2 tbsp Granulated Garlic: Why this? More heat resistant than fresh garlic, preventing bitter burnt bits.
- Substitute: Garlic powder (use slightly less as it’s finer).
- 1 tbsp Onion Powder: Why this? Adds a savory depth that balances the sweetness of the sugar.
- Substitute: Shallot powder or celery salt (reduce sea salt if using).
- 1 tbsp Coarse Black Pepper: Why this? Provides "bite" and texture to the bark.
- Substitute: White pepper (for a more floral, sharper heat).
- 1 tbsp Sea Salt: Why this? Enhances every other flavor and helps draw out moisture for the rub to stick.
- Substitute: Kosher salt or Himalayan pink salt.
- 1 tbsp Coconut Sugar: Why this? Adds sweetness with a subtle earthy note that isn't cloying.
- Substitute: Brown sugar or maple sugar.
- 1 tsp Chipotle Powder: Why this? Adds a gentle, smoky heat that lingers on the tongue.
- Substitute: Cayenne pepper or ancho chili powder.
- 1/2 cup Apple Cider Vinegar: Why this? The acidity tenderizes the meat during the spritz phase.
- Substitute: Apple juice or white wine vinegar.
- 1/2 cup Water: Why this? Dilutes the vinegar so it doesn't overpower the pork.
- Substitute: Beef broth or a light beer.
- 1/2 cup Low Sugar BBQ Sauce: Why this? Gives that final "shatter" glaze without being overly sticky.
- Substitute: Honey and mustard glaze or a spicy vinegar mop.
Simple Tools for Stress Free Barbecue Success
You really don't need much to get this done. A heavy duty sheet pan is your best friend here it catches all the drippings and gives the ribs a flat surface to sit on. If you have a wire rack that fits inside the pan, even better, as it allows air to circulate underneath the meat.
Chef's Tip: Use a dull butter knife and a piece of paper towel to grip and peel away the silver skin (membrane) on the back of the ribs. If you leave it on, it becomes tough and rubbery, and your rub won't penetrate the meat!
You'll also want some high-quality aluminum foil. Not the thin stuff that rips if you look at it wrong, but the thick, heavy duty variety. This is crucial for the "wrap" phase where we trap the steam to soften the meat.
If you have a spray bottle for the vinegar spritz, that's great, but if not, a simple pastry brush works just as well.
step-by-step Path to Low and Slow Bliss
- Prep the meat. Remove the ribs from the packaging and pat them completely dry with paper towels to ensure the rub sticks.
- Remove the membrane. Slide a butter knife under the silver skin on the bone side, grip it with a paper towel, and pull it off firmly. Note: This ensures the ribs are "pull apart" tender rather than chewy.
- Apply the binder. Rub 1 tbsp of yellow mustard over both sides of each rack until thinly coated.
- Season generously. Mix your paprika, garlic, onion, pepper, salt, sugar, and chipotle, then sprinkle over the meat. Press the rub in until the meat looks completely matte.
- Preheat and set. Set your oven to 135°C (approx. 275°F) and place the ribs on a sheet pan, bone side down.
- Initial bake. Roast for 3 hours until the bark is set and doesn't smudge when touched.
- The Spritz. Mix the apple cider vinegar and water, then spray or brush the ribs every 45 minutes during this first phase.
- The Wrap. Tear off two large sheets of foil, place the ribs inside, add a splash of the spritz liquid, and seal them tightly. Bake for another 2 hours until the meat is very soft.
- The Glaze. Carefully open the foil, brush with the low sugar BBQ sauce, and bake uncovered for 1 hour until the sauce is tacky and starting to sizzle.
- The Rest. Remove from the oven and let them sit for 15 minutes before slicing between the bones.
If you enjoy the flavor profile of this dry rub but want to try it on a smoker, check out my Smoked Ribs recipe for a more traditional backyard BBQ experience.
Solving Common Problems for Better Bark
Even the most seasoned cooks run into trouble sometimes. The biggest issue usually comes down to temperature control. If your oven runs hot, that sugar in the rub is going to burn before the meat is tender.
If you see the edges turning black too quickly, just tent some foil over the top and drop the temperature by 10 degrees.
Why Your Ribs Are Still Tough
If you’ve cooked them for the full 6 hours and they still feel like they're fighting back when you pull them, it’s usually because the collagen hasn't quite reached that magic melting point.
This often happens if the ribs were particularly thick or if they were still a bit cold when they went into the oven. The fix is simple: wrap them back up and give them another 30 minutes.
| Problem | Root Cause | Solution |
|---|---|---|
| Dry Meat | Overcooked or not wrapped tightly | Ensure foil seal is airtight to trap steam. |
| Rub is Mushy | Too much spritz or no initial bake | Let the bark "set" for 3 hours before spraying. |
| Salty Aftertaste | Too much salt in the dry rub | Balance with more coconut sugar next time or a sweet glaze. |
Common Mistakes Checklist
- ✓ Forgetting to remove the membrane (leads to a "plastic" texture on the bottom).
- ✓ Peeking too often (every time you open the oven, you lose heat and moisture).
- ✓ Not resting the meat (the juices will run right out onto the cutting board).
- ✓ Using "active" heat like a broiler for the glaze (this will burn the sugar in seconds).
- ✓ Over saucing (you want to taste the meat and spices, not just a bottle of sauce).
Adjusting Quantities for Every Sized Family
If you're cooking for a crowd, you can easily double or triple this recipe. The main constraint is oven space! You can actually "stack" the ribs slightly during the wrapped phase, but for the first 3 hours and the final glaze hour, they really need their own space on the rack to get that air circulation.
Scaling Down (1 rack): You can easily do just one rack. Use half the ingredients and keep the timing exactly the same. Don't be tempted to shorten the cook time just because there's less meat; the thickness of the rack determines the time, not the total weight.
Scaling Up (4+ racks): When doing 4 racks, increase the spices to 1.5x rather than 2x to avoid it being overpowering. You'll likely need to rotate your sheet pans from the top rack to the bottom rack every hour to ensure even cooking, as ovens usually have "hot spots."
| Method | Time | Texture | Best For |
|---|---|---|---|
| Oven (Standard) | 6 hours | Soft and Velvety | Consistency and ease |
| Slow Cooker | 8 hours | Fall off-the bone | Busy workdays (no bark) |
| Instant Pot | 45 mins | Very Tender | Last minute cravings |
Debunking Barbecue Tall Tales and Mistakes
One of the biggest myths in the BBQ world is that "fall off-the bone" is the gold standard. In competition cooking, that’s actually considered overcooked! A perfect rib should have a "clean bite," meaning the meat comes away where you bit it, but the rest stays on the bone.
However, this is your kitchen, not a competition. If you like them falling apart, cook them for that extra 30 minutes in the wrap!
Another common misconception is that the bone adds all the flavor. While the bone does provide structure and helps with heat conduction, the real flavor comes from the fat and the connective tissue breaking down. This is why St.
Louis ribs are so much tastier than leaner cuts; they have the internal "fuel" to keep the meat moist through a 6 hour cook.
Keeping Your Leftovers Juicy and Flavorful
If you actually have leftovers (which is rare in my house!), store them in an airtight container in the fridge for up to 4 days. To reheat, don't use the microwave it turns the pork rubbery and sad.
Instead, wrap them in foil with a tiny splash of water or apple juice and pop them in a 150°C (300°F) oven for 15 minutes. They’ll taste almost as good as the day you made them.
For zero waste cooking, take any leftover meat, shred it off the bone, and use it for "Rib Tacos" the next day. The smoky bark adds an incredible dimension to a soft corn tortilla with some fresh lime and cilantro.
You can also simmer the clean bones with some onions and celery to make a smoky pork stock for ramen or split pea soup.
Adding Personal Flair with Spice Swaps
The beauty of this recipe is how adaptable it is. If you want a more "Carolina style" vibe, double the amount of black pepper and add a teaspoon of mustard powder to the dry rub. For a "Memphis style" dry rib, skip the final glaze entirely and just sprinkle a little extra rub over the meat right before serving.
- Spicy Kick: Swap the chipotle powder for habanero powder or add a tablespoon of red pepper flakes to the rub.
- sugar-free: Use a monk fruit sweetener or erythritol instead of coconut sugar for a keto friendly version.
- Asian Fusion: Use ginger powder and five spice in the rub, and glaze with a mix of BBQ sauce and hoisin.
Completing the Meal with Hearty Sides
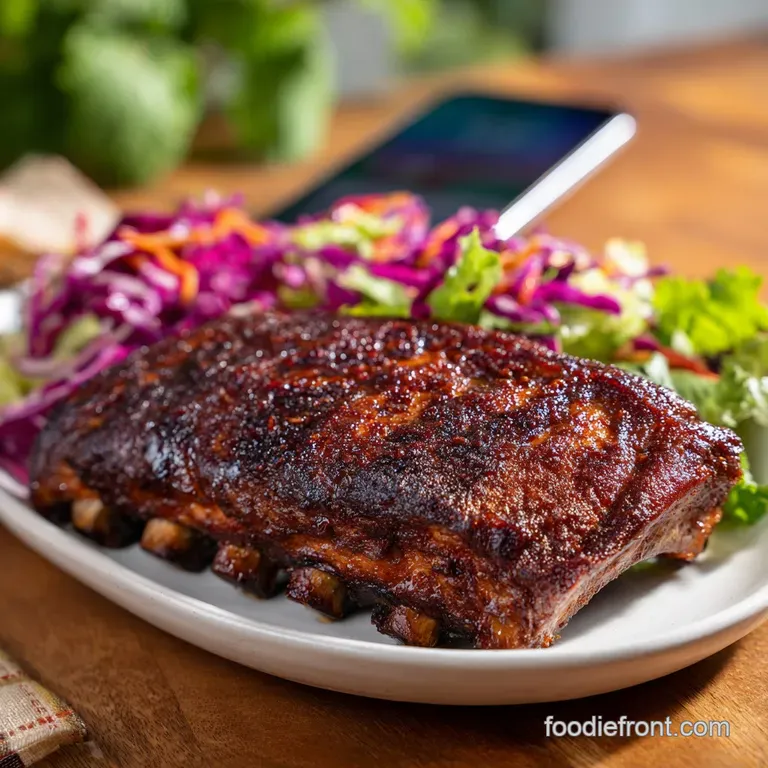
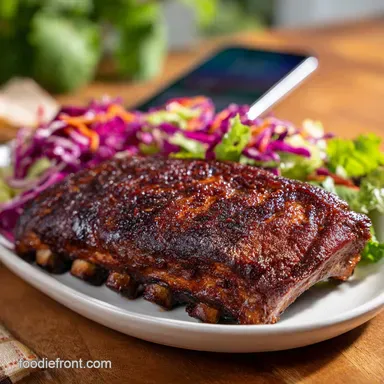
A heavy, rich meat like this needs something bright or crunchy to balance it out. A classic creamy coleslaw is the traditional choice, but I also love serving these with some pickled red onions or a sharp apple salad. The acidity from the vinegar in the salad cuts right through the velvety fat of the pork.
If you want to keep it simple, a big tray of cornbread or some smashed garlic potatoes works wonders. Just make sure you have plenty of napkins on the table. Ribs are meant to be eaten with your hands, and things are going to get messy in the best way possible. Right then, you're ready to go.
Get that oven preheated and enjoy the process!

Very High in Sodium
1180 mg mg of sodium per serving (51% % of daily value)
The American Heart Association recommends limiting sodium intake to no more than 2,300mg per day for most adults. This recipe significantly exceeds that recommendation.
Sodium Reduction Tips for Your Ribs
-
Reduce Sea Salt-25%
The recipe contains 1 tbsp of sea salt, a significant source of sodium. Reduce the amount of sea salt by half, using only 1/2 tbsp. This will significantly lower the sodium content without sacrificing too much flavor; taste and adjust if needed.
-
Low-Sodium BBQ Sauce-20%
BBQ sauce can be high in sodium. Substitute your regular BBQ sauce with a low-sodium or no-sodium added version. Alternatively, make your own BBQ sauce to control the sodium content.
-
Mustard Moderation-10%
While mustard contributes to the flavor, it can contain sodium. Reduce the amount of yellow mustard used from 2 tbsp to 1 tbsp, or opt for a low-sodium mustard option.
-
ACV Dilution-5%
Dilute the apple cider vinegar (ACV) with a little more water. Increasing the water to 3/4 cup while keeping the ACV at 1/2 cup will slightly reduce the concentration of sodium and acidity without majorly impacting the overall flavor profile.
-
Spice it Up!
Experiment with other herbs and spices to enhance the flavor profile without adding sodium. Consider adding smoked flavor with more smoked paprika, a touch of cumin, or a pinch of cayenne pepper for a subtle heat. These additions will help compensate for the reduced salt.
Recipe FAQs
What internal temperature indicates St. Louis Ribs are perfectly tender?
Cook to 95°C (203°F). This sustained internal temperature ensures that the tough collagen converts into silky gelatin, resulting in a velvety texture.
Must I remove the silver skin (membrane) from the back of the ribs before rubbing?
Yes, you must remove it. If left on, the membrane becomes tough and rubbery during cooking, preventing the rub from penetrating the meat properly.
How to achieve a dark, flavorful bark in an oven cooked St. Louis Rib recipe?
Bake low and slow at 135°C (275°F). This temperature allows the Maillard reaction to develop the crust without burning the sugars in the dry rub.
Is it true that baby back ribs can be substituted directly for St. Louis style with no time adjustments?
No, they require a time adjustment. Baby backs are leaner and cook faster; you should reduce the total cooking time by about 1 hour and 30 minutes.
How to reheat leftover St. Louis Ribs without drying them out?
Wrap them tightly in foil with a splash of liquid. Reheat in a 150°C (300°F) oven for about 15 minutes; avoid using the microwave which makes them rubbery.
Is using yellow mustard as a binder necessary for oven cooked ribs?
No, it is not strictly necessary, but highly recommended. Mustard acts as an emulsifying binder that helps the dry rub adhere evenly to the meat surface.
Should St. Louis Ribs be cooked until they are completely "fall off the bone"?
No, this is generally considered overcooked. Competition standard dictates a "clean bite" where the meat separates easily but remains attached to the bone.
Oven Baked St Louis Ribs
Ingredients:
Instructions:
Nutrition Facts:
| Calories | 885 kcal |
|---|---|
| Protein | 58 g |
| Fat | 66 g |
| Carbs | 9 g |
| Fiber | 1.5 g |
| Sugar | 5 g |
| Sodium | 1180 mg |
