Marshmallow Dipped Chocolate Recipe
- Time: Active 15 minutes, Passive 35 minutes, Total 50 minutes
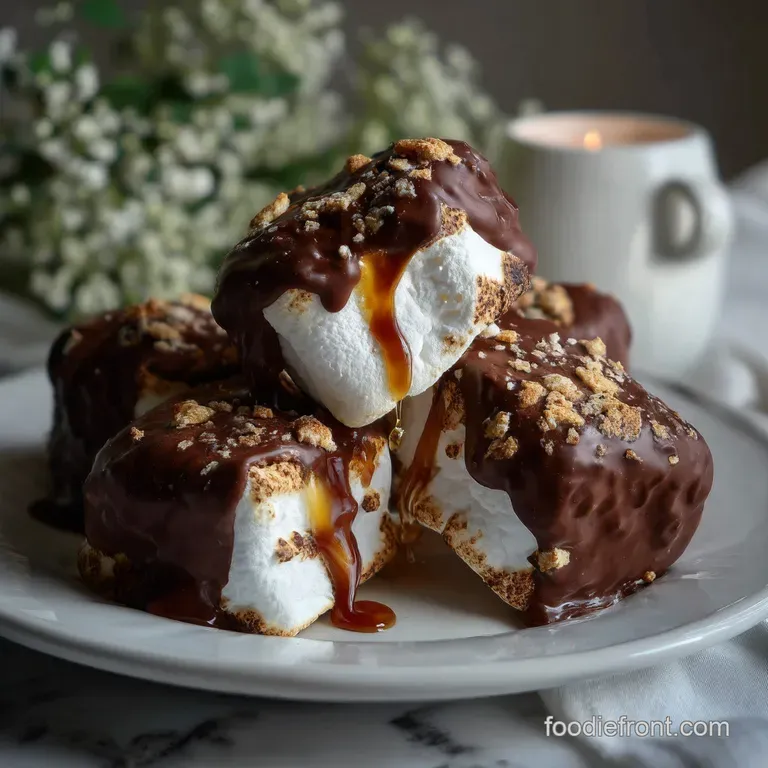
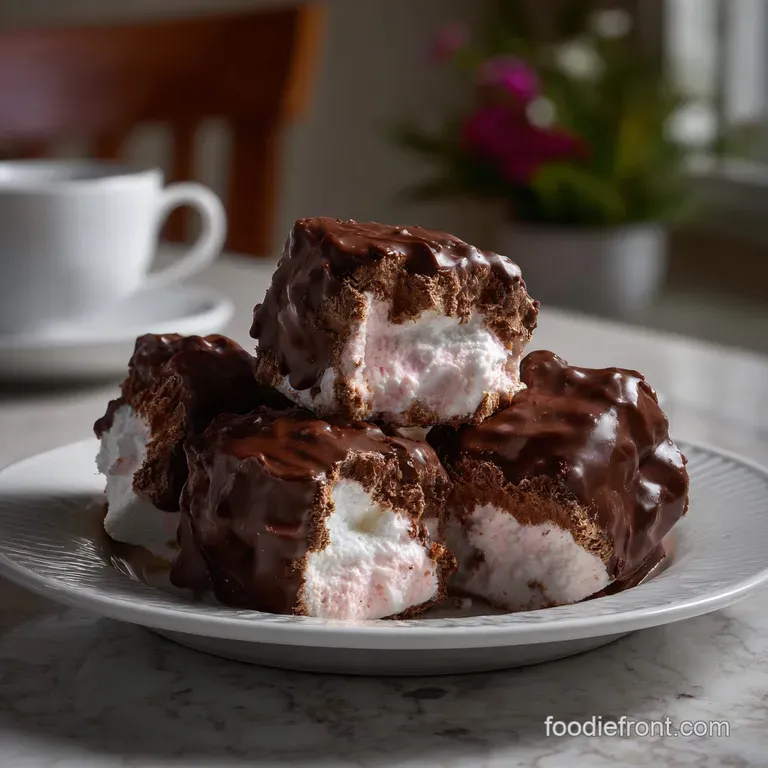
- Flavor/Texture Hook: The velvety dark chocolate provides a sharp shatter that gives way to a pillowy, sweet marshmallow core.
- Perfect for: Last minute dinner parties or impressive holiday gift boxes.
- Create the Best Marshmallow Dipped Chocolate
- Molecular Magic Behind the Snap
- Selecting Superior Sweet Components
- Essential Components and Clever Swaps
- Required Tools for Success
- Step-By-Step Coating Guide
- Solving Common Coating Issues
- Adjusting Quantities for Crowds
- Debunking Classic Dessert Fables
- Keeping Treats Fresh Longer
- Three Levels of Plating
- Making the Best Choices
- Recipe FAQs
- 📝 Recipe Card
Create the Best Marshmallow Dipped Chocolate
Do you hear that? It is the distinct, satisfying shatter of a high-quality dark chocolate shell breaking under your teeth. We have all been there, reaching for a bag of store-bought treats only to find them waxy, overly sweet, and frankly, a bit boring.
Making your own marshmallow dipped chocolate at home is not just about the flavor, though that is a massive part of it. It is about that professional finish that makes your friends ask which boutique bakery you visited.
I remember the first time I tried to make these for a school bake sale. I just threw some chocolate chips in a bowl, nuked them until they were liquid, and started dunking. It was a disaster.
The chocolate was thick, the marshmallows melted into sticky blobs, and the whole thing looked like a science experiment gone wrong. But after years of playing with temperatures and fats, I have cracked the code.
This version uses a precise ratio of cacao to coconut oil to ensure the coating is thin, glossy, and perfectly snappy.
We are going to use some grown up flavors here too. Think freeze dried raspberries and crushed pistachios. These aren't just for kids. By using 70% dark chocolate, we balance the sugar of the marshmallow with a sophisticated bitterness. It is an impressive little treat that takes less than an hour from start to finish.
Let’s get into the kitchen and make something beautiful.
Molecular Magic Behind the Snap
The science of why this works comes down to fat crystals and surface tension. When we melt dark chocolate, we are breaking down the stable structure of the cocoa butter; adding coconut oil lowers the melting point slightly, creating a velvety flow that coats the marshmallow without weighing it down.
- Beta V Crystals
- Proper heating ensures the cocoa butter reforms into stable Beta V crystals, which provides that iconic "snap" and a glossy sheen.
- Emulsification Stability
- The small amount of coconut oil acts as a thinning agent, allowing the chocolate to retreat from the marshmallow surface evenly, preventing those ugly "feet" or puddles at the base.
- Hydrophobic Barrier
- The fat in the chocolate creates a seal that prevents the marshmallow from absorbing moisture from the air, which would otherwise make it sticky or "weepy."
- Starch Suspension
- Most marshmallows are coated in a thin layer of cornstarch; we need to manage this layer so the chocolate can actually grip the sugar structure instead of sliding off.
Chef's Tip: Freeze your marshmallows for exactly 10 minutes before dipping. This cold surface causes the chocolate to set almost instantly, preventing it from sliding off and creating a much more even coat.
Selecting Superior Sweet Components
| Component | Science Role | Pro Secret |
|---|---|---|
| Dark Chocolate (8 oz) | Provides the structural shell through cocoa butter crystallization. | Use chopped bars, not chips, for a smoother melt. |
| Refined Coconut Oil (1 tsp) | Reduces viscosity for a thinner, more professional coating. | Ensure it is refined to avoid a strong coconut scent. |
| Large Marshmallows (24) | Acts as a stable, airy scaffold for the heavy chocolate. | Use fresh, "springy" ones for the best internal texture. |
| Flaky Sea Salt (1 pinch) | Suppresses bitterness and amplifies the perception of sweetness. | Add at the very last second so it doesn't dissolve. |
Essential Components and Clever Swaps
To get the best results, you need the right building blocks. I always reach for Ghirardelli 70% Cacao Bittersweet Chocolate because it melts predictably and has a deep, fruity undertone. For the marshmallows, Jet Puffed Large Marshmallows are the gold standard for consistent sizing.
- 24 Large marshmallows: These provide the structural base.
- Substitute: Vegan marshmallows (like Dandies) work perfectly for a plant based version.
- 8 oz (227g) dark chocolate (70% cocoa), finely chopped: This creates the rich, snappy exterior. Why this? Higher cacao percentages have more cocoa butter, leading to a better temper.
- Substitute: Milk chocolate (though it will be significantly sweeter and softer).
- 1 tsp (5ml) refined coconut oil: This helps the chocolate flow. Why this? It creates a thinner coating that doesn't overwhelm the marshmallow.
- Substitute: Cocoa butter (food grade) for an even harder snap.
- 1 pinch flaky sea salt: This cuts through the sugar.
- Substitute: A tiny dusting of smoked paprika for a hidden kick.
- 2 tbsp (30g) finely crushed raw pistachios: Adds a much needed crunch.
- Substitute: Toasted almond slivers or crushed pretzels.
- 1 tbsp (15g) unsweetened desiccated coconut: Provides a tropical texture.
- Substitute: Toasted sesame seeds for a savory sweet vibe.
- 1 tbsp (15g) freeze dried raspberry dust: This adds a sharp, acidic punch to the dark chocolate.
- Substitute: Orange zest or crushed peppermint candies.
Required Tools for Success
You don't need a professional pastry kitchen, but a few specific items make this much easier. I swear by my Lodge Cast Iron Dutch Oven used as the base for a double boiler it holds heat so well that the chocolate stays melted for much longer while I am dipping.
You will also want a KitchenAid Silicone Spatula to scrape every last drop of that liquid gold out of the bowl.
For the dipping itself, a simple bamboo skewer or a dedicated chocolate dipping fork is essential. If you use your fingers, you’ll end up with messy smudges and heat marks on the chocolate. Finally, grab some parchment paper or a Silpat Silicone Baking Mat.
The chocolate will peel right off once it’s set, leaving you with a perfectly smooth bottom.
step-by-step Coating Guide
- Prepare the station. Line a large baking sheet with parchment paper and set out your toppings in small, separate bowls. Note: You must work quickly once the chocolate is melted, so having your pistachios and raspberry dust ready is vital.
- Chop the chocolate. Use a sharp knife to finely shave the 8 oz of dark chocolate into uniform pieces. Note: Smaller pieces melt faster and more evenly, preventing hot spots that can burn the cocoa solids.
- Setup the double boiler. Fill a small pot with 2 cm of water and bring it to a gentle sizzle. Place a glass bowl over the top, ensuring the bottom does not touch the water.
- Melt the chocolate. Add two thirds of the chopped chocolate to the bowl and stir constantly with a silicone spatula.
- Incorporate the oil. Once the chocolate is smooth, stir in the 1 tsp of refined coconut oil until it is completely velvety.
- Add the remaining chocolate. Remove the bowl from the heat and stir in the remaining third of the chocolate. Note: This "seeding" method helps stabilize the temperature for a glossier finish.
- Dip the marshmallows. Insert a skewer into a marshmallow and submerge it halfway into the chocolate. Lift it out and let the excess drip off for 5 seconds.
- Apply the toppings. While the chocolate is still wet, sprinkle on the crushed pistachios, coconut, or raspberry dust.
- Set the chocolate. Place the marshmallow on the parchment paper and let it sit at room temperature for 35 minutes until firm to the touch.
- Final touch. Sprinkle the pinch of flaky sea salt over the tops just as the chocolate begins to lose its wet sheen.
Solving Common Coating Issues
Even the simplest recipes can have hiccups. If your chocolate looks dull or has white streaks, it likely got too hot. But don't panic! It still tastes great, even if it isn't "magazine ready."
Why Your Chocolate Seizing and Turning Grainy
This usually happens if even a single drop of water gets into your melting bowl. Water and chocolate are sworn enemies. The water causes the sugar and cocoa solids to clump together.
| Problem | Cause | Fix | Pro Tip |
|---|---|---|---|
| Seized Chocolate | Moisture contact | Add 1 tsp vegetable oil | Never cover the pot while melting. |
| Dull Finish | Improper temp | Re melt with "seed" chocolate | Keep temp below 45°C. |
| Sliding Toppings | Dipping too fast | Wait 10 seconds before topping | Let the chocolate slightly thicken. |
Why Won't the Chocolate Stick?
If your marshmallows are very fresh, they might have a lot of cornstarch on the outside. This acts like a dry barrier. I usually give mine a quick "tumble" in a clean kitchen towel to remove the excess powder before dipping. Also, make sure your chocolate isn't too thin. If it’s like water, it will just run right off. Similar to making the coating for a No Bake Chocolate Cookies recipe, the consistency needs to be thick enough to coat a spoon but thin enough to flow.
Adjusting Quantities for Crowds
If you are hosting a big party, you can easily double this recipe. Just keep in mind that chocolate can be temperamental when handled in large batches.
- Scaling Up (2x or 4x): Double the chocolate and oil, but only increase the salt and toppings by 1.5x. You can always add more toppings later, but you don't want the salt to become overwhelming.
- Work in Batches: Don't melt all the chocolate at once if you are making 100 marshmallows. It will cool down and thicken before you finish. Melt 8 oz at a time.
- Scaling Down: If you only want a few treats, you can use the microwave. Heat the chocolate in 20 second bursts, stirring between each one, until it is 75% melted, then stir until the rest dissolves.
Debunking Classic Dessert Fables
One common myth is that you must use a refrigerator to set chocolate. In reality, the "shock" of a cold fridge can actually cause "sugar bloom," where moisture condenses on the surface and draws sugar to the top, leaving white spots. Room temperature is always best for a slow, stable set.
Another one I hear all the time is that "low-fat" chocolate is better for dipping. This is completely false. You need the fat (cocoa butter) to create the flow. If you use low-fat or "diet" chocolate, you'll end up with a thick, clumpy mess that won't coat anything.
Stick to the high-quality bars; the fat is what makes it work!
Keeping Treats Fresh Longer
Storage: Keep your marshmallow dipped chocolate in a cool, dry place in an airtight container for up to 5 days. Do not put them in the sun, or you’ll have a sticky puddle.
Zero Waste: If you have leftover melted chocolate, don't throw it away! Stir in any leftover crushed pistachios and coconut, then pour it onto a piece of parchment paper. Let it set, and you have a "kitchen sink" chocolate bark for snacking later.
You can also use the leftover raspberry dust to flavor your morning yogurt or oatmeal.
Three Levels of Plating
Presentation is everything when you are working with something as simple as a marshmallow. You can go from "after school snack" to "fine dining" with just a few tweaks.
Plating Tweak Table
| Level | Style | Technique |
|---|---|---|
| Simple | Casual | Piled high in a wooden bowl with a light dusting of salt. |
| Polished | Gift Ready | Placed in individual mini cupcake liners inside a gold box. |
| Restaurant | Sophisticated | Served on a slate board with a "swipe" of raspberry coulis. |
For the Restaurant look, try a "deconstructed" approach. Place three marshmallows in a line, each with a different topping. Add a few fresh raspberries on the side and a sprig of mint. It looks incredibly impressive but takes almost no extra effort.
Making the Best Choices
Dark vs Milk Chocolate: Which is better?
Dark chocolate (70%) is almost always better for dipping because the higher fat content (cocoa butter) allows for a thinner, crispier shell. Milk chocolate contains milk solids which make the coating thicker and much softer, meaning it won't have that "snap." Plus, the bitterness of dark chocolate balances the sugar of the marshmallow perfectly.
Microwave vs Double Boiler: Which is safer?
The double boiler is the "pro" choice because it provides gentle, indirect heat. The microwave is faster but risky; it is very easy to "scorch" the chocolate, which makes it taste bitter and ruins the texture. If you are new to this, use the double boiler.
It’s worth the extra five minutes of effort to ensure your chocolate stays smooth.
Homemade vs store-bought: Is it worth the effort?
For the marshmallows? Honestly, store-bought is fine for dipping. Homemade marshmallows are delicious, but they are often much softer and can dissolve if the chocolate is even a little too warm. For the chocolate?
Always go high-quality. Avoid chocolate chips if you can; they contain stabilizers that prevent them from melting into the smooth consistency we need for a professional dip.
If you enjoy the process of working with chocolate, you might also like experimenting with different textures, much like the chewy finish of a No Bake Chocolate Cookies recipe. It's all about finding that balance of sweet and crunch. Trust me on this, once you make these at home, the store-bought versions will never taste the same again. Let’s crack on and get dipping!

Recipe FAQs
How to make marshmallow covered chocolate?
Prepare chocolate and freeze marshmallows first. Dip the marshmallows, which should be slightly chilled, into the melted, refined coconut oil and dark chocolate mixture until evenly coated.
How to make marshmallow chocolate dip?
Melt high-quality dark chocolate with 1 teaspoon of refined coconut oil. Stir until the mixture is velvety smooth using an indirect heat source like a double boiler to prevent scorching.
How to make marshmallows dipped in chocolate on a stick?
Insert a skewer into each marshmallow before dipping into the tempered chocolate. Freeze the marshmallows for 10 minutes beforehand so the cold surface helps the chocolate set instantly.
How to make marshmallow pops dipped in chocolate?
Use skewers inserted into the marshmallow and work quickly while the chocolate is fluid. After dipping, tap off the excess chocolate and immediately apply your desired toppings like crushed pistachios or raspberry dust.
How long do chocolate dipped marshmallows last?
They last up to 5 days stored properly at room temperature. Keep them in a cool, dry, airtight container, avoiding direct sunlight which can cause the chocolate to melt.
What is the key to getting a shiny, snappy chocolate shell?
Properly melting the chocolate using a seeded method. After melting most of the chocolate with indirect heat, remove it from the warmth and stir in the remaining chocolate to stabilize the Beta V crystals.
Should I freeze marshmallows before dipping them in chocolate?
Yes, freezing them for exactly 10 minutes is highly recommended. The cold surface causes the chocolate coating to set almost immediately, which prevents the coating from sliding off the marshmallow surface.
Marshmallow Dipped Chocolate Treat

Ingredients:
Instructions:
Nutrition Facts:
| Calories | 87 kcal |
|---|---|
| Protein | 1.0 g |
| Fat | 4.4 g |
| Carbs | 10.5 g |
| Fiber | 1.1 g |
| Sugar | 7.6 g |
| Sodium | 28 mg |
