Fudgy Browkies: a Chocolate Brownie Cookie Hybrid

- Time: Active 20 minutes, Passive 25 minutes, Total 45 minutes
- Flavor/Texture Hook: Velvety dark chocolate base with a golden, buttery crunch
- Perfect for: Potlucks, birthday parties, or a serious sweet tooth craving
- Master the Ultimate Fudgy Browkies
- Why the Sugar Whisking Creates Crackle
- Selecting Your Preferred Baking Method
- Deep Dive Into Ingredient Roles
- Gathering Your Essentials
- Equipment Needed for Success
- The Cooking Process
- Precision Checkpoints for the Best Texture
- Fixing Common Baking Problems
- Scaling Your Batch Size
- Myths About Brownie Consistency
- Making This Your Own
- Storage and Zero Waste Tips
- The Art of Plating
- Recipe FAQs
- 📝 Recipe Card
Master the Ultimate Fudgy Browkies
Forget everything you’ve heard about having to choose between a cookie and a brownie. The biggest myth in the baking world is that you can’t have both in one pan without one of them ending up dry or raw.
I used to think the "brookie" was a gimmick, something that looked good on social media but tasted like a confused mess. I was wrong. The secret isn't in some fancy gadget; it’s all about the order of operations and the way we handle the fats.
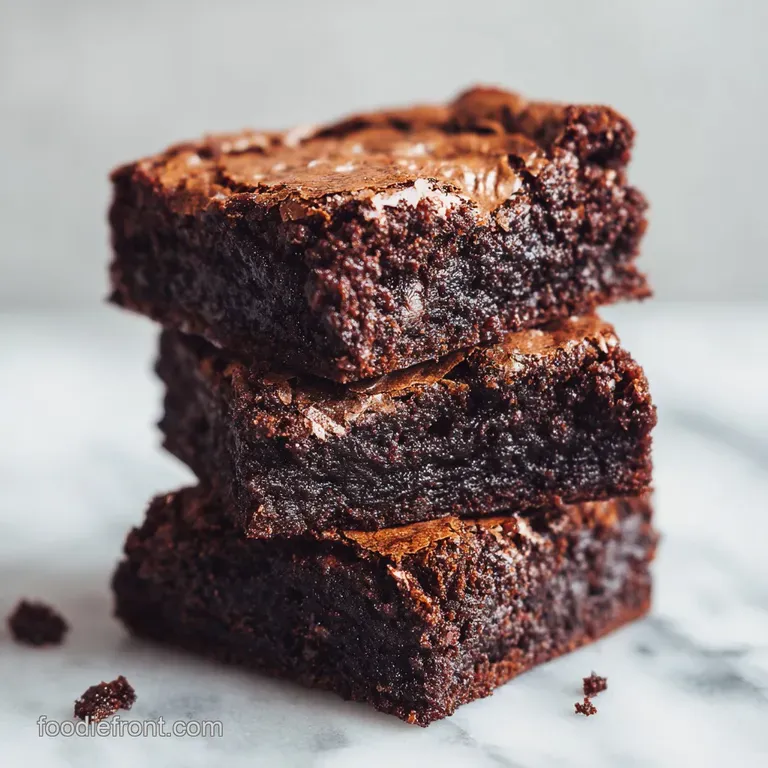
When you pull these out of the oven, the aroma of toasted butter and dark cocoa hits you like a warm hug. You’ll see that classic brownie crackle thin as tissue paper right next to the golden, mounded peaks of the cookie dough. It’s a sensory explosion.
The first time I got this right, the kitchen smelled like a high end chocolatier. I realized then that the box mixes have been lying to us; you don’t need stabilizers or artificial flavors to get that "shatter crisp" top. You just need a whisk and a little bit of arm strength.
We’re going to walk through this together, friend to friend. We aren't just throwing ingredients in a bowl. We’re building a masterpiece that will make your neighbors knock on your door asking what that smell is.
Trust me, once you see how the velvety brownie base holds up the chewy cookie dollops, you’ll never go back to plain brownies again. It's impressive, it's quick, and it’s honestly a little bit dangerous to have in the house.
Why the Sugar Whisking Creates Crackle
Most people just stir their sugar into the butter and call it a day, but that’s why they end up with dull, matte tops. This recipe relies on a few specific mechanical actions to get that professional finish.
- Mechanical Aeration: Whisking the melted butter and granulated sugar for two full minutes partially dissolves the sugar and incorporates tiny air bubbles that expand in the heat.
- Starch Gelatinization: Folding the flour into the cocoa heavy base ensures the brownies stay dense and fudgy rather than becoming airy and cake like.
- Fat Suspension: Using softened butter in the cookie layer creates a sturdy, tacky dough that sits on top of the brownie batter rather than sinking to the bottom.
- Leavening Control: The baking soda in the cookie layer reacts with the brown sugar's acidity, giving the top layer just enough lift to stay light against the heavy brownie base.
Selecting Your Preferred Baking Method
Before you start preheating, it’s worth deciding how you want your final texture to turn out. While the oven is the gold standard for that golden brown finish, some people swear by other methods for smaller batches.
| Method | Time | Texture | Best For |
|---|---|---|---|
| Conventional Oven | 25 minutes | Golden tops, fudgy centers | The standard crowd pleaser |
| Convection Oven | 22 minutes | Extra crispy cookie edges | Those who love a crunch |
| Toaster Oven | 28 minutes | Soft, gooey middle | Small batches or quick snacks |
Right then, choosing the right method is the first step toward success. If you’re using a convection oven, remember that the fan circulates heat more efficiently, which means your Fudgy Browkies might finish a few minutes early.
Always keep a close eye on them during those final moments to ensure the brownie base doesn't overcook while you're waiting for the cookies to brown.
Deep Dive Into Ingredient Roles
Every component in this bake has a job to do. We aren't just adding things for bulk; we’re adding them for structural integrity and that specific mouthfeel we all crave.
| Component | Science Role | Pro Secret |
|---|---|---|
| Dutch processed Cocoa | Lower acidity, darker color | Sift it twice to avoid bitter lumps |
| Brown Sugar | Adds moisture and molasses | Pack it tight for a chewier cookie |
| Unsalted Butter | Controls fat to liquid ratio | Use high-quality butter for a richer flavor |
| Large Eggs | Emulsifies the fats and sugars | Ensure they are room temp for better volume |
Chef's Note: If you really want to make the chocolate flavor pop, add a tiny pinch of espresso powder to the brownie batter. It won't taste like coffee; it just makes the cocoa feel much deeper and more intense.
Gathering Your Essentials
For the brownie base, we’re keeping things rich and dark. You’ll need 115g of unsalted butter, which we’re going to melt until it’s silky. Combine that with 1 cup of granulated sugar. Don't skimp on the 2 tsp of vanilla extract it's the backbone of the flavor profile.
You’ll also need 2 large eggs, 1/2 cup of Dutch processed cocoa powder (the dark stuff!), 65g of all purpose flour, and 1/4 tsp of sea salt.
For the cookie layer, we want a contrast. Grab 85g of softened unsalted butter and cream it with 1/2 cup of packed brown sugar and 1/4 cup of granulated sugar. You’ll need one more large egg for this layer.
For the dry bits, have 160g of all purpose flour ready, along with 1/2 tsp of baking soda and 1 cup of semi sweet chocolate chips.
| Original Ingredient | Substitute | Why It Works |
|---|---|---|
| Dutch processed Cocoa | Natural Cocoa Powder | Higher acidity, lighter color; Note: Adds a slight tang |
| Sea Salt | Table Salt | Use half the amount; Note: Provides a sharper saltiness |
| Semi sweet Chips | Dark Chocolate Chunks | Higher cocoa content; Note: Creates larger pools of melted chocolate |
| Brown Sugar | Coconut Sugar | Similar moisture; Note: Adds a hint of caramel/nutty flavor |
Equipment Needed for Success
You don't need a pantry full of gadgets, but a few specific tools make the "presentation" side of things much easier. A good 8x8 inch square baking pan is non negotiable here. If you go larger, they’ll be too thin; if you go smaller, the middle will never set.
I highly recommend using a stand mixer or a sturdy electric hand mixer for the cookie dough, but the brownie base should really be done by hand with a whisk to avoid over mixing. You'll also want some parchment paper. This is the secret to getting those clean, sharp edges when you slice them.
If you like a more uniform look, a small cookie scoop (about 1 tablespoon size) helps you place the cookie dough evenly across the top.
The Cooking Process
- Prep the heat. Preheat your oven to 350°F (175°C). Line your 8x8 inch pan with parchment paper, making sure it hangs over the sides like a little sling.
- Start the brownies. In a large glass bowl, whisk the 115g melted butter and 1 cup granulated sugar. Do this for 2 full minutes until the mixture looks slightly gritty but combined.
- Incorporate the eggs. Add the 2 eggs and vanilla. Whisk vigorously until the batter turns pale and glossy. This is where that crackly top is born.
- Fold the chocolate. Sift in the 1/2 cup cocoa powder, 65g flour, and sea salt. Use a spatula to gently fold until no dry streaks remain.
- Pour and smooth. Spread the brownie batter into your prepared pan. It will be thick and velvety. Smooth it into the corners.
- Cream the cookie base. In a separate bowl, beat the 85g softened butter with the brown and granulated sugars until light and fluffy.
- Finish the dough. Add the egg to the cookie mixture, then stir in the 160g flour, baking soda, and chocolate chips until a thick, tacky dough forms.
- The layering trick. Use a scoop to drop dollops of cookie dough onto the brownie base. Space them out like little islands.
- The gentle press. Lightly press the dough balls down with your fingertips until they are slightly flattened but not submerged.
- Bake and cool. Bake for 25 minutes. The cookies should be golden and the brownies set. Let them cool completely in the pan trust me, if you cut them hot, they’ll just be a delicious pile of mush.
Precision Checkpoints for the Best Texture
To ensure your Fudgy Browkies are perfect every time, keep these three numeric markers in mind. First, the butter for the cookies must be exactly room temperature around 68°F (20°C). If it's too melty, the cookies will spread into one big sheet.
Second, your whisking time for the brownie eggs and sugar should be exactly 120 seconds. Finally, the internal temperature of the center, if you’re using a probe, should hit 190°F (88°C) for that "fudgy but safe" middle.
Fixing Common Baking Problems
Sometimes things go south in the kitchen. Maybe your oven runs hot, or you accidentally used cold eggs. Don't panic; most "fails" are still edible and easily fixed for the next round.
Why Your Layers Merged
If your cookie dough sank into the brownie batter, it usually means your brownie base was too thin or your cookie dough was too warm. If you find your cookie dough is very soft, pop it in the fridge for 10 minutes before scooping it onto the brownies.
This gives the fats time to firm up so the dough sits proudly on top.
Fixing Dry or Crumbly Textures
A dry brookie is usually the result of over baking. Remember, these will continue to cook in the pan as they cool. If they look "done" in the oven, they might be overdone by the time you eat them. Look for the edges to be firm but the very center to still have a slight wobble.
| Problem | Root Cause | Solution |
|---|---|---|
| Cookies are burnt | Oven rack is too high | Bake on the middle rack only |
| Brownies are greasy | Butter wasn't fully emulsified | Whisk eggs and sugar more vigorously |
| Dough is too sticky | Flour was measured by cup, not weight | Use a kitchen scale for 160g exactly |
Preventive Success Checklist
- ✓ Always use room temperature eggs to ensure they emulsify with the butter properly.
- ✓ Sift your cocoa powder; Dutch processed cocoa is notorious for having tiny, stubborn lumps.
- ✓ Don't over mix the flour into the brownies; stop as soon as the last white streak disappears.
- ✓ Use the "parchment sling" method for easy removal and cleaner slicing.
- ✓ Let the pan cool for at least 1 hour before cutting to allow the fudgy center to set.
Scaling Your Batch Size
If you’re baking for a big party, you can easily double this recipe. Use a 9x13 inch pan instead of the 8x8. When you scale up, the cooking time usually increases by about 5-8 minutes. Keep an eye on the golden color of the cookies.
If you're scaling down for just two people, you can halve the recipe and bake it in a loaf pan, but keep the bake time around 20 minutes as the layers will be slightly deeper.
Speaking of sweet treats, if you find yourself with leftover chocolate chips, you should definitely try making my Chocolate Ball Candy. They are the perfect little bite to serve alongside these brookies for a full on dessert spread.
Myths About Brownie Consistency
Many people think that adding more flour makes a brownie "sturdier." In reality, it just makes them cakey and bread like. The "fudge" factor comes from the ratio of fat and sugar to flour. Another common myth is that you need baking powder for brownies. You don't!
The eggs provide all the lift you need for that dense, chewy crumb.
One more thing: people often say "melted chocolate is better than cocoa powder." While melted chocolate adds fat, cocoa powder actually provides a more intense, pure chocolate flavor because it lacks the extra sugar and milk solids found in bars. For these Fudgy Browkies, cocoa powder is the king.
Making This Your Own
If you need to adapt this for dietary needs, it's fairly straightforward. For a gluten-free version, a 1:1 gluten-free flour blend works wonders here because the recipe doesn't rely heavily on gluten structure.
If you’re looking for a nut free twist that still has a crunch, try topping the cookies with some crushed pretzels before baking.
If you enjoy making these sweet combinations, you might also love my Chocolate Covered Marshmallows. They share that same balance of soft and firm textures that make desserts so addictive.
Storage and Zero Waste Tips
These Fudgy Browkies stay fresh in an airtight container at room temperature for up to 4 days. If you want them to last longer, they freeze beautifully. Wrap individual squares in plastic wrap and then foil; they’ll stay perfect for up to 3 months.
When you're ready to eat one, just zap it in the microwave for 15 seconds for that "fresh from the oven" gooeyness.
Don't throw away the crumbs! If you have broken bits or "ugly" edges, crumble them up and use them as a topping for vanilla bean ice cream. You can even mix the crumbs into a milkshake for a "Brookie Blast" that will ruin all other milkshakes for you.
The Art of Plating
Since this recipe is all about "presentation," let's talk about how to serve it. Depending on the occasion, you can take these from "lunchbox snack" to "fine dining dessert" with just a few tweaks.
Level 1: The Simple Square
Cut the cooled slab into 16 even squares. Serve them on a wooden board or a plain white plate. This is perfect for a casual get together where people can just grab one and go.
Level 2: The Polished Bistro
Warm the square slightly and place it in the center of a shallow bowl. Dust the top with a tiny bit of powdered sugar and add a sprig of fresh mint. The contrast between the dark brownie and the white sugar looks incredibly professional.
Level 3: The Restaurant Masterpiece
Place a warm brookie on a dark slate plate. Add a generous scoop of sea salt caramel gelato on top. Drizzle with a homemade raspberry coulis to cut through the richness of the chocolate. Finish with a few shavings of dark chocolate and a sprinkle of Maldon sea salt.
| Feature | Simple | Polished | Restaurant |
|---|---|---|---|
| Garnish | None | Powdered sugar | Sea salt & Coulis |
| Temperature | Room Temp | Warm | Warm with Cold Gelato |
| Plate Type | Board | White Porcelain | Dark Slate |
By following these steps and paying attention to the little details like that 2 minute whisking session you'll create something that looks like it came from a professional bakery. These Fudgy Browkies are more than just a recipe; they're a crowd pleasing tradition waiting to happen in your kitchen.
Enjoy every fudgy, chewy bite!

Recipe FAQs
How to achieve the signature crackly brownie top?
Whisk the melted butter and granulated sugar together for at least 2 minutes. This process creates a stable meringue like layer on the surface of your batter before you add the dry ingredients.
Is it true that over mixing the flour makes the browkies tough?
Yes, this is correct. Excessive mixing develops gluten, which turns a fudgy, delicate brownie base into a chewy or bread like texture. Fold your dry ingredients just until they disappear into the batter.
How to ensure the cookie dough portion remains soft after baking?
Bake only until the cookie portions look set and golden at the edges. Pulling them from the 350°F oven at the 25-minute mark preserves the centers, which will continue to firm up as they cool in the pan.
How to get clean, professional cuts for all 16 servings?
Cool the bars completely in the pan before slicing. If you enjoy the precision of slicing dense, fudgy layers, you can see how the same fudge like consistency logic applies when shaping our no-bake treats.
Is a convection setting necessary for this recipe?
No, a standard bake setting works best. Convection fans can cause the cookie dough dollops to brown too quickly while the brownie base remains under baked in the center.
How to store browkies to maintain their texture?
Keep them in an airtight container at room temperature for up to 4 days. For longer storage, wrap individual bars in plastic and foil to keep them for up to 3 months in the freezer.
How to reheat a frozen browkie?
Microwave for 15 seconds to restore that fresh baked gooeyness. This short burst of heat softens the chocolate chips and brings the brownie base back to its ideal fudgy state.
Homemade Fudgy Browkies

Ingredients:
Instructions:
Nutrition Facts:
| Calories | 296 kcal |
|---|---|
| Protein | 3.6 g |
| Fat | 14.5 g |
| Carbs | 40.5 g |
| Fiber | 1.9 g |
| Sugar | 28.1 g |
| Sodium | 94 mg |
