Garlic Green Beans to Serve with Chicken and Dumplings
- Time: Active 10 minutes, Passive 0 minutes, Total 18 minutes
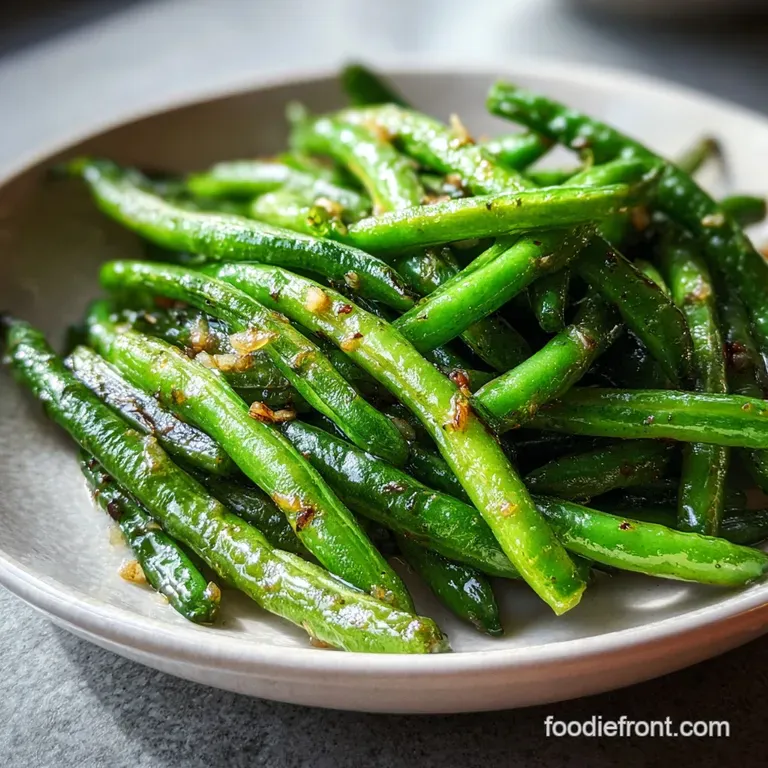
- Flavor/Texture Hook: Blistered skins with a salty sweet garlic crunch
- Perfect for: Weeknight family dinners and heavy comfort food pairings
- Savory Garlic Green Beans to Serve with Chicken and Dumplings
- The Thermodynamics of the Blister
- The Anatomy of a Great Bean
- Essential Elements and Easy Swaps
- Tools for High Heat Success
- Step by Step to Crispy Perfection
- Solving Common Green Bean Issues
- Adjusting for a Crowd
- Varying Your Flavor Profile
- Keeping Things Fresh and Tasty
- What to Eat With These Beans
- Recipe FAQs
- 📝 Recipe Card
Savory Garlic Green Beans to Serve with Chicken and Dumplings
The moment those damp green beans hit the shimmering avocado oil, you hear it that sharp, aggressive sizzle that sounds like a tiny round of applause. My kitchen suddenly fills with the scent of toasted garlic and sea salt air, a sharp contrast to the heavy, herbal aroma of the chicken soup simmering on the back burner.
This recipe delivers perfectly crisp tender Garlic Green Beans to Serve with Chicken and Dumplings, providing the exact textural "snap" needed to wake up your palate between bites of doughy goodness.
I remember the first time I hosted a big family Sunday dinner and realized my entire plate was various shades of beige. The Chicken and Dumplings were hearty, sure, but the meal felt heavy and flat until I threw together a quick batch of these beans. That bright green pop and the hit of garlic changed everything.
Now, I don't consider the meal complete without them. We are going for that blistered, almost charred skin that you usually only find in high end diners or authentic stir fry spots.
Forget the soggy, greyish beans of school cafeterias. We want beans that have a bit of fight left in them. This isn't about long braising; it's about speed, heat, and a sauce that clings to every crevice.
If you have a busy household like mine, you'll appreciate that these take less than 10 minutes of actual cooking time. You can whip them up while your dumplings are doing their final steam, ensuring everything hits the table piping hot.
The Thermodynamics of the Blister
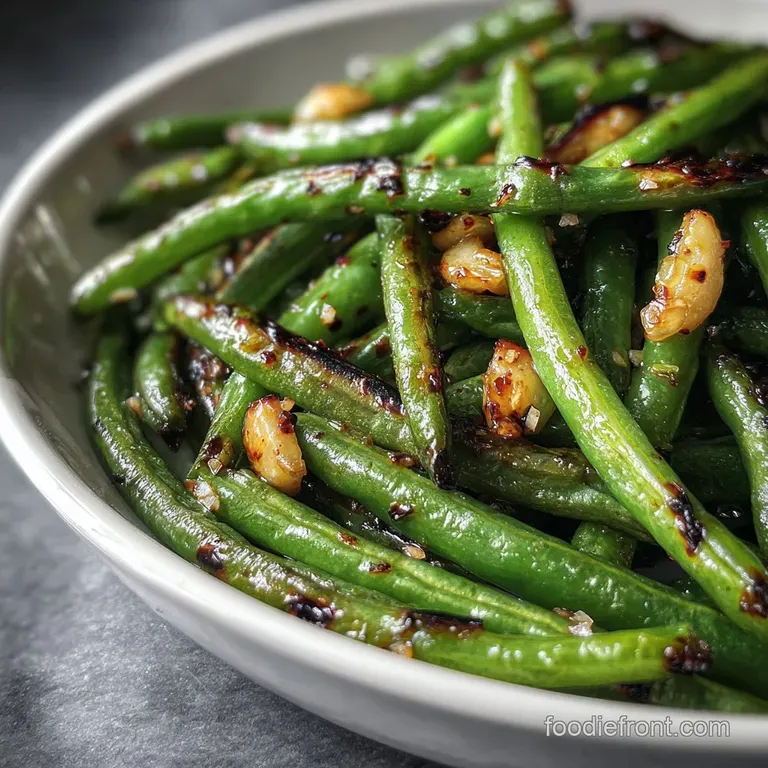
Heat Transfer: over High heat searing causes the moisture within the bean’s skin to evaporate instantly, creating "blisters" that hold onto sauce better than smooth skins. This rapid cooking preserves the chlorophyll, keeping the beans vibrantly green rather than dull olive.
| Bean Thickness | Desired Texture | Cook Time | Visual Cue |
|---|---|---|---|
| Thin (Haricot) | Snap tender | 4-5 mins | Light brown spots |
| Standard String | Crisp tender | 6-8 mins | Visible skin puckering |
| Thick/Wax | Soft crunch | 8-10 mins | Deep charring on sides |
This table helps you decide exactly when to pull your pan off the heat depending on what you found at the market. Thinner beans are elegant, but standard string beans hold up much better to the heavy nature of a dumpling dinner.
The Anatomy of a Great Bean
Finding the right balance of salt and sweet is what makes this side dish stand out. We aren't just dumping soy sauce in a pan; we are building a glaze that mimics the "dry fried" style often found in Sichuan cooking but adapted for a classic American dinner table.
| Ingredient | Science Role | Pro Secret |
|---|---|---|
| Avocado Oil | High Smoke Point | Prevents the oil from breaking down and smoking at the high temps needed for blistering. |
| Oyster Sauce | Emulsifier | Contains natural starches that help the sauce "velvet" onto the smooth bean surface. |
| Granulated Sugar | Caramelization | Lowers the temperature required for the Maillard reaction, giving you better color faster. |
Selecting your ingredients with a bit of "why" in mind ensures you don't end up with a watery mess at the bottom of the bowl.
Essential Elements and Easy Swaps
To get that restaurant style finish, you need 1 lb fresh string beans, ends trimmed and patted dry. Moisture is the enemy of the sear, so if they are wet, they will steam instead of blister. You also need 6 cloves fresh garlic, smashed and roughly minced.
Don't use the jarred stuff here; the flavor profile is completely different and often too acidic.
- 1 lb fresh string beans: Why this? Fresh beans provide the essential snap and structural integrity under high heat. Substitute: Frozen whole beans (thawed and dried completely).
- 6 cloves fresh garlic: Why this? Garlic creates the aromatic base and crispy bits that cling to the beans. Substitute: 1.5 tsp garlic powder (add at the very end to avoid burning).
- 1.5 tbsp oyster sauce: Why this? Provides the thick, savory body for the glaze. Substitute: Vegetarian stir fry sauce or Hoisin.
- 1 tsp light soy sauce: Why this? Adds essential salinity without darkening the beans too much. Substitute: Tamari for a gluten-free option.
- 0.5 tsp toasted sesame oil: Why this? Adds a deep, nutty aroma as a finishing touch. Substitute: Walnut oil or skip entirely.
- 0.25 tsp granulated sugar: Why this? Balances the salt and helps the garlic brown. Substitute: Honey or maple syrup.
- 2 tbsp avocado oil: Why this? Allows for over high heat cooking without burning. Substitute: Grapeseed oil or canola oil.
Chef Tip: Freeze your garlic for 5 minutes before mincing. It firms up the cloves, allowing you to get those tiny, uniform pieces that brown evenly without turning into a sticky paste on your knife.
Tools for High Heat Success
You don't need a kitchen full of gadgets for this. A heavy bottomed skillet is your best friend here. A cast iron pan or a carbon steel wok works best because they retain heat even when you dump a pound of cold vegetables into them.
If you use a thin non stick pan, the temperature will drop too quickly, and you'll lose that "shatter crisp" skin.
A pair of long handled tongs is also vital. You’ll be moving these beans constantly to ensure they don't burn on one side while staying raw on the other. Finally, a small stainless mixing bowl for pre mixing your sauce components is better than trying to measure them over the steaming pan.
It prevents the sugar from clumping and ensures the sesame oil is evenly distributed.
step-by-step to Crispy Perfection
- Prep the beans. Wash the 1 lb fresh string beans and trim the stem ends. Pat them dry with a lint free towel until no moisture remains. Note: Water causes oil splatter and prevents charring.
- Mix the glaze. In a small bowl, whisk 1.5 tbsp oyster sauce, 1 tsp light soy sauce, 0.5 tsp toasted sesame oil, and 0.25 tsp granulated sugar.
- Heat the pan. Set your skillet over medium high heat and add 2 tbsp avocado oil. Wait 2 minutes until the oil shimmers and wisps of smoke appear.
- Flash sear. Carefully add the beans to the pan. Listen for a loud, aggressive sizzle.
- Blister the skins. Use tongs to toss the beans every 30 seconds. Cook for 5 minutes until the skins look puckered and slightly charred.
- Create the garlic well. Push the beans to the outer edges of the pan, leaving a clear space in the center.
- Sauté the aromatics. Drop the 6 cloves of minced garlic into the center. Cook for 30-45 seconds until the garlic is fragrant and pale golden.
- Incorporate the sauce. Pour the prepared sauce mixture directly over the garlic.
- The final toss. Move the beans back into the center and toss vigorously for 1-2 minutes. Cook until the sauce thickens and glazes every bean.
- Serve immediately. Move to a warm plate to prevent the residual heat from overcooking the beans into softness.
Solving Common Green Bean Issues
One of the biggest letdowns is a plate of limp, oily vegetables. If your beans aren't "shattering" when you bite into them, it usually comes down to temperature control or hidden moisture. Similar to the technique used in our One Pot Chicken recipe, heat management is the difference between a soggy mess and a professional finish.
Why Your Beans Are Soggy
If the beans look wet and dull instead of charred, your pan wasn't hot enough or you overcrowded it. When too many beans hit a lukewarm pan, they release their internal moisture as steam. This "steams" the bean from the outside in, destroying the crunch.
Always work in batches if your pan isn't large enough to hold the beans in a single, somewhat loose layer.
Bitter Garlic Aftertaste
Garlic turns bitter the second it crosses the line from golden to dark brown. Because we are working with high heat, timing is everything. If you add the garlic at the start with the beans, it will burn long before the beans are cooked.
Adding it to a "well" in the center near the end of the process protects it just enough to mellow the raw bite without scorching the sugars.
| Problem | Root Cause | Solution |
|---|---|---|
| Tough/Stringy | Old produce | Remove the "string" from the side or use younger beans. |
| Salty/Acidic | Too much soy | Add a pinch more sugar or a splash of water to dilute. |
| Gray color | Overcooked | Reduce cook time by 2 minutes; use an ice bath if prepping ahead. |
Common Mistakes Checklist
- ✓ Pat the beans completely dry (prevents steaming).
- ✓ Ensure the oil is "shimmering" before adding vegetables.
- ✓ Don't mince the garlic too small; "rough mince" stands up better to heat.
- ✓ Use a heavy pan like cast iron to maintain constant temperature.
- ✓ Keep the beans moving to ensure even blistering on all sides.
Adjusting for a Crowd
If you are doubling this recipe for a big family gathering, don't just throw 2 lbs of beans into the pan at once. The temperature will plummet, and you’ll lose that beautiful blister. Instead, sear the beans in two separate batches with half the oil each time.
Once both batches are blistered and removed, wipe the pan, add a tiny bit of fresh oil, and cook all the garlic and sauce together. Toss all the beans back in at the very end just to coat them.
For those cooking for just one or two, you can easily halve the recipe. However, keep the sauce measurements almost the same maybe 1 tbsp of oyster sauce instead of 1.5. A tiny bit of extra glaze never hurt anyone, and it’s harder to emulsify very small amounts of sauce in a large, hot pan.
Varying Your Flavor Profile
If you want a bit of heat, adding a teaspoon of red chili flakes to the garlic well creates a spicy version similar to Chinese garlic green beans. For a more sophisticated twist, you could even try using black garlic green beans by swapping the fresh garlic for fermented black garlic, which adds a balsamic like sweetness that pairs beautifully with the creaminess of the dumplings.
If you are looking for something faster on a weeknight, you might be tempted to use canned goods. While fresh is best for this specific texture, you can learn How to Season recipe for canned beans to get the most out of your pantry staples when you're in a pinch.
Keeping Things Fresh and Tasty
Storage: These beans are best eaten immediately to maintain that snap. However, you can store leftovers in an airtight container in the fridge for up to 3 days. Note that the garlic will intensify in flavor overnight, and the beans will lose their crispness, becoming more "velvety" and soft.
Reheating: Avoid the microwave if you can. It will turn the beans into rubber. Instead, toss them back into a dry, hot skillet for 2 minutes. This helps re crystallize the sugars in the glaze and brings back a bit of the surface tension.
Zero Waste: Don't throw away those trimmed stem ends! If you are making the Chicken and Dumplings from scratch, toss those green bean ends into your stock pot along with your onion skins and carrot peels. They add a subtle, earthy sweetness to the broth that deepens the overall flavor of the soup.
What to Eat With These Beans
While these are designed specifically as Garlic Green Beans to Serve with Chicken and Dumplings, their versatility is incredible. They act as a bridge between the rich, fatty protein and the starchy sides. The hit of umami from the oyster sauce complements the savory notes in the chicken broth perfectly.
If you find yourself with extra beans and want a different main course, they also pair wonderfully with a Marry Me Chicken recipe. The acidity in some chicken recipes balances the salty sweet glaze of the beans. Whether it's a holiday spread or a simple Tuesday night, these beans provide that essential "something green" that makes a homemade meal feel complete and thoughtful. Stay hearty, keep the heat high, and enjoy that perfect snap!

Recipe FAQs
What would be a good side dish for chicken and dumplings?
A contrasting bright, crisp vegetable is ideal. Chicken and dumplings are very soft and hearty, so a dish that offers texture and acidity, like these blistered garlic green beans, cuts through the richness perfectly.
Can you put green beans in chicken and dumplings?
No, it is generally not recommended for the classic version. While some rustic variations include vegetables, adding them directly into the stew often results in overcooked, mushy beans that dilute the dumpling texture.
What meat goes well with garlic green beans?
Pork, simple roasted poultry, or pan-seared white fish pair excellently. The savory, slightly sweet garlic glaze complements rich meats. If you are looking for a quick poultry alternative, try our Teriyaki Chicken and recipe for similar flavor profiles.
What vegetables usually go in chicken and dumplings?
Carrots, celery, and onions form the standard aromatic base. These are typically sautéed before the liquid is added to create the rich stock foundation for the dish.
How to ensure my green beans are blistered and not soggy when pan-searing?
Ensure your oil is shimmering and the pan is screaming hot before adding the beans. If the oil isn't hot enough, the moisture trapped inside the bean releases as steam, preventing the necessary high heat sear to create the blistered skin.
Is it true you should cook frozen green beans the same way as fresh?
False. Frozen green beans require thawing and drying first. Frozen vegetables release significantly more surface water than fresh ones, so you must thoroughly pat them dry before introducing them to high heat, or they will steam.
How can I make my green bean garlic sauce stick better to the vegetable?
Incorporate a natural emulsifier into your sauce mixture. Ingredients like oyster sauce contain starches that help the liquids cling to the smooth surface of the beans as they reduce. If you enjoyed mastering texture control here, see how the same principle applies when balancing starches in our Crispy Roasted Garlic Potatoes recipe.
Garlic Green Beans Side

Ingredients:
Instructions:
Nutrition Facts:
| Calories | 114 kcal |
|---|---|
| Protein | 2.6 g |
| Fat | 7.9 g |
| Carbs | 10.4 g |
| Fiber | 3.1 g |
| Sugar | 2.4 g |
| Sodium | 251 mg |
