Chocolate Cottage Cheese Mousse: Silky and Rich
- Time: Active 5 minutes, Passive 15 minutes, Total 20 minutes
- Flavor/Texture Hook: Glass smooth, rich, and intensely chocolatey
- Perfect for: Post workout fuel or a quick weeknight sweet tooth fix
- Crafting Silky Chocolate Cottage Cheese Mousse
- What Actually Makes It Silky
- Ingredient Deep Dive Analysis
- Selecting the Best Elements
- Essential Tools for Success
- Step by Step Instructions
- Perfecting the Texture and Flavor
- Guidelines for Scaling
- Inventive Flavor Variations
- Storage and Sustainable Practices
- Debunking Kitchen Myths
- Expert Garnish and Color Strategy
- Pairing Ideas
- Recipe FAQs
- 📝 Recipe Card
Crafting Silky Chocolate Cottage Cheese Mousse
The first time I tried making a healthy chocolate mousse, it was a literal disaster. I’d seen people online just stirring cocoa powder into a bowl of cottage cheese, and I thought, "Sure, how hard can it be?" It was miserable.
I ended up with a bowl of cold, lumpy curds swimming in a thin, gritty brown liquid that tasted like sad intentions. The texture was so off putting that I almost gave up on the whole "healthy dessert" thing altogether.
I wanted that velvety, melt on-the tongue sensation you get from a French patisserie, not a bowl of chunky cheese.
But I knew there had to be a way to make it work. The problem isn't the cottage cheese itself; it’s the structure. Those curds are stubborn. If you don't break them down properly, they’ll never give you that glossy finish.
After experimenting with different blender speeds and chilling times, I found the secret. It’s all about the emulsification process. When you hit those curds with high velocity, you’re not just chopping them up; you’re forcing the fats and liquids to bond into a stable, airy cream.
This Chocolate Cottage Cheese Mousse is the result of that discovery. It’s thick enough to hold a spoon upright but light enough that it doesn't feel heavy in your stomach. We’re using Dutch processed cocoa for that deep, dark color and a touch of espresso powder to make the chocolate flavor really pop.
It’s an impressive little treat that comes together in five minutes, and honestly, no one will ever guess there’s a drop of cheese in it. It’s become my go to when I want something sweet but don't want to spend an hour in the kitchen.
What Actually Makes It Silky
- High Velocity Shearing: Rapid blender blades physically tear apart the casein curds, transforming them into a microscopic suspension of fat and protein.
- Cocoa Hydration: Allowing the mousse to sit for 15 minutes lets the dry cocoa particles fully absorb the moisture from the cottage cheese, thickening the texture.
- Fat Stabilization: Using whole milk (4%) cottage cheese provides enough lipid content to coat the cocoa solids, creating a mouthfeel that mimics heavy cream.
- Natural Emulsification: The maple syrup acts as a liquid binder, helping the espresso and vanilla integrate without breaking the smooth consistency.
| Method | Prep Time | Texture Result | Best Used For |
|---|---|---|---|
| High Speed Blender | 5 minutes | Glass smooth, airy | Gourmet presentation |
| Food Processor | 7 minutes | Thick, slightly dense | Quick snack prep |
| Manual Whisking | 15 minutes | Lumpy, liquidy | Avoid this method |
The difference between a "good" mousse and a "great" one often comes down to the temperature of your ingredients. If your cottage cheese is ice cold, the cocoa powder might clump. I’ve found that letting the cheese sit on the counter for just ten minutes before blending helps the powders incorporate much more smoothly.
Ingredient Deep Dive Analysis
| Component | Science Role | Pro Secret |
|---|---|---|
| Cottage Cheese | Provides the protein lattice and creamy base | Always use 4% fat for the best "clatter" on the spoon |
| Cocoa Powder | Adds structure and creates a firm "set" | Sift it first to avoid tiny pockets of dry powder |
| Maple Syrup | Provides hygroscopic moisture and sweetness | Dark Grade A syrup adds a subtle caramel undertone |
When you are looking for more cottage cheese baking tricks, you'll notice that the moisture content is everything. For this mousse, the water to fat ratio in the 4% whole milk version is what gives us that decadence. If you go fat free, you'll end up with something more like a runny yogurt, which just doesn't hit the same way.
Selecting the Best Elements
- 1.5 cups (400g) Whole Milk (4%) Cottage Cheese: This is your foundation. Look for "small curd" as it blends faster, but the fat content is the non negotiable part. Why this? High fat ensures a velvety finish and prevents a watery, grainy texture.
- 0.25 cup (25g) Dutch processed cocoa powder: This is darker and less acidic than natural cocoa. Why this? It provides a smoother, more mellow chocolate flavor without the bite.
- 3 tbsp (60g) Pure Maple Syrup: Use the real stuff, not the flavored pancake syrup. Why this? It blends instantly without leaving a gritty sugar residue.
- 1 tsp Pure Vanilla Bean Paste: You can see the little black flecks. Why this? It offers a much deeper floral aroma than standard extract.
- 0.5 tsp Espresso Powder: Don't worry, it won't taste like coffee. Why this? Caffeine and coffee notes amplify the chocolate’s natural richness.
- 1 pinch Flaky Sea Salt: Just a tiny bit. Why this? Salt cuts through the dairy and heightens the perception of sweetness.
- 0.25 cup Fresh Raspberries: For that bright red pop. Why this? The acidity balances the heavy creaminess of the mousse.
- 1 tsp Cacao Nibs: For the crunch. Why this? It adds a sophisticated, bitter contrast to the sweet base.
Essential Tools for Success
You don't need a professional kitchen, but a high speed blender is your best friend here. A standard smoothie blender (like a NutriBullet or Ninja) works perfectly because the small cup size forces the ingredients down into the blades.
If you use a massive 64 ounce blender jar, you might find the 1.5 cups of ingredients get lost under the blades. In that case, you'll need to be very diligent with your spatula.
A good silicone spatula is the unsung hero of this recipe. You want one that is firm enough to scrape the thick mousse out of the corners but flexible enough to get every last drop. Since this mixture is quite thick, a "spoonula" style works best. Also, have two small glass jars or ramekins ready.
Glass is better than plastic here because it holds the cold better during that 15 minute "cook" time in the fridge.
step-by-step Instructions
- Place the 1.5 cups of cottage cheese, 0.25 cup cocoa powder, 3 tbsp maple syrup, 1 tsp vanilla paste, and 0.5 tsp espresso powder into your blender. Note: Adding liquids first helps the blades spin more easily.
- Secure the lid tightly and start the blender on the lowest setting, gradually increasing to high velocity.
- Blend on high for about 45 seconds until the mixture looks like liquid silk.
- Stop the blender and use your silicone spatula to scrape down the sides. Note: Check for any hidden "cocoa pockets" near the base of the blades.
- Pulse the blender 5 or 6 more times to ensure total emulsification.
- Taste a tiny bit of the mousse to check for salt balance; add the pinch of flaky sea salt now if needed.
- Divide the mixture evenly into two small glass ramekins or jars.
- Place the jars in the refrigerator for 15 minutes until the surface feels slightly firm to the touch.
- Garnish the top with the 0.25 cup of fresh raspberries and 1 tsp of cacao nibs.
- Serve immediately while the mousse is chilled and the garnishes are fresh.
Perfecting the Texture and Flavor
To Achieve a Glass Smooth Finish
If you find your mousse still has tiny specks, it's usually because the cottage cheese was too cold or the blender wasn't on high enough. To fix this, let the mixture sit in the blender for two minutes to let the cocoa soften the cheese, then blast it again on high for 30 seconds.
The friction from the blades actually warms the fats slightly, allowing them to merge into that glass smooth finish we're looking for.
To Neutralize the Tangy Profile
Some brands of cottage cheese are tangier than others. If you find the "cheesy" taste too prominent, add an extra half teaspoon of vanilla paste or a tiny splash more maple syrup. The espresso powder also does a great job of masking the lactic acid tang, so don't skip it!
| Problem | Root Cause | Solution |
|---|---|---|
| Runny Mousse | Too much liquid or low-fat cheese | Add 1 tsp of chia seeds and blend again |
| Gritty Texture | Cocoa powder didn't dissolve | Let sit for 5 mins and re blend on high |
| Too Salty | Brand of cheese was high sodium | Increase maple syrup by 1 tsp to balance |
The "Flash Chill" in the fridge is the secret to getting that mousse like body. While 15 minutes is the minimum, 30 minutes is even better. This gives the proteins time to realign and the cocoa solids time to "swell," which naturally thickens the entire bowl without needing gelatin or cornstarch.
Common Mistakes Checklist
- ✓ Avoid using 0% or fat free cottage cheese; it will never become truly creamy.
- ✓ Don't skip the scrape down step; cocoa powder loves to hide in the corners of the blender.
- ✓ Ensure your espresso powder is "instant" and not actual coffee grounds, which will stay gritty.
- ✓ Garnish right before serving; raspberries will bleed juice into the mousse if left too long.
- ✓ Use Dutch processed cocoa for color; regular cocoa will look much lighter and more like milk chocolate.
Guidelines for Scaling
Scaling this recipe is incredibly easy since it’s a blender based dish. If you want to make a single serving, just cut everything in half. However, be careful with your blender size; half a portion might be too small for the blades to catch effectively.
In that case, a small immersion blender in a tall jar is your best bet.
When doubling the recipe for a dinner party, you can follow the measurements exactly. The only thing to watch for is the "air." When you blend a larger volume, you might incorporate too many air bubbles. To fix this, after blending on high, turn the speed to the lowest setting for 20 seconds to "knock out" the excess air, leaving you with a denser, more decadent ganache style treat.
Inventive Flavor Variations
For a Fiber Boosted Crunch
If you want some extra texture, try adding a tablespoon of chia seeds during the final 10 seconds of blending. They won't disappear completely, but they'll give the mousse a "tapioca pudding" vibe while adding a massive boost of fiber.
It’s a great way to make this feel more like a filling breakfast than just a dessert.
For the Ultra Low Carb Lifestyle
You can easily swap the maple syrup for a liquid monk fruit or allulose sweetener. Just be careful with the conversion; usually, you only need a few drops of concentrated liquid sweetener to match the sweetness of 3 tablespoons of syrup.
This turns the dish into a keto friendly powerhouse that keeps you in ketosis while satisfying that chocolate craving.
The Spicy Mexican Chocolate Twist
Add a quarter teaspoon of ground cinnamon and a tiny pinch of cayenne pepper to the blender. The heat from the cayenne resonates beautifully with the dark cocoa and the creamy cheese base. It’s a sophisticated variation that feels very high end.
Storage and Sustainable Practices
Storage Guidelines: Keep your mousse in an airtight container in the fridge for up to 4 days. Because it’s dairy based, it will eventually start to "weep" (release a little liquid) after a few days. If this happens, just give it a quick stir with a spoon to re incorporate the moisture.
I wouldn't recommend freezing this; the ice crystals will break the emulsion, and when it thaws, the texture will be grainy and separated.
Zero Waste Tips: If you have a tablespoon or two of mousse left over that isn't quite enough for a serving, don't toss it! It makes an incredible fruit dip for apple slices or strawberries.
Alternatively, you can stir it into your morning oatmeal or smear it onto a piece of toasted sourdough for a high protein "chocolate toast." If you have leftover raspberries that are starting to get soft, mash them up with a fork and swirl them into the mousse before chilling to create a marbled effect.
Debunking Kitchen Myths
One common myth is that you need heavy cream or eggs to make a "real" mousse. While traditional French mousse relies on whipped egg whites or cream for aeration, the high speed blending of cottage cheese creates a similar micro bubble structure that mimics that lightness.
The protein in the cheese acts as the stabilizer, so you don't need the extra fat or the risk of raw eggs.
Another misconception is that you can't use cocoa powder to get a rich result and that you must melt real chocolate. While melted chocolate is great, cocoa powder actually provides a more intense "chocolate" hit because it lacks the cocoa butter and sugar found in bars.
By using Dutch processed powder and espresso, we’re getting the maximum flavor profile without the temperamental nature of melting chocolate.
Expert Garnish and Color Strategy
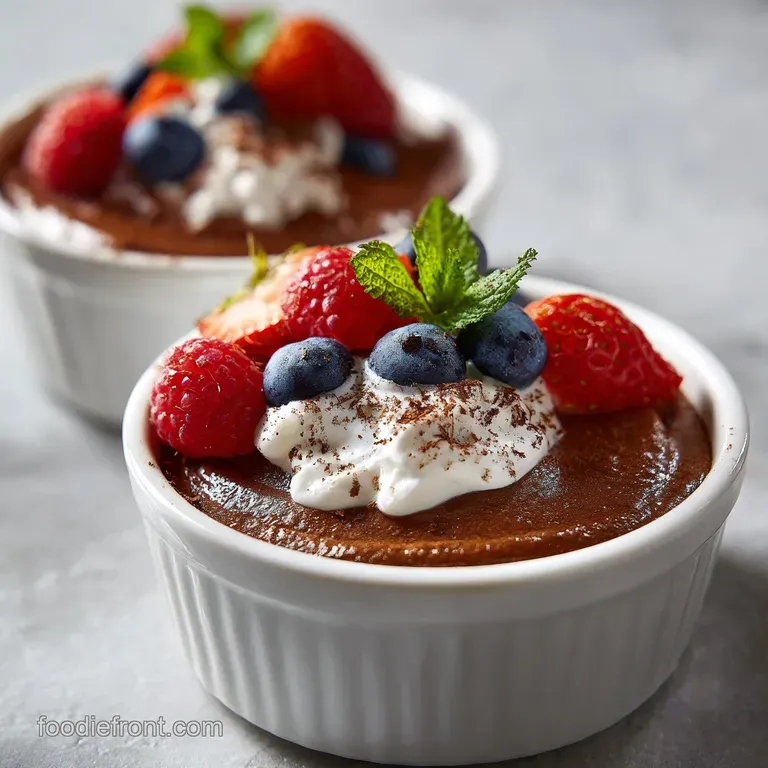
To make this look like it came from a professional kitchen, we use a specific color balance strategy. The deep, dark brown of the mousse is our base. We need three distinct color accents to make the eyes pop before the first bite.
- Accent 1: Ruby Red: The fresh raspberries provide a vibrant contrast. Place them in a cluster on one side of the ramekin rather than scattering them. This creates a focal point.
- Accent 2: Matte Earthy Brown: The cacao nibs provide texture and a different shade of brown. Sprinkle these over the center to bridge the gap between the red fruit and the dark mousse.
- Accent 3: Bright Herbaceous Green: Even though it's not in the main ingredients, a single tiny sprig of fresh mint or a dusting of bright green pistachio flour adds that final "chef's kiss" of color. Add these only at the very last second so they stay crisp.
The timing of these additions is crucial. Add the raspberries and nibs after the 15 minute chill but right before you carry the dishes to the table. If the raspberries sit on the mousse in the fridge, they can lose their shine and start to look dull.
A fresh garnish sends the message that the dish was made just for that moment.
Pairing Ideas
This mousse is quite rich, so it pairs beautifully with something light and effervescent. A glass of sparkling water with a lime wedge is perfect for clearing the palate between bites.
If you're serving this as part of a larger dessert spread, it sits wonderfully next to a plate of almond biscotti or light shortbread cookies. The crunch of the cookie is the perfect foil for the silky smoothness of the cheese base.
For a more indulgent pairing, try serving it alongside a small scoop of tart lemon sorbet. The sharp citrus notes cut right through the density of the chocolate, making every bite feel fresh. It’s all about finding that balance between the heavy, protein rich mousse and something bright and acidic.
Honestly, though, it’s just as good standing alone as a midnight snack straight out of the jar!

Recipe FAQs
How do I make chocolate mousse with cottage cheese?
Combine the cottage cheese, cocoa powder, maple syrup, vanilla bean paste, and espresso powder in a high speed blender. Blend on high velocity until the mixture appears smooth, then continue for an additional 30 seconds to ensure a glass smooth finish.
Is cottage cheese chocolate mousse good for you?
Yes, it is a protein dense alternative to traditional whipped desserts. By using whole milk cottage cheese, you get a satisfying texture packed with nutrients instead of relying solely on heavy cream or sugar laden bases.
How to make 2 ingredient mousse?
Start by blending cottage cheese and cocoa powder until completely smooth. While the base recipe requires a few extra flavor boosters like maple syrup and espresso powder for depth, these two items are the functional requirements for achieving the mousse structure.
Why is my cottage cheese chocolate mousse runny?
You likely used a low-fat or fat-free cottage cheese variant. Always use 4% whole milk cottage cheese, as the higher fat content is essential for a stable, thick emulsion; if you enjoyed nailing this creamy dessert structure, you will find that same fat-balance principle applies to achieving the perfect set in our other protein rich recipes.
Is it true I must whip this like egg-based mousse?
No, this is a common misconception. Unlike traditional mousse that requires folding in airy proteins, this recipe relies on high speed blending to reach a silk like consistency, making it significantly faster and easier to prepare.
Can I keep this in the freezer for later?
No, avoid freezing your mousse. The freezing process creates ice crystals that destroy the delicate emulsion, leading to a grainy, separated texture once it thaws.
How to ensure a smooth, grit free texture?
Use a silicone spatula to scrape down the sides of the blender during the process. This prevents dry cocoa pockets from remaining and ensures every bit of the mixture is fully incorporated into the final, velvety emulsion.
Chocolate Cottage Cheese Mousse
Ingredients:
Instructions:
Nutrition Facts:
| Calories | 312 kcal |
|---|---|
| Protein | 24.6 g |
| Fat | 10.5 g |
| Carbs | 33.8 g |
| Fiber | 4.2 g |
| Sugar | 25.1 g |
| Sodium | 420 mg |
