Simple Vanilla Mug Cake Recipe: Velvety Crumb
- Effort/Time: 3 minutes total / Low effort
- Flavor Hook: Rich Madagascar vanilla notes with a buttery, melt-in-your-mouth finish
- Perfect for: Late-night cravings, solo celebrations, and kid-friendly dessert sessions
- Mastering the Ultimate simple vanilla mug cake recipe
- The Science of Instant Crumb Structure
- Technical Specifications and Yield Data
- The Pantry Architecture: Essential Components and Chemistry
- Necessary Culinary Apparatus for Microwave Success
- The Three-Minute Assembly and Activation Protocol
- Navigating Texture Failures and Structural Collapse
- Artistic Interpretations and Component Swaps
- ⚗️ The Scaling Lab: The Physics of Quantity
- Common Myths
- Storage & Zero Waste Philosophy
- Recipe FAQs
- 📝 Recipe Card
Mastering the Ultimate simple vanilla mug cake recipe
We have all been there: it is 10 PM, the sugar craving hits like a freight train, and you reach for the nearest mug. You throw in some flour, a splash of milk, and hit "start," only to pull out a gray, rubbery puck that tastes like a wet sponge.
It is a heartbreaking waste of King Arthur All-Purpose Flour and your precious time. There is nothing worse than that first bite of a dessert that feels more like a pencil eraser than a cake, leaving you with a dirty mug and unfulfilled expectations.
I will be the first to admit that I spent my entire first year of college trying to "wing" this. I destroyed dozens of mugs by overcooking the batter or forgetting the leavening agent entirely, thinking I could just "feel" the ratios.
I once served a "lava cake" to a date that was actually just raw, hot flour paste because I didn't understand how microwave radiation interacts with sugar molecules. It was embarrassing, messy, and a total culinary failure that taught me one thing: even the simplest treats require a bit of scientific respect.
The secret to a truly impressive result isn't just luck; it is understanding the physics of steam based leavening. Because a microwave cooks from the inside out by vibrating water molecules, we aren't relying on traditional oven convection.
Instead, we are using the rapid expansion of water vapor trapped within a gluten and fat network to create a shattering, tender crumb. When you nail this simple vanilla mug cake recipe, the result is a velvety, gold hued sponge that rivals any oven baked cupcake, provided you respect the chemistry of the ingredients.
The Science of Instant Crumb Structure
- Starch Gelatinization: As the microwave excites water molecules in the 3 tbsp (45ml) Whole Milk, the starch granules in the flour swell and burst, creating a stable, set structure in seconds.
- Carbon Dioxide Release: The 1/4 tsp (1.25g) Baking Powder reacts instantly to the heat and moisture, releasing CO2 bubbles that get trapped by the protein in the flour.
- Hygroscopic Moisture Retention: Granulated sugar attracts and holds onto water, ensuring the cake remains moist even as the microwave tries to evaporate the liquid.
- Lipid Enclosure: Melted butter coats the flour proteins, limiting gluten development so the cake stays tender rather than becoming tough and bread like.
Technical Specifications and Yield Data
When you are preparing this simple vanilla mug cake recipe, precision is your best friend. This is a single serving masterpiece designed for high speed execution without sacrificing the quality of a traditional dessert.
| Specification | Value |
|---|---|
| Yield | 1 Serving |
| Prep Time | 2 minutes |
| Cook Time | 1 minute |
| Total Energy | 342 kcal |
| Optimal Vessel | 350ml Ceramic Mug |
The Pantry Architecture: Essential Components and Chemistry
Building a simple vanilla mug cake recipe requires a specific understanding of how each pantry staple contributes to the final architecture of the crumb. We aren't just mixing things; we are building a temporary emulsion that must survive intense electromagnetic radiation.
Ingredient Chemistry Breakdown
| Ingredient | Chemical/Physical Role (Science) | The Pro Secret (Why This Matters) |
|---|---|---|
| 4 tbsp All-Purpose Flour | Provides the structural protein (gluten) network | Too much whisking creates a "bread" texture; stop when just combined. |
| 3 tbsp Whole Milk | Solvent for sugar and hydration for starch gelatinization | Use full fat milk for a silkier mouthfeel and better fat-to-protein ratio. |
| 1/4 tsp Baking Powder | Chemical leavener that reacts to heat | Ensure it's fresh; old powder leads to a dense, leaden cake that won't rise. |
| 1 tbsp Melted Butter | Interferes with gluten strands (shortening) | Adds the "maillard adjacent" richness that oil-based mug cakes lack. |
The Components:
- 4 tbsp (30g) All-Purpose Flour: Why this? Provides the protein structure necessary to trap steam bubbles during the rapid rise.
- Substitute: 1:1 gluten-free Flour Blend (Look for brands with Xanthan Gum for similar elasticity).
- 2 tbsp (25g) Granulated Sugar: Why this? Beyond sweetness, sugar interferes with gluten development, keeping the "simple vanilla mug cake recipe" soft.
- Substitute: Coconut Sugar (adds a deeper, caramel like note and slightly denser crumb).
- 1/4 tsp (1.25g) Baking Powder: Why this? The primary engine for the 60 second rise.
- Substitute: 1/8 tsp Baking Soda + 1/4 tsp Lemon Juice (The acid activates the base).
- 1 pinch Salt: Why this? Sharpens the vanilla profile and balances the sweetness.
- Substitute: Diamond Crystal Kosher Salt (provides a cleaner salt profile than table salt).
- 3 tbsp (45ml) Whole Milk: Why this? Provides the liquid medium for the chemical reactions to occur.
- Substitute: Oat Milk (keeps the fat content high while adding a subtle toasted grain flavor).
- 1 tbsp (15ml) Melted Butter: Why this? Fat coats the tongue and carries the vanilla flavor throughout the palate.
- Substitute: Neutral Oil (Grapeseed or Canola). Note: Results in a moister but less "bakery flavored" cake.
- 1/2 tsp (2.5ml) Pure Vanilla Extract: Why this? The soul of the dish; provides the essential aromatic compounds.
- Substitute: Vanilla Bean Paste (adds beautiful black specks and a more intense floral aroma).
Necessary Culinary Apparatus for Microwave Success
To achieve a "Masterclass" level simple vanilla mug cake recipe, the tools you use are just as important as the ingredients. You want a vessel that manages heat distribution evenly to avoid "hot spots" that cause localized overcooking.
- Le Creuset 350ml Ceramic Mug: The thick walls of a high-quality ceramic mug retain heat better than thin porcelain, ensuring the bottom of your cake cooks at the same rate as the top.
- OXO Good Grips Mini Whisk: A fork works in a pinch, but a mini whisk aerates the dry ingredients and ensures no flour pockets remain at the bottom of the mug.
- KitchenAid Digital Scale: Measuring by weight (30g flour, 25g sugar) is the only way to ensure consistency. Volume measurements for flour can vary by up to 20% depending on how "packed" the spoon is.
- 1100 Watt Microwave: This recipe is calibrated for a standard high power microwave. If your microwave is 700 watts, you may need an extra 15 20 seconds.
The Three Minute Assembly and Activation Protocol

Follow these steps with precision. The order of operations is vital to preventing the gluten from becoming overworked before the heat hits.
- Whisk 4 tbsp (30g) All-Purpose Flour and 2 tbsp (25g) Granulated Sugar in your Le Creuset mug until the mixture looks like fine sand.
- Add 1/4 tsp (1.25g) Baking Powder and a pinch of Diamond Crystal Kosher Salt. Note: Distributing the leavener while dry prevents "clumped" air pockets.
- Pour in 3 tbsp (45ml) Whole Milk. Note: Hydrates the flour to start the protein alignment.
- Drizzle 1 tbsp (15ml) melted Land O'Lakes butter over the surface. Note: The fat creates a barrier that prevents the milk from over hydrating the flour.
- Stir in 1/2 tsp (2.5ml) Pure Vanilla Extract. Note: Vanilla is alcohol based and highly volatile; adding it late preserves the aroma.
- Mix with a mini whisk for 20 seconds until the batter is smooth and no dry streaks remain.
- Tap the mug firmly on the counter three times until large air bubbles rise to the surface and pop.
- Microwave on high for 60 seconds until the center looks matte and the cake pulls slightly away from the edges.
- Observe the rise; the cake should crest the top of the mug until the surface looks set but slightly springy.
- Rest for 2 minutes until the steam redistributes and the structure firms up.
Chef's Tip: Do not skip the resting phase! The cake continues to cook via residual heat (carry over cooking). If you eat it immediately, the texture will feel "gummy." If you want a refreshing drink to cut through the sweetness, a fresh homemade lemonade recipe provides the perfect acidic balance.
Navigating Texture Failures and Structural Collapse
The microwave is an unforgiving oven. Understanding the thermodynamics of this simple vanilla mug cake recipe helps you avoid the dreaded "mug-tastrophe."
Why Your Cake is Rubber Like
This is almost always a result of over mixing. When you whisk flour and milk, you develop gluten. In a traditional oven, this happens slowly. In a microwave, the rapid heat locks that gluten network into a tight, elastic bond before the sugar can soften it.
Troubleshooting Table
| Problem | Root Cause | The Fix | Pro Protocol |
|---|---|---|---|
| Rubbery/Tough | Over mixing or over cooking | Mix until just combined; reduce time by 10s | Use a toothpick; it should have a few moist crumbs. |
| Overflowing Mug | Mug too small or too much leavener | Use a 350ml+ mug; check baking powder measurement | Leave at least 2 inches of "headspace" in the mug. |
| Dry/Crumbly | Lack of fat or too much flour | Ensure you used a full 1 tbsp butter; weigh flour | Add 1 tsp of water to the batter if it looks like paste. |
Artistic Interpretations and Component Swaps
Once you master the base simple vanilla mug cake recipe, you can begin to layer flavors. This recipe is an impressive canvas for your "sweet tooth" creativity.
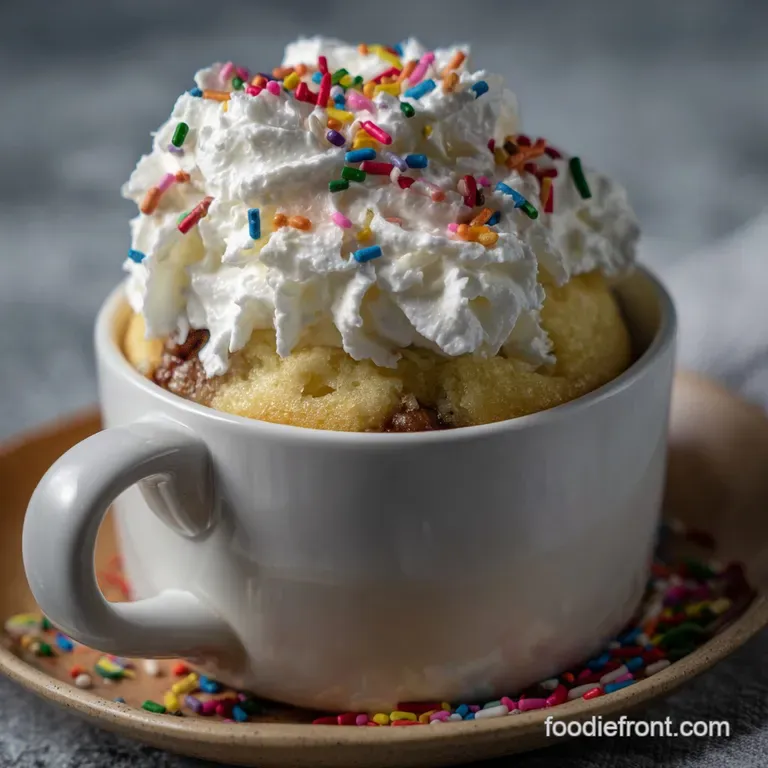
- The Confetti Twist: Fold in 1 tsp of rainbow sprinkles before cooking. The sugar in the sprinkles will melt slightly, creating "blooms" of color.
- The Deep Cocoa Variant: Swap 1 tbsp of flour for 1 tbsp of high-quality Dutch process cocoa powder. You may need an extra 1/2 tsp of milk to compensate for the cocoa's absorption.
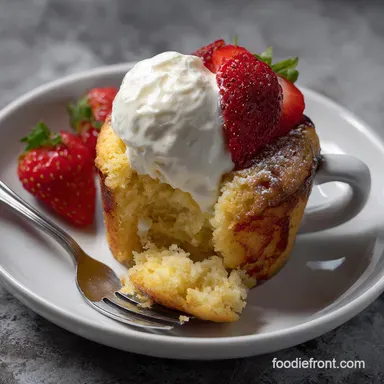
- The Fruit Fusion: Drop 3 fresh raspberries into the center of the batter. Pair this with a Simple Strawberry Banana Smoothie recipe for a quick afternoon treat.
Plating Levels for Impressive Presentation
| Level | Description | Plating Tweak |
|---|---|---|
| Simple | The "Midnight Snack" | Eat directly from the mug with a dusting of powdered sugar. |
| Polished | The "Friend Over" | Invert the mug onto a small saucer; top with a dollop of whipped cream. |
| Restaurant | The "Dinner Party" | Slice the cake into three discs; layer with macerated berries and a sprig of mint. |
⚗️ The Scaling Lab: The Physics of Quantity
Do not simply double this simple vanilla mug cake recipe in one mug. It will not work.
- The Square Cube Law: Doubling the volume in a single mug increases the depth significantly. The center will remain raw while the edges turn into carbon. Protocol: If you need two servings, use two separate mugs and microwave them one at a time.
- Flavor Saturation: If you decide to add spices (like cinnamon), scale to 1.5x (NOT 2x). Spices can become overpowering and bitter when concentrated in a small, steamed environment.
- Carry Over Cooking: A larger mass of cake retains more thermal energy. If you use a giant mug for a double batch, pull the cake 5 10 seconds earlier than you think, as it will continue to cook internally for several minutes.
Common Myths
- Myth: "You need an egg for a good mug cake."
- Truth: Eggs in a single serving microwave recipe often lead to a "rubbery" or "spongy" texture. The butter and milk provide enough protein and fat for a superior crumb.
- Myth: "Mug cakes are just bad versions of real cakes."
- Truth: When the hydration ratio is correct (like our 3 tbsp milk to 4 tbsp flour), the result is a delicate steamed pudding texture that is a legitimate dessert category of its own.
Storage & Zero Waste Philosophy
This simple vanilla mug cake recipe is designed for immediate consumption. However, if you find yourself with leftovers:
- Fridge: Wrap the mug in plastic wrap. It will stay moist for 24 hours. To reheat, microwave for 10 seconds with a teaspoon of water sprinkled on top to restore steam.
- Freezing: Not recommended. The cell structure of a microwave cake is more fragile than an oven baked one; freezing causes the moisture to expand and shatter the crumb, resulting in mush upon thawing.
💡 ZERO WASTE TIP: Don't discard slightly "off" vanilla extract that has lost its punch. Transform: Use it to soak the cake after cooking (like a Tres Leches). Science: The alcohol evaporates, leaving the concentrated vanillin behind to rehydrate the sponge.
Decision Shortcut
- If you want a richer cake, use 1 tbsp of heavy cream and 2 tbsp of milk.
- If you want a lighter cake, use 1/2 tsp of lemon juice to react with the baking powder.
- If you want a fudgy center, push a square of dark chocolate into the middle of the batter before microwaving.
Precision Checkpoints
- Weight: Flour must be exactly 30g to avoid a dry, dense result.
- Microwave Time: 60 seconds is the "sweet spot" for 1100W; if it looks wet, add 5 second intervals only.
- Resting: 120 seconds of rest is mandatory for the crumb to set.
Fresh vs. Shortcut Comparison
| Feature | Fresh (This Recipe) | Shortcut (store-bought Mix) |
|---|---|---|
| Texture | Velvety and light | Often gummy or overly chewy |
| Flavor | Pure vanilla and butter | Artificial aftertaste from preservatives |
| Customization | Infinite (extracts, spices) | Fixed flavor profile |
By following this simple vanilla mug cake recipe, you are no longer just "making a snack" you are executing a precision engineered dessert. The combination of high-quality ingredients like pure vanilla and the scientific application of microwave heat ensures an impressive result every single time.
Enjoy your sweet tooth fix!

Recipe FAQs
Is it okay to use almond milk instead of whole milk?
No, use whole milk for best results. Lower fat milks result in a drier, denser cake because the full fat content is crucial for coating the gluten strands and retaining moisture during microwaving.
How long should I microwave the cake for?
60 seconds on high power. Microwaves cook by exciting water molecules; cooking longer than 70 seconds often leads to rapid protein coagulation, resulting in a tough texture.
Can I use baking soda instead of baking powder?
Baking powder is mandatory for proper rise. Baking soda requires an acid (like buttermilk or lemon juice) to activate fully, whereas baking powder reacts immediately with the existing moisture and heat.
Why does my mug cake taste rubbery after cooking?
Over mixing created excessive gluten structures. Vigorous stirring aligns the flour proteins, which tighten into an elastic network when exposed to rapid microwave radiation.
- Mix only until streaks disappear
- Stop whisking when batter is smooth
- Use minimal strokes for incorporation
Is weighing ingredients strictly necessary for this recipe?
Unsalted butter allows for precision control. Measuring flour by volume varies significantly based on packing density, leading to incorrect hydration ratios in this high speed recipe.
Myth: A larger mug requires doubling the ingredients.
Myth: A larger mug means you can double the batch for efficiency. Reality: Doubling the volume increases the center depth, causing the edges to overcook before the center sets, leading to uneven texture.
Should I use vanilla extract or vanilla bean paste?
Vanilla bean paste yields deeper flavor. Extract relies on alcohol evaporation, whereas paste contributes tiny solids that carry more intense floral aroma compounds throughout the finished crumb.
Vanilla Mug Cake Masterclass
Ingredients:
Instructions:
Nutrition Facts:
| Calories | 342 kcal |
|---|---|
| Protein | 4.8 g |
| Fat | 13.2 g |
| Carbs | 51.4 g |
| Fiber | 0.8 g |
| Sugar | 27.2 g |
| Sodium | 218 mg |
