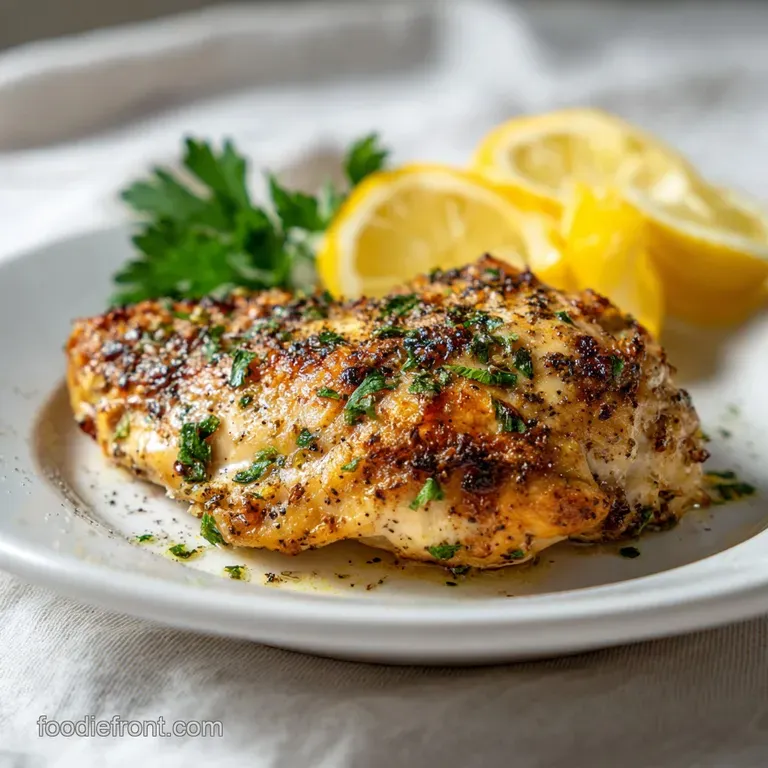
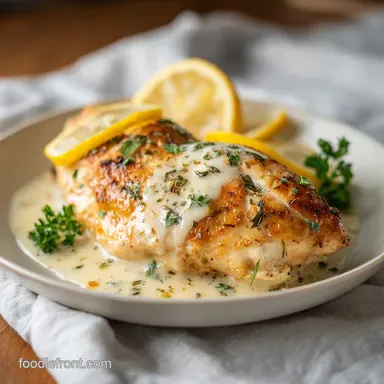
Creamy Lemon Chicken: Silky and Golden
- Time: Active 10 minutes, Passive 20 minutes, Total 30 minutes
- Flavor/Texture Hook: Shatter crisp skin met with a silky, citrus infused cream sauce
- Perfect for: A comforting weeknight family dinner that feels like a special occasion
- Mastering the Art of Creamy Lemon Chicken at Home
- Quick Specifications for the Perfect Family Meal
- Deep Dive Into Every Essential Pan Component
- Selecting the Right Tools for Success
- Step by Step Guide to Golden Perfection
- Navigating the Most Common Kitchen Stumbling Blocks
- Creative Ways to Spin the Base Flavor
- Smart Methods for Keeping Everything Fresh
- Family Style Sides for a Complete Table
- Recipe FAQs
- 📝 Recipe Card
Mastering the Art of Creamy Lemon Chicken at Home
In many sun drenched Mediterranean villages, the arrival of the winter lemon harvest marks a season of rich, comforting stews and braises. This particular combination of citrus and poultry has roots that stretch back through centuries of Italian and Greek kitchen traditions, where the "agrumi" (citrus) was used not just for flavor, but as a practical way to tenderize meats and balance the richness of local dairy.
I remember visiting a small farm outside of Sorrento where the grandmother insisted that a chicken wasn't ready for the table unless it had been "blessed" by the zest of a lemon picked that very morning. That cultural emphasis on freshness and the harmony between fat and acid is exactly what we are recreating today.
We are moving away from the heavy, flour laden sauces of the 1950s and returning to a style of cooking that relies on reduction and emulsification. This version of Creamy Lemon Chicken is designed for the modern home cook who wants that deep, lingering comfort of a cream sauce without the sluggishness that comes from heavy starches.
It is a dish that speaks to family gatherings around a big wooden table, where the sound of bread (or keto crackers!) scraping the bottom of a cast iron pan is the highest form of praise.
The beauty of this meal lies in its deceptive simplicity. You are essentially using a single pan to build layers of flavor, starting with the rendered fat from the chicken and finishing with a bright, zesty cream that cuts right through the savory weight of the protein.
It is a recipe that works because it respects the ingredients, allowing the natural sugars in the lemon to caramelize and the proteins in the parmesan to provide the structure for our sauce. You'll find that once you master the timing of the sear, this becomes a reliable staple in your weekly rotation.
Quick Specifications for the Perfect Family Meal
Understanding the timeline of a recipe is the secret to a stress free kitchen environment. When you are cooking for a family, you need to know exactly when the "active" work ends and the "waiting" begins.
This dish is remarkably efficient, requiring only 10 minutes of focused preparation before the pan takes over the heavy lifting.
- Heat Management
- Keeping the oil at a shimmering point ensures the skin dehydrates and crisps instead of boiling in its own juices.
- Acid Integration
- Adding lemon juice at the end of the sauce making process prevents the cream from separating while maintaining a punchy flavor profile.
- Resting Period
- Allowing the chicken to sit in the simmering sauce for those final 120 seconds ensures the internal temperature reaches a safe 74°C without drying out the meat.
| Method | Total Time | Texture Outcome | Best For |
|---|---|---|---|
| Stovetop (Cast Iron) | 30 minutes | Ultimate crispy skin and thick sauce | Maximum flavor and speed |
| Oven Finished | 40 minutes | Evenly cooked through, softer skin | Hands off cooking for large batches |
| Slow Cooker | 4 hours | Fall apart tender, no crisp skin | Meal prep and busy workdays |
The stovetop method is our primary focus because it allows for the "fond" those beautiful browned bits at the bottom of the pan to be fully incorporated into the sauce. This is where the deep, roasted chicken flavor comes from.
If you were to bake this from start to finish, you would lose that concentrated umami base that makes the cream so spectacular.
Deep Dive Into Every Essential Pan Component
When we talk about why this dish feels so decadent yet balanced, we have to look at the interaction between the heavy cream and the bone broth. Most people make the mistake of using just cream, which can feel one dimensional and overly heavy on the palate.
By introducing a high-quality chicken bone broth, we add gelatin and depth that rounds out the sharp citrus.
| Ingredient | Science Role | Pro Secret |
|---|---|---|
| Chicken Thighs (680g) | Fat Source & Base | Always use bone in for a juicier result and better sauce body. |
| Heavy Whipping Cream (240ml) | Emulsion Base | High fat content (36%+) prevents curdling when hitting the lemon acid. |
| Fresh Lemons | Acid & Pectin | Charring the slices first releases essential oils and sweetens the juice. |
| Parmesan Cheese (25g) | Stabilizer | Acts as a natural thickener and adds a salty, nutty "umami" punch. |
The role of the parmesan here is actually quite technical. It isn't just for flavor; the proteins in the cheese help to bind the fat from the cream to the water in the broth, creating a stable emulsion that won't break even if you reheat it the next day.
This is the difference between a sauce that looks oily and one that looks velvety.
Selecting the Right Tools for Success
You don't need a kitchen full of gadgets, but a few specific pieces of equipment will make your life significantly easier. The most important tool in your arsenal for this recipe is a heavy bottomed skillet. I personally swear by a 30cm cast iron pan.
Cast iron holds heat better than stainless steel, which means when you drop 680g of cold chicken into the pan, the temperature doesn't plummet. A drop in temperature leads to steaming, and steaming is the enemy of crispy skin.
A good whisk is also non negotiable. When you pour the heavy cream into the deglazed pan, you need to be able to incorporate the lemon juice and parmesan quickly. A silicone coated whisk is great if you are using a non stick pan, but for cast iron, a sturdy metal whisk allows you to scrape up every bit of that flavorful fond.
Finally,, an instant read meat thermometer is the only way to guarantee your chicken is cooked to a perfect 74°C. Guessing is how we end up with dry meat or, worse, undercooked thighs.
| Original Ingredient | Substitute | Why It Works |
|---|---|---|
| Avocado Oil | Ghee or Lard | Both have high smoke points. Note: Ghee adds a toasted, buttery aroma. |
| Bone Broth | Dry White Wine | Adds more acidity and a sophisticated depth. Note: Not strictly keto friendly for all. |
| Heavy Cream | Full fat Coconut Milk | Provides similar viscosity. Note: Adds a distinct tropical flavor profile. |
If you find yourself out of lemons, you can use a high-quality white wine vinegar in a pinch, though you will lose the aromatic oils from the zest. However, the science of the acid remains the same it is there to provide a counterpoint to the fat. If you are looking to change things up, you might even consider using some of the techniques found in my Easy Crispy Wings to get that skin even crunchier before it hits the sauce.
step-by-step Guide to Golden Perfection

Before you even turn on the stove, ensure your chicken is at room temperature for about 15 minutes. This small step prevents the meat from "shaping" or tightening up too quickly when it hits the heat.
- Pat the 1.5 lbs (680g) chicken thighs extremely dry with paper towels. Note: Moisture on the skin creates steam, which prevents browning.
- Season both sides of the chicken aggressively with 1 tsp sea salt and 1/2 tsp cracked black pepper.
- Heat 2 tbsp avocado oil in a 30cm cast iron skillet over medium high heat until it shimmers and just begins to wisps of smoke.
- Place chicken skin side down and sear without moving for 6 to 7 minutes until the skin is mahogany colored and releases easily from the pan.
- Flip the chicken and cook for 2 more minutes, then remove to a plate. Note: The chicken will not be fully cooked yet; we finish it in the sauce.
- Lower the heat to medium and add the lemon rounds to the skillet, charring for 1 minute per side until edges are blackened and caramelized.
- Add 3 cloves of minced garlic and sauté for 30 seconds until the kitchen smells like a trattoria.
- Pour in 1/2 cup (120ml) chicken bone broth to deglaze, scraping the bottom of the pan with a spatula until all the brown bits are dissolved.
- Whisk in 1 cup (240ml) heavy cream, lemon juice, and zest, simmering for 3 minutes until the liquid reduces by a third.
- Stir in 1/4 cup (25g) grated parmesan and nestle the chicken back into the pan, simmering for 2 minutes until the sauce is thick and velvety.
Garnish with 1 tbsp of fresh parsley right before serving. The heat from the sauce will wake up the oils in the herbs, providing a final hit of freshness that ties the whole dish together.
Navigating the Most Common Kitchen Stumbling Blocks
Even the best of us have bad days in the kitchen. The most common issue people face with any cream based sauce is curdling or separation. This usually happens because the heat is too high or the acid was added too quickly to a low-fat dairy product.
Since we are using heavy whipping cream, we have a safety net of fat that protects the proteins, but you still want to avoid a violent boil once the cream is in the pan.
Why is my sauce too thin?
If your sauce looks more like a soup than a gravy, it likely hasn't reduced enough or you didn't add enough parmesan. The reduction phase is where the water in the cream evaporates, concentrating the fats and solids.
Give it another 2 minutes of simmering, and remember that the sauce will continue to thicken as it cools slightly on the plate.
Why is my lemon sauce bitter?
Bitterness usually comes from two places: the white pith of the lemon or burnt garlic. When zesting your lemon, make sure you only take the bright yellow outer layer. If you see white, you've gone too far.
Also, ensure your garlic only sautés for 30 seconds; any longer and it turns acrid, ruining the delicate cream.
| Problem | Root Cause | Solution |
|---|---|---|
| Broken Sauce | Heat too high after adding cream | Remove from heat and whisk in a splash of cold cream. |
| Soggy Chicken Skin | Chicken was added back too early | Only nestle the meat half way into the sauce, skin side up. |
| Overly Salty | Too much parmesan or salt | Add a splash of water or more cream to dilute the intensity. |
Common Mistakes Checklist
- ✓ Never skip the "pat dry" step for the chicken; it is the difference between crispy and rubbery.
- ✓ Don't crowd the pan; if the thighs are touching, they will steam instead of sear.
- ✓ Avoid using bottled lemon juice; the preservatives change the flavor and can cause the cream to break.
- ✓ Let the pan deglaze fully before adding the cream to ensure all the flavor is off the bottom of the pan.
- ✓ Always use a meat thermometer to hit exactly 74°C; carryover cooking will do the rest.
Creative Ways to Spin the Base Flavor
Once you have the foundation of this recipe down, you can start to play with the aromatics. While the classic version is a crowd pleaser, I often find myself wanting to add a bit of a kick or a different herbal note depending on what is growing in my garden.
If you want a Lemon Pepper specialty, double the amount of cracked black pepper and add it directly into the oil before searing the chicken. This blooms the pepper's flavor and coats the skin in a spicy crust.
For those who want to add more greens, stir in two handfuls of baby spinach during the last minute of simmering. The heat of the sauce will wilt the leaves perfectly without turning them into mush.
Chef's Tip: For an extra layer of depth, add 1/2 teaspoon of Dijon mustard to the broth before whisking in the cream. The mustard acts as an additional emulsifier and adds a subtle tang that complements the lemon perfectly.
Scaling this recipe is straightforward. If you are cooking for a larger crowd, work in batches for the searing phase. You can't fit 1.2kg of chicken in one pan and expect it to brown. Sear the first half, move to a plate, and then do the second half.
For the sauce, you only need to increase the liquids by about 50% rather than doubling them, as a larger surface area on a big pan will cause faster evaporation.
Smart Methods for Keeping Everything Fresh
This dish is a fantastic candidate for meal prep because the cream sauce actually protects the chicken from drying out during reheating. You can store the leftovers in an airtight container in the fridge for up to 3 days.
When you're ready to eat, the best way to reheat is on the stovetop over low heat with a tiny splash of water or broth to loosen the sauce.
Freezing: While you can freeze this dish, be aware that cream sauces can sometimes have a slightly grainy texture upon thawing. To fix this, whisk it vigorously while reheating. It will stay good in the freezer for about 2 months.
Zero Waste: Don't throw away those lemon ends! Toss the squeezed lemon halves into a jar of white vinegar for a natural kitchen cleaner, or use the leftover chicken bones to start a new batch of bone broth for next week’s dinner.
The parsley stems can also be frozen and added to stocks for an extra hit of chlorophyll and earthiness.
Family Style Sides for a Complete Table
When I serve this to my family, I like to keep the sides simple to let the sauce be the star. Since we are keeping things keto, a bed of riced cauliflower is the perfect vehicle for soaking up every drop of that lemony gold.
If you aren't strictly low carb, a piece of crusty sourdough is the traditional way to enjoy this, especially for "scarpetta" the Italian art of cleaning your plate with bread.
For a bit of color, I often pair this with a roasted vegetable. This dish pairs perfectly with my Broccoli Casserole recipe, as the earthy tones of the broccoli provide a nice balance to the bright citrus. Another great option is a simple arugula salad with a light vinaigrette; the peppery bite of the greens cuts through the richness of the heavy cream beautifully.
Ultimately, this recipe is about the joy of a shared meal. It’s hearty, comforting, and has that "cooked all day" flavor despite only taking 30 minutes from start to finish.
Whether it's a rainy Tuesday or a Sunday family gathering, this chicken always seems to bring a bit of sunshine to the table. Give it a try, and don't be afraid to let that chicken sear a little longer than you think that dark, golden crust is where the magic lives!

Recipe FAQs
Is it true I must wash the chicken thighs before seasoning?
No, this is a common misconception. Washing raw chicken splashes bacteria around your kitchen and prevents you from getting the skin dry enough for a proper sear, which is essential for that mahogany color.
How to ensure the chicken skin gets crispy instead of soggy?
Pat the chicken thighs extremely dry with paper towels before adding your salt and pepper. Moisture on the skin creates steam, which prevents the skin from browning effectively in the cast iron skillet.
Why should I sear the chicken skin side down for 6 7 minutes without moving it?
The skin needs uninterrupted contact with the hot avocado oil to render the fat and achieve a deep, caramelized color. Moving the chicken too early will cause the skin to tear and prevent the fond from developing on the bottom of the pan.
How to deglaze the skillet properly after searing?
Pour the chicken bone broth into the pan while the heat is at medium and use a spatula to scrape up all the browned bits known as fond. If you enjoyed the technique of building flavor through pan-deglazing here, see how we apply similar flavor extraction logic in our Spinach Chicken Casserole.
What is the secret to getting a thick, smooth lemon cream sauce?
Whisk in the grated parmesan cheese gradually once the cream and lemon mixture reaches a gentle simmer. This allows the cheese to melt and emulsify, binding with the heavy cream to create a velvet like consistency.
Is it necessary to char the lemon slices before making the sauce?
Yes, charring the slices for 1 minute per side softens the pith and releases essential oils, adding a smoky, caramelized depth that balances the tart lemon juice. It prevents the lemon flavor from tasting one-dimensional or overly acidic.
How to know exactly when the chicken is finished cooking?
Use an instant read thermometer to verify the chicken reaches an internal temperature of 165°F (74°C). Relying on this temperature ensures the meat remains juicy after the final simmer in the sauce.
Creamy Lemon Chicken
Ingredients:
Instructions:
Nutrition Facts:
| Calories | 551 kcal |
|---|---|
| Protein | 25.4 g |
| Fat | 48.4 g |
| Carbs | 4.2 g |
| Fiber | 0.5 g |
| Sugar | 1.5 g |
| Sodium | 710 mg |
