Chocolate Almond Bark
- Time: Active 10 minutes, Passive 50 minutes, Total 1 hour
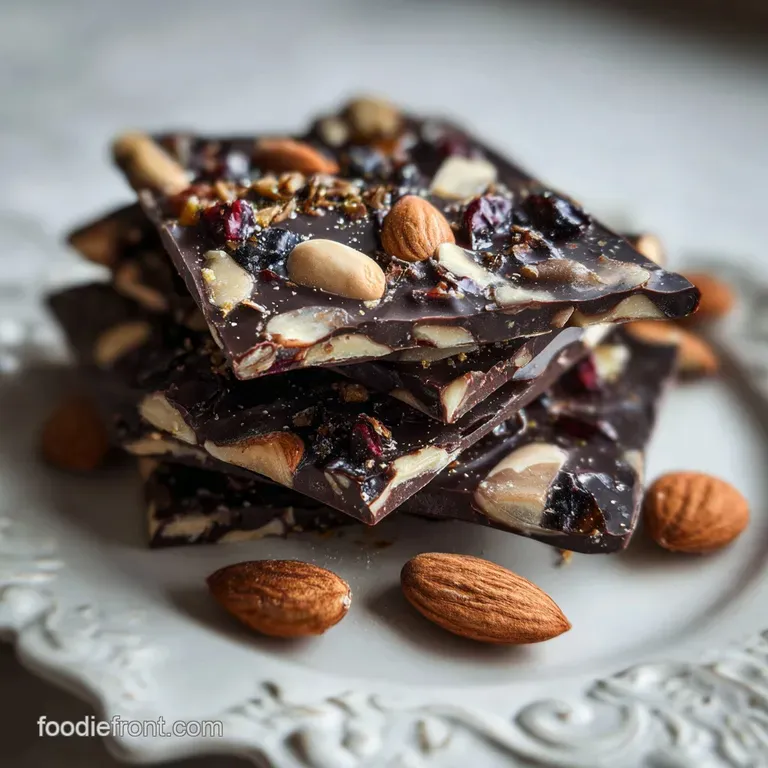
- Flavor/Texture Hook: Velvety dark chocolate meets the brittle, toasted snap of whole almonds.
- Perfect for: Holiday gifting, impressive party platters, or a low effort sweet tooth fix.
- Create an Irresistible Chocolate Almond Bark
- The Physics of the Snap
- Recipe Specs
- The Components of Flavor
- Essential Kitchen Tools
- The Step-by-Step Method
- Fix Common Bark Blunders
- Fun Flavor Customizations
- Storing for Peak Freshness
- Presentation and Garnish Strategy
- Debunking Candy Making Myths
- Recipe FAQs
- 📝 Recipe Card
Create an Irresistible Chocolate Almond Bark
Close your eyes and listen for it. That sharp, clean snap as a slab of chilled chocolate yields to your hands. It’s a sound that signals a job well done in the kitchen. I remember the first time I tried making this. I thought I could just melt a few bars, toss in some nuts, and call it a day. The result?
A grainy, dull mess that bent like cardboard instead of breaking like glass. I was devastated, but that failure led me to the secrets I’m sharing with you today.
We've all been there, standing over a bowl of seized chocolate wondering where it all went wrong. But honestly, once you understand the relationship between temperature and fat, you'll never buy the store-bought stuff again.
This Chocolate Almond Bark is about more than just sugar; it's about the contrast between the velvety bitterness of 70% cacao and the sizzle of a perfectly toasted almond. It’s a sensory experience that starts the moment the aroma of roasting nuts fills your home.
You’re looking for that specific moment when the chocolate turns into a glossy, flowing ribbon of silk. We aren't just making candy; we're crafting a centerpiece. Whether you're tucking these into parchment lined boxes for friends or keeping a secret stash in the back of the fridge, this method ensures a professional finish every single time.
Trust me on this, the tiny addition of coconut oil is the secret trick that makes the texture feel like it came from a high end chocolatier.
The Physics of the Snap
Fat Crystal Alignment: The coconut oil helps stabilize the cocoa butter, allowing it to set with a glossy sheen and a firm structure. This prevents the chocolate from becoming soft at room temperature while ensuring it shatters cleanly when bitten.
Chef Tip: Freeze your roasting pan for 5 minutes before pouring the chocolate onto the parchment. This thermal shock helps the bottom set instantly, trapping the almonds in place and preventing them from sinking to the very bottom.
| Method | Time | Texture | Difficulty |
|---|---|---|---|
| Fast Method | 1 hour | Silky with coconut oil gloss | Beginner |
| Classic Tempering | 3 hours | Harder snap, no oil | Advanced |
| Microwave Quick Set | 45 minutes | Softer, matte finish | Very Easy |
The choice between methods usually comes down to how much time you have. While classic tempering is a feat of engineering, our "Fast Method" using the coconut oil provides that impressive professional look without the need for a candy thermometer.
It’s perfect for when you need a quick dessert that still looks like you spent all afternoon on it.
Recipe Specs
To ensure you get the exact result I’m picturing, keep these three precision checkpoints in mind. First, your chocolate should never exceed 115°F during melting, or you risk scorching the delicate solids.
Second, your almonds should be toasted for exactly 8 to 10 minutes until they smell like warm wood and honey. Finally, the finished slab needs at least 50 minutes of undisturbed cooling to reach its peak structural integrity.
| Component | Science Role | Pro Secret |
|---|---|---|
| Dark Chocolate (16 oz) | Provides the structural base and intense flavor profile | Chop it into uniform pea sized bits for an even, gentle melt. |
| Whole Almonds (1.5 cups) | Adds structural contrast and "earthy" aromatic notes | Toast them fresh; pre toasted nuts often lose their volatile oils. |
| Coconut Oil (1 tsp) | Lowers the melting point slightly for a smoother mouthfeel | Use refined oil to avoid a coconut scent, keeping the focus on cacao. |
By focusing on the quality of these few elements, you’re setting yourself up for success. I once used old almonds from the back of the pantry and the whole batch tasted dusty. It’s a mistake you only make once!
Always opt for high-quality dark chocolate (60-70% cacao) like Ghirardelli or Guittard to ensure the fat content is high enough for a smooth flow.
The Components of Flavor
For this recipe, we are using 16 oz high-quality dark chocolate (60-70% cacao). Why this? Dark chocolate has more cocoa butter, which creates a much firmer, more satisfying snap. You'll also need 1.5 cups whole roasted almonds, unsalted.
Why this? Whole nuts provide a more impressive visual and a better textural "crunch" than slivers.
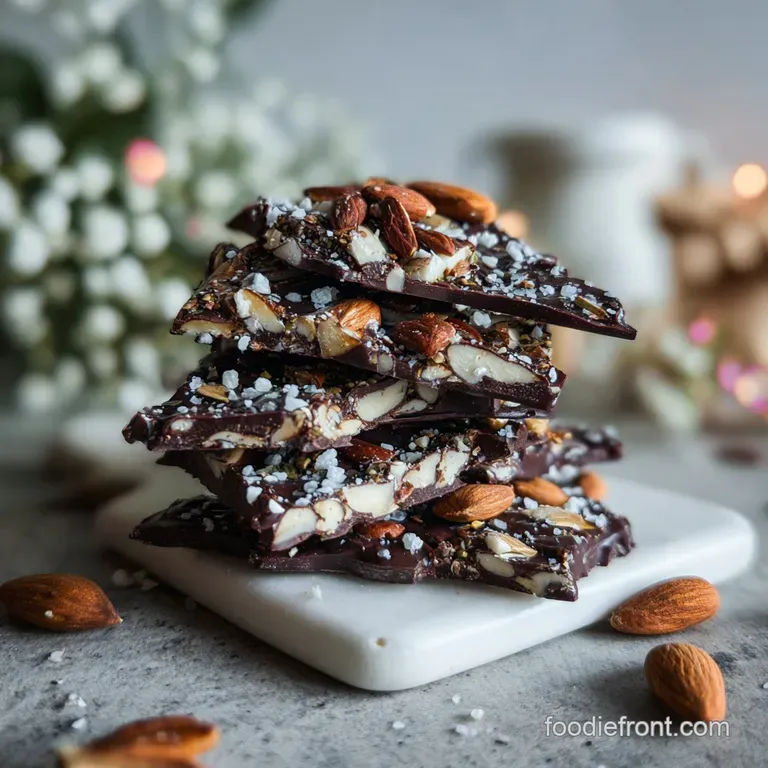
Rounding things out, we have 1 tsp refined coconut oil. Why this? It adds a subtle gloss that prevents the bark from looking dull or "chalky." Finally, don't forget the 0.5 tsp flaky sea salt.
Why this? Salt cuts through the richness and makes the chocolate flavors feel more vibrant.
| Original Ingredient | Substitute | Why It Works |
|---|---|---|
| Dark Chocolate (16 oz) | Milk Chocolate (16 oz) | Sweeter profile, but will be softer at room temp. |
| Roasted Almonds (1.5 cups) | Salted Macadamias (1.5 cups) | Higher fat content; adds a buttery, tropical note. |
| Coconut Oil (1 tsp) | Cocoa Butter (1 tsp) | Maintains the pure chocolate flavor with the same gloss. |
If you find yourself looking for something even faster, you can check out my No Bake Chocolate Cookies recipe which uses a similar melting technique but requires zero setting time. But if you're sticking with the bark, let’s talk about the gear you’ll need to get that velvety finish.
Essential Kitchen Tools
You don't need a professional laboratory, but a few specific items make this a breeze. A heavy bottomed glass bowl is my go to for melting because it retains heat gently. You'll also want a large baking sheet and a high-quality roll of parchment paper don't use wax paper here, as the warm chocolate can actually melt the wax and stick to your treat.
A sharp chef's knife is non negotiable for chopping that 16 oz of chocolate. If the chunks are too big, the outside will burn before the inside melts. I also highly recommend an offset spatula.
It’s the tool that allows you to spread the chocolate into a thin, even layer without dragging your knuckles through the mix. It feels a bit fancy, but it makes the "pour and spread" part of the process so much more satisfying.
The step-by-step Method
- Toast the almonds. Spread 1.5 cups whole almonds on a tray and bake at 350°F for 8-10 minutes until they smell fragrant and look slightly darkened. Note: This step is vital for removing moisture and adding crunch.
- Prep the chocolate. Finely chop 16 oz dark chocolate into uniform pieces using a serrated knife.
- Set up a double boiler. Place the chocolate and 1 tsp coconut oil in a glass bowl over a pot of simmering water. Ensure the bowl doesn't touch the water.
- Melt slowly. Stir constantly with a silicone spatula until the mixture is velvety and no lumps remain.
- Combine elements. Fold the warm, toasted almonds into the melted chocolate.
- Pour the bark. Transfer the mixture onto a parchment lined baking sheet.
- Spread evenly. Use an offset spatula to smooth the chocolate into a 1/4 inch thick rectangle until the surface is glossy and level.
- Season the top. Sprinkle 0.5 tsp flaky sea salt evenly over the wet chocolate.
- Cool and set. Let the bark sit at room temperature for 20 minutes, then refrigerate for 30 minutes until it is completely firm to the touch.
- Break and serve. Peel the bark off the parchment and use your hands to shatter it into irregular, rustic shards.
Fix Common Bark Blunders
Why Your Chocolate Is Streaky or Gray
If you see white or gray streaks, that’s "bloom." It usually happens if the chocolate gets too hot or cools too slowly, causing the fat to separate. It's still safe to eat, but it doesn't have that professional look. To avoid this, keep your heat low and steady.
If you've already made it and it looks dull, a quick dusting of cocoa powder or extra sea salt can hide the imperfections beautifully.
What If the Chocolate Seizes
This is the nightmare scenario where smooth chocolate suddenly turns into a gritty, clumpy paste. This happens when even a single drop of water gets into the bowl. If this happens, you can sometimes "save" it by whisking in a tablespoon of boiling water or more coconut oil, but it will no longer set hard enough for bark. Instead, turn it into a ganache for my Chocolate Ball Candy recipe.
| Problem | Root Cause | Solution |
|---|---|---|
| Soft/Melting Bark | Too much coconut oil | Reduce oil to exactly 1 tsp per 16 oz. |
| Dull Surface | Cooling too quickly in freezer | Let it sit at room temp for 20 mins before refrigerating. |
| Almonds Falling Off | Adding nuts too late | Fold the nuts into the chocolate before pouring. |
Common Mistakes Checklist
- ✓ Pat your spatula completely dry before stirring (prevents seizing).
- ✓ Avoid using a plastic bowl; glass or metal conducts heat more predictably.
- ✓ Don't rush the cooling process by putting it in the freezer immediately.
- ✓ Use a serrated knife for chopping chocolate to prevent it from flying off the board.
- ✓ Ensure the almonds are completely cooled before adding them to the chocolate.
Fun Flavor Customizations
While the classic almond and dark chocolate combo is my absolute favorite, you can really play with the "color balance" here to make the bark look like a work of art. I like to think in "accents." For instance, adding a pop of red with dried cranberries or crushed freeze dried raspberries creates a stunning contrast against the dark base.
If you want to go the "Salty Sweet" route, try adding crushed pretzels alongside the almonds. The jagged edges of the pretzels sticking out of the dark chocolate look incredible. If you're feeling adventurous, a tiny pinch of cayenne pepper in the melting stage adds a slow heat that catches people by surprise in the best way possible.
- The Tropical Mix: Use white chocolate, macadamias, and dried mango.
- The Holiday Classic: Peppermint extract in the chocolate with crushed candy canes.
- The Energizer: Add 1 tablespoon of finely ground espresso beans to the melt.
Storing for Peak Freshness
Chocolate is a bit like a sponge; it will soak up any smells in your fridge. Always store your finished bark in an airtight container. At room temperature (if your kitchen is cool), it will stay fresh and snappy for about 1 week. In the fridge, it lasts for up to 3 weeks.
If you’re a "bulk baker" like me, you can freeze the bark for up to 3 months just wrap it tightly in plastic wrap and then foil to prevent freezer burn.
Don't let any scraps go to waste! The tiny "dust" and small shards left over after breaking the bark are gold. I keep a small jar of these "bark crumbs" in the freezer to sprinkle over vanilla ice cream or to stir into my morning oatmeal.
Even the leftover parchment paper usually has a few smears of chocolate I’ve been known to scrape those off with a spoon while waiting for the main slab to set. No judgment here!
Presentation and Garnish Strategy
When it comes to making this look "impressive," the garnish is everything. I follow a simple rule of three color accents to ensure the bark doesn't just look like a brown blob. First, add your white accent using the flaky sea salt. The large crystals catch the light and provide a beautiful sparkle.
Second, add a vibrant accent like dried rose petals or orange zest right as the chocolate begins to "matte" slightly.
Finally, for a luxury accent, you can apply a tiny bit of edible gold leaf or a dusting of luster powder. If you're gifting this, skip the plastic bags. Use a simple brown kraft box, line it with unbleached parchment paper, and tie it with a heavy velvet ribbon.
The contrast between the rustic bark and the elegant packaging makes it feel like a boutique purchase.
Debunking Candy Making Myths
A huge misconception is that you need "melting wafers" to get a good result. In reality, those wafers often contain more wax and vegetable oils than actual cacao. Using a real bar of chocolate might require a bit more chopping, but the flavor is incomparable.
Another myth is that the chocolate needs to be boiling hot to be smooth. If you see bubbles, you've gone too far! Chocolate is happiest at "baby bath" temperature just warm enough to be liquid, but not hot enough to burn your skin.
Finally,, many people believe that you must use a wooden spoon for chocolate. While wood is traditional, it can actually hold onto moisture and odors from previous savory meals (nobody wants garlic scented almond bark!).
A clean silicone spatula is actually the superior tool because it's non porous and allows you to scrape every last velvety drop out of the bowl. Right then, you're ready to create. Let’s get snapping!

Recipe FAQs
Is melting chocolate and almond bark the same thing?
No, they are different products. Melting chocolate refers to the process of heating solid chocolate until it becomes liquid. "Almond bark" is a confectionary coating, often made with vegetable oil and artificial flavors, designed to melt and set easily without tempering.
While you can melt both, they yield different results.
What is almond bark chocolate?
Almond bark is not typically real chocolate. It's a coating made primarily from sugar, vegetable oils, and flavorings, designed to mimic the appearance and texture of chocolate.
It's often used for candy making and dipping because it sets up firm and glossy without the need for tempering, unlike real chocolate.
Is almond bark better for you than chocolate?
No, generally not. Real chocolate, especially dark chocolate, contains antioxidants and minerals. Almond bark is mostly sugar and processed oils, offering less nutritional benefit and often containing artificial ingredients.
What kind of chocolate to use for almond bark?
Use high-quality dark chocolate (60-70% cacao) for the best flavor and snap. Avoid chocolate chips as they contain stabilizers that prevent smooth melting. For a glossier finish and easier setting, you can add 1 teaspoon of refined coconut oil per 16 ounces of chocolate, similar to how we achieve a smooth finish in our White Chocolate Pretzels: Velvety Smooth Finish.
How do I prevent chocolate from seizing when making bark?
Ensure absolutely no water touches the chocolate. Seizing occurs when even a tiny amount of moisture enters the melted chocolate, causing it to clump. Use dry bowls and utensils, and stir gently to avoid splashing.
Why is my chocolate almond bark soft or dull?
This is usually due to the fat content or cooling method. Using a chocolate with a lower cocoa butter content, or adding too much oil, can result in a softer set. Cooling too quickly in the freezer can also cause a dull, matte finish rather than a glossy snap.
Letting it set at room temperature for a while before refrigerating is key.
Can I add other nuts or mix-ins to chocolate almond bark?
Yes, absolutely! Feel free to experiment with other toasted nuts like pecans or pistachios. Dried fruits, pretzels, or even a sprinkle of flaky sea salt can add wonderful flavor and texture contrast, much like the diverse textures found in our Sweet Potato Pecan Pie Baked Golden. Just ensure all mix-ins are dry before adding them to the melted chocolate.
Chocolate Almond Bark

Ingredients:
Instructions:
Nutrition Facts:
| Calories | 251 kcal |
|---|---|
| Protein | 4.7 g |
| Fat | 18.5 g |
| Carbs | 17.8 g |
| Fiber | 3.5 g |
| Sugar | 7.4 g |
| Sodium | 75 mg |
